常用的程序通知,显示到主页面的顶部栏。
1 package com.lixu.tongzhi; 2 3 import android.app.Activity; 4 import android.app.Notification; 5 import android.app.NotificationManager; 6 import android.app.PendingIntent; 7 import android.content.Intent; 8 import android.os.Bundle; 9 import android.support.v4.app.NotificationCompat;10 import android.view.View;11 import android.view.View.OnClickListener;12 import android.widget.Button;13 import android.widget.RemoteViews;14 import android.widget.Toast;15 16 public class MainActivity extends Activity {17 18 private static final int ID = 1987;19 private static final int REQUEST_CODE = 123;20 21 @Override22 protected void onCreate(Bundle savedInstanceState) {23 super.onCreate(savedInstanceState);24 setContentView(R.layout.activity_main);25 26 Button btn1 = (Button) findViewById(R.id.fasong);27 Button btn2 = (Button) findViewById(R.id.qingchu);28 29 btn1.setOnClickListener(new OnClickListener() {30 31 @Override32 public void onClick(View v) {33 send();34 35 Toast.makeText(getApplicationContext(), "发送通知成功!", 0).show();36 37 }38 });39 40 btn2.setOnClickListener(new OnClickListener() {41 42 @Override43 public void onClick(View v) {44 45 delete();46 47 Toast.makeText(getApplicationContext(), "清除通知成功!", 0).show();48 49 }50 });51 52 }53 54 private void send() {55 // 获取通知管理器56 NotificationManager manager = (NotificationManager) getSystemService(NOTIFICATION_SERVICE);57 58 NotificationCompat.Builder mBuilder = new NotificationCompat.Builder(this);59 // 设置通知栏图片60 mBuilder.setSmallIcon(R.drawable.sdfdf);61 62 Notification notification = mBuilder.build();63 // RemoteViews中自定义Notification布局64 65 RemoteViews cv = new RemoteViews(getApplicationContext().getPackageName(), R.layout.list);66 // 设置下拉后通知栏图片67 cv.setImageViewResource(R.id.image, R.drawable.meimei);68 // 设置内容69 cv.setTextViewText(R.id.tv1, "我是小超人");70 cv.setTextViewText(R.id.tv2, "我是小超人,主人有什么事情要吩咐。");71 notification.contentView = cv;72 73 // 设置通知声音或者震动或闪光。74 notification.defaults = Notification.DEFAULT_SOUND | Notification.DEFAULT_VIBRATE;75 // 通知时间76 notification.when = System.currentTimeMillis();77 78 // 需要注意的是,作为选项,此处可以设置MainActivity的启动模式为singleTop,避免重复新建onCreate()。79 Intent intent = new Intent(getApplicationContext(), MainActivity.class);80 // 当用户点击通知栏的Notification时候,切换回MainActivity。81 PendingIntent pi = PendingIntent.getActivity(getApplicationContext(), REQUEST_CODE, intent,82 PendingIntent.FLAG_UPDATE_CURRENT);83 notification.contentIntent = pi;84 85 // 通过特定id来发送这个通知86 manager.notify(ID, notification);87 88 }89 90 private void delete() {91 // 获取通知管理器92 NotificationManager manager = (NotificationManager) getSystemService(NOTIFICATION_SERVICE);93 manager.cancel(ID);94 95 }96 97 }
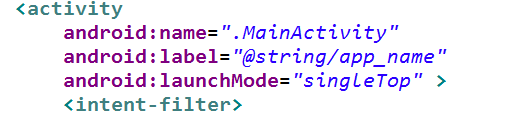
需要注意的是,默认Android的Activity为标准模式,即每次都new一个新的Activity出来,不是原先的Activity,在本例中,可以观察到MainActivity中的onCreate()如果不修改启动模式,则每次本调用每次TextView显示的时间不同(递增),所有为了使用原来的Activity、避免重复new一个新的出来,需要:
在AndroidManifest.xml中修改MainActivity启动模式为:singleTop
xml文件:
1 <RelativeLayout xmlns:android="http://schemas.android.com/apk/res/android" 2 xmlns:tools="http://schemas.android.com/tools" 3 android:layout_width="match_parent" 4 android:layout_height="match_parent" > 5 6 <Button 7 android:id="@+id/fasong" 8 android:layout_width="wrap_content" 9 android:layout_height="wrap_content"10 android:layout_alignLeft="@+id/qingchu"11 android:layout_alignParentTop="true"12 android:layout_marginTop="56dp"13 android:text="发送通知" />14 15 <Button16 android:id="@+id/qingchu"17 android:layout_width="wrap_content"18 android:layout_height="wrap_content"19 android:layout_below="@+id/fasong"20 android:layout_centerHorizontal="true"21 android:layout_marginTop="88dp"22 android:text="清除通知" />23 24 </RelativeLayout>
1 <?xml version="1.0" encoding="utf-8"?> 2 <RelativeLayout xmlns:android="http://schemas.android.com/apk/res/android" 3 android:layout_width="match_parent" 4 android:layout_height="match_parent" > 5 6 <ImageView 7 android:id="@+id/image" 8 android:layout_width="50dp" 9 android:layout_height="50dp"10 android:layout_alignParentLeft="true"11 android:layout_marginRight="10dp" />12 13 <TextView14 android:id="@+id/tv1"15 android:layout_width="wrap_content"16 android:layout_height="wrap_content"17 android:layout_toRightOf="@id/image"18 android:background="#ff0000" />19 20 <TextView21 android:id="@+id/tv2"22 android:layout_width="wrap_content"23 android:layout_height="wrap_content"24 android:layout_below="@id/tv1"25 android:layout_toRightOf="@id/image"26 android:background="#00ff00" />27 28 </RelativeLayout>
运行效果图: