下面我们研究一下如何实现一个数字液晶时钟,本质属于特效一种哈。
首先创建一个布局文件:
<?xml version="1.0" encoding="utf-8"?><RelativeLayout xmlns:android="http://schemas.android.com/apk/res/android" android:layout_width="match_parent" android:layout_height="match_parent" > <TextView android:id ="@+id/ledview_clock_time" android:layout_width ="wrap_content" android:layout_height ="wrap_content" android:layout_centerInParent="true" android:shadowColor ="#00ff00" android:shadowDx ="0" android:shadowDy ="0" android:shadowRadius ="10" android:textColor ="#00ff00" android:textSize ="80sp" /> <TextView android:id ="@+id/ledview_clock_bg" android:layout_width="wrap_content" android:layout_height="wrap_content" android:layout_centerInParent="true" android:layout_gravity="center" android:text="@string/default_time" android:textColor="#3300ff00" android:textSize="80sp" /> </RelativeLayout>
对于阴影的几个属性我们引用一下别人博客里的内容:(http://blog.csdn.net/whoispo/article/details/8061907)
Android的TextView的XML属性中有关于阴影的几条属性
shadowDX、shadowDy、shadowRadius,说明分别是阴影的横、纵坐标偏移,以及阴影的半径,这个不太好理解。一下的图可以实际说明这些的参数的内容。
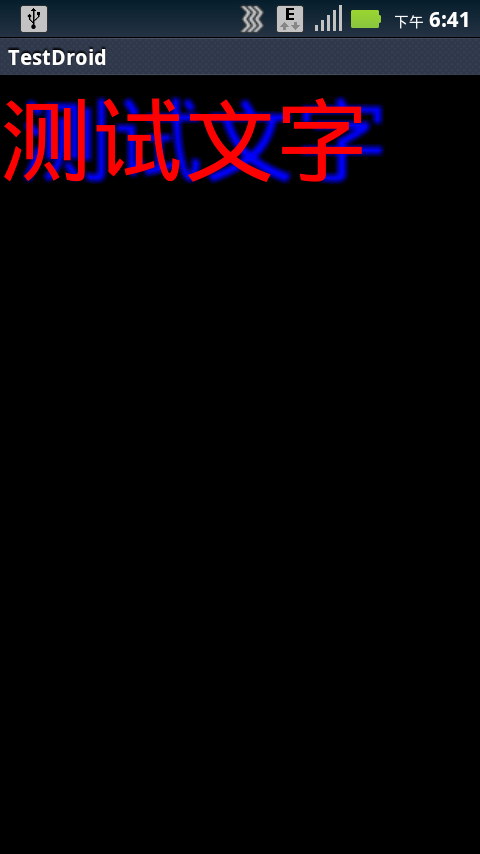
shadowDx,shadowDy从下面三幅图可以看出是是什么
DX=20,Dy=0
DX=0,DY=20
DX=20,DY=20

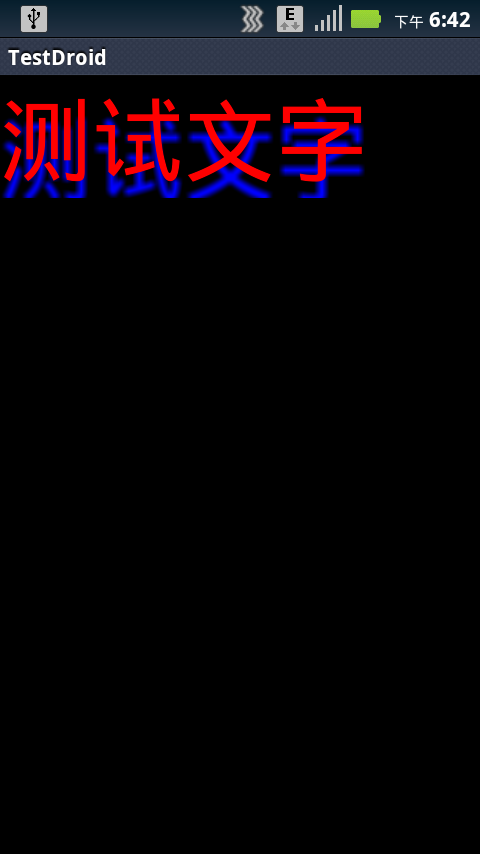
shadowRadius可以从下面三幅图看出是什么
R=3
R=10

R=40
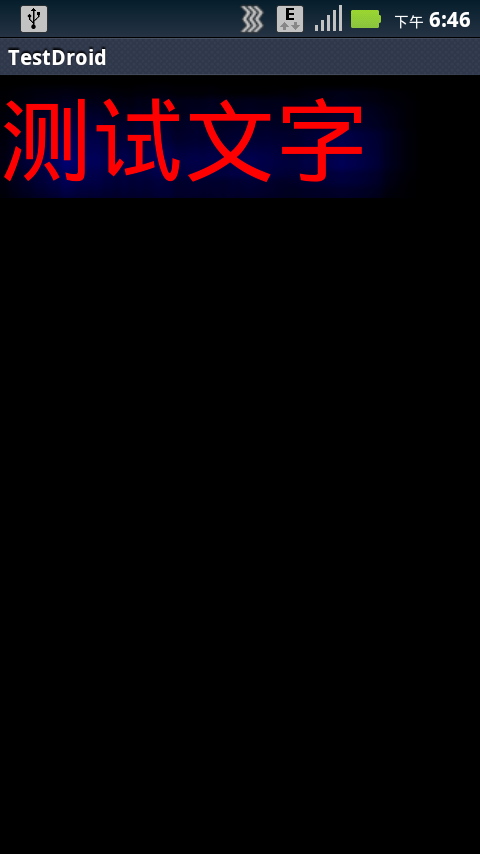
通过这些效果可以直观的看出每个属性的含义。
下面自定义一个控件:
package com.yayun.leddemo;import java.io.File;import java.util.Calendar;import java.util.Date;import java.util.TimeZone;import android.annotation.SuppressLint;import android.content.Context;import android.content.res.AssetManager;import android.graphics.Typeface;import android.os.Handler;import android.util.AttributeSet;import android.view.LayoutInflater;import android.view.View;import android.widget.LinearLayout;import android.widget.TextView;public class LEDView extends LinearLayout { private TextView timeView; private TextView bgView; private static final String FONT_DIGITAL_7 = "fonts" + File.separator + "digital-7.ttf";//字体 private static final String DATE_FORMAT = "%02d:%02d:%02d";//日期格式 private static final int REFRESH_DELAY = 500;//刷新延迟 private final Handler mHandler = new Handler(); private final Runnable mTimeRefresher = new Runnable() { @Override public void run() { Calendar calendar = Calendar.getInstance(TimeZone .getTimeZone("GMT+8"));//时区 final Date d = new Date(); calendar.setTime(d); timeView.setText(String.format(DATE_FORMAT, calendar.get(Calendar.HOUR), calendar.get(Calendar.MINUTE), calendar.get(Calendar.SECOND))); mHandler.postDelayed(this, REFRESH_DELAY); } }; @SuppressLint("NewApi") public LEDView(Context context, AttributeSet attrs, int defStyle) { super(context, attrs, defStyle); init(context); } public LEDView(Context context, AttributeSet attrs) { super(context, attrs); init(context); } public LEDView(Context context) { super(context); init(context); } private void init(Context context) { LayoutInflater layoutInflater = LayoutInflater.from(context); View view = layoutInflater.inflate(R.layout.ledview, this); timeView = (TextView) view.findViewById(R.id.ledview_clock_time); bgView = (TextView) view.findViewById(R.id.ledview_clock_bg); AssetManager assets = context.getAssets();//字体管家类 final Typeface font = Typeface.createFromAsset(assets, FONT_DIGITAL_7); timeView.setTypeface(font);// 设置字体 bgView.setTypeface(font); } public void start() { mHandler.post(mTimeRefresher); } public void stop() { mHandler.removeCallbacks(mTimeRefresher); }}新建一个Activity调用这个控件:
<RelativeLayout xmlns:android="http://schemas.android.com/apk/res/android" xmlns:tools="http://schemas.android.com/tools" android:layout_width="match_parent" android:layout_height="match_parent" tools:context=".LEDActivity" android:background="@color/black" > <com.yayun.leddemo.LEDView android:id="@+id/ledview" android:layout_width="wrap_content" android:layout_height="wrap_content" android:layout_centerInParent="true" android:layout_gravity="center" /> </RelativeLayout>
package com.yayun.leddemo;import android.annotation.SuppressLint;import android.annotation.TargetApi;import android.app.ActionBar;import android.app.Activity;import android.os.Build;import android.os.Bundle;import android.view.Menu;@TargetApi(Build.VERSION_CODES.HONEYCOMB)public class LEDActivity extends Activity { private LEDView ledView; @SuppressLint("NewApi") @Override protected void onCreate(Bundle savedInstanceState) { super.onCreate(savedInstanceState); setContentView(R.layout.activity_led); ledView = (LEDView) findViewById(R.id.ledview); ActionBar actionBar = getActionBar(); actionBar.setDisplayHomeAsUpEnabled(true); } @Override protected void onResume() { super.onResume(); ledView.start();//调用开始 } @Override protected void onStop() { super.onStop(); ledView.stop();//暂停 } @Override public boolean onCreateOptionsMenu(Menu menu) { getMenuInflater().inflate(R.menu.activity_led, menu); return true; }}运行实例如下:
录制显示问题,不知道为什么,大家可以自行运行查看效果。
喜欢的朋友关注我,谢谢!
源码下载
版权声明:本文为博主原创文章,未经博主允许不得转载。