既然要使用ArrayAdapter,那我们先看看系统中所以的Adapter关系:
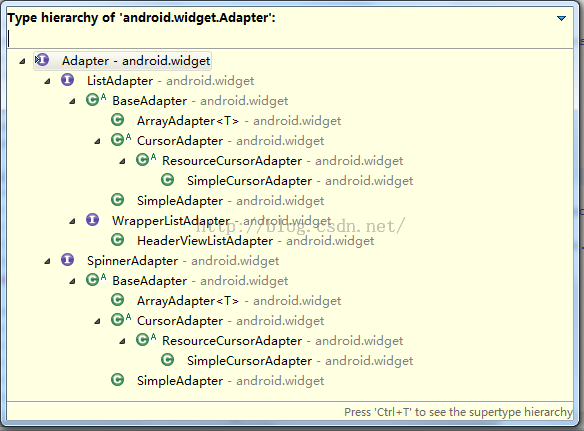
在实际中使用频率比较高的有:SimpleAdapter, ArrayAdapter, BaseAdapter
BaseAdapter: 是一个抽象类,实现它要实现比较多的方法,但是灵活的高
ArrayAdapter:支持了泛型操作,比较简单,一般只能显示同类型的数据
SimpleAdapter:有比较好的灵活的,可以定义自己的UI
关于BaseAdapter在上一节已经讲过,这里不在举例说明
我们先使用ArrayAdapter:
public class MainActivity extends Activity { @Override protected void onCreate(Bundle savedInstanceState) { super.onCreate(savedInstanceState); setContentView(R.layout.activity_main); ListView listView = (ListView) findViewById(R.id.lv); listView.setAdapter(new ArrayAdapter<String>( MainActivity.this, R.layout.item_list, //每个元素的布局文件 R.id.tv_name, //要给布局文件中那个控件设置属性 new String[]{"视频", "电影", "无线"}));//给id=tv_name设置属性 }效果图如下:
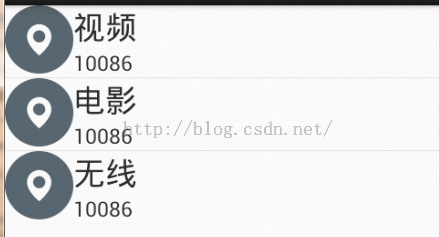
可以看到,ArrayAdapter只能设置id相同的属性,别的id的属性是设置不了的。
所以,ArrayAdapter一般用于设置只需要设置一种类型的数据,既方便又简单。
SimpleAdapter学习:
先贴出我们上面的布局文件:
<LinearLayout xmlns:android="http://schemas.android.com/apk/res/android" android:layout_width="wrap_content" android:layout_height="wrap_content" android:orientation="horizontal" > <ImageView android:id="@+id/image_head" android:layout_width="50sp" android:layout_height="50sp" android:src="@drawable/afh" /> <LinearLayout android:layout_width="match_parent" android:layout_height="wrap_content" android:orientation="vertical" > <TextView android:id="@+id/tv_name" android:layout_width="wrap_content" android:layout_height="wrap_content" android:textSize="23sp" /> <TextView android:id="@+id/tv_phone" android:layout_width="wrap_content" android:layout_height="wrap_content" android:textSize="15sp" android:text="10086" /> </LinearLayout></LinearLayout>
使用SimpleAdapter显示:
//定义一个list List<Map<String, Object>> data = new ArrayList<Map<String,Object>>(); //第一个行数据设置 Map<String, Object> map1 = new HashMap<String, Object>(); map1.put("image", R.drawable.afh); map1.put("name", "定位"); map1.put("phone", "12345678900000000000"); data.add(map1); Map<String, Object> map2 = new HashMap<String, Object>(); map2.put("image", R.drawable.afj); map2.put("name", "音乐"); map2.put("phone", "99999999999999999999"); data.add(map2); Map<String, Object> map3 = new HashMap<String, Object>(); map3.put("image", R.drawable.afl); map3.put("name", "图片"); map3.put("phone", "66666666666666666666"); data.add(map3); Map<String, Object> map4 = new HashMap<String, Object>(); map4.put("image", R.drawable.afn); map4.put("name", "链接"); map4.put("phone", "88888888888888888888"); data.add(map4); listView.setAdapter(new SimpleAdapter(this, data, R.layout.item_list, //每行的布局文件样式 new String[]{"image", "name" ,"phone"}, //这里image和资源id的是一一对应的,顺序是对应的 new int[]{R.id.image_head, R.id.tv_name, R.id.tv_phone}));显示效果如下:
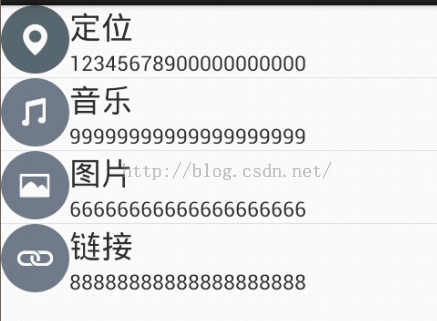
可以看到SimpleAdapter作用还是很明显的,同时可以设置image, 和2个textview
版权声明:本文为博主原创文章,未经博主允许不得转载。