本文围绕以下两个部分展开:
一、意图
二、两个案例
1. 拨打电话、发送Email、提取图片
2. 显式意图传递和隐式意图传递
一、意图
1. 意图
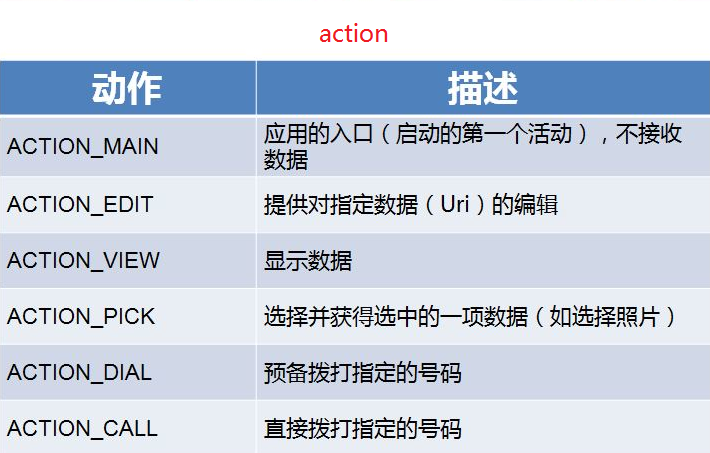
意图是组件间传递消息的一种对象,主要由动作(action)和数据(data)两部分组成,实现了组件之间的解耦。
它用于请求其他组件(活动、服务、广播接收器)中的操作,完成组件之间的交互。
2. 意图在应用框架中的位置
Android 应用框架让你使用一组可重用的基本组件即可创建出丰富而有创意的应用程序。
虽然每个组件是一个独立的存在,扮演特定的角色,但是部分组件之间存在依赖关系,应用框架使用意图(Intent)将组件连接起来,共同构成一个程序的整体行为。
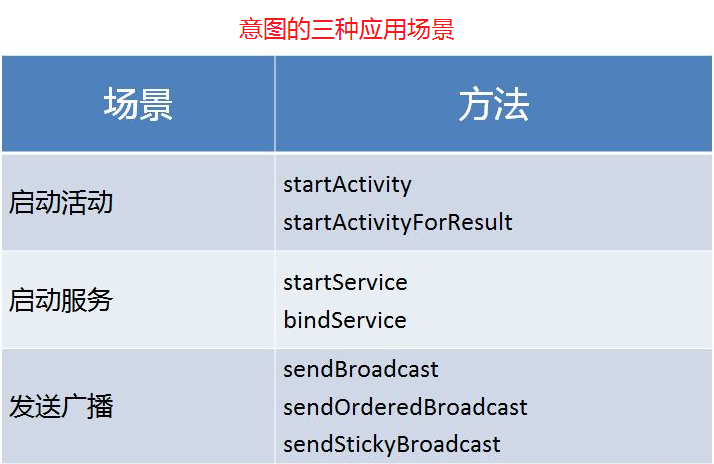
3. 意图的三种应用场景
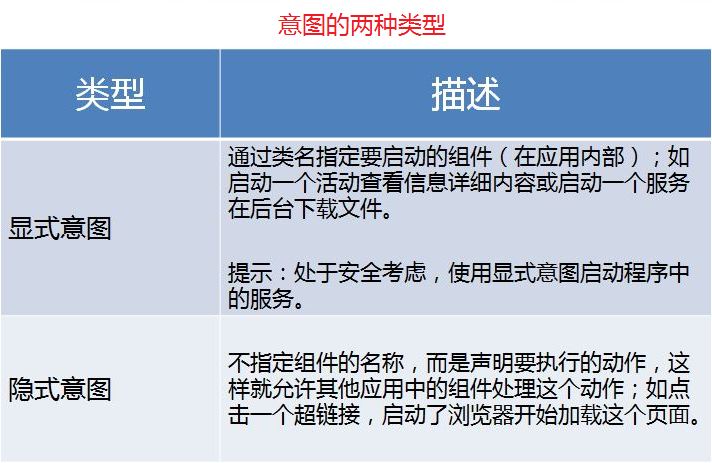
4. 意图的两种类型
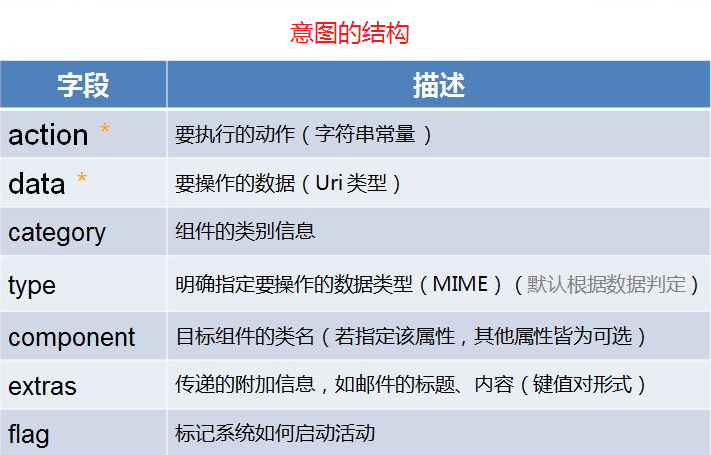
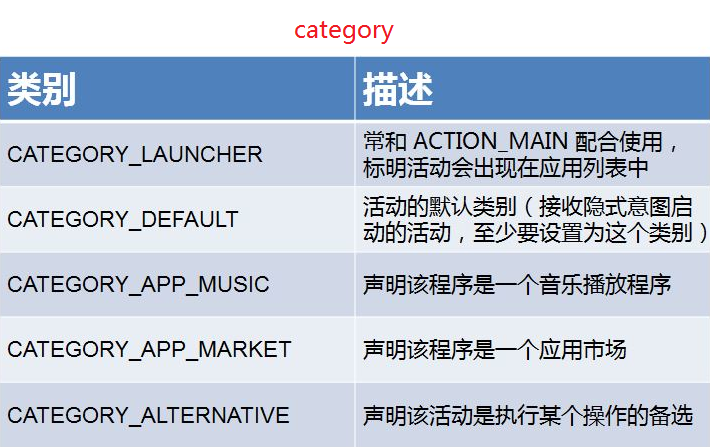
5. 意图的结构

二、两个案例
1. 拨打电话、发送Email、提取图片
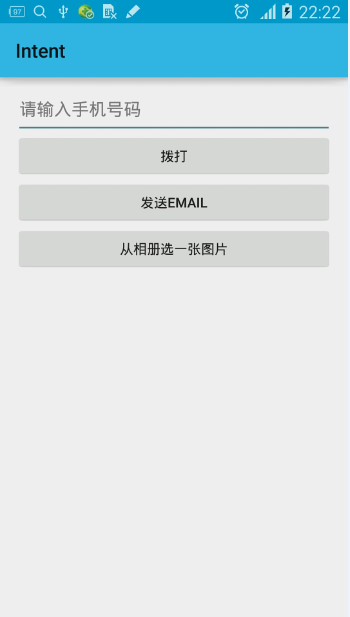
(1)核心功能模块
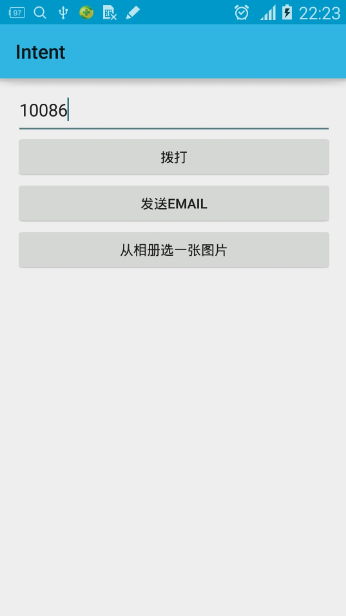
模块1:通过输入电话号码,点击“拨打”按钮,转到手机拨号界面,或者调用手机拨号程序,直接拨打出去。
/** * 拨打电话 */ private void doDial() { String phone = txtPhone.getText().toString(); Intent intent = new Intent(); //指定意图的动作:拨号 //intent.setAction(Intent.ACTION_DIAL); intent.setAction(Intent.ACTION_CALL); //指定意图的数据(注意数据格式:打电话必须是这样的格式。) Uri data = Uri.parse("tel:"+phone); intent.setData(data); //隐式启动意图 (没有写跳到哪个界面,因此拨号的时候,就隐式跳到拨打电话页面了。) startActivity(intent); }说明:
(1)点击“拨打”按钮,转到手机拨号界面――直接在doDial()方法中使用这句话:
intent.setAction(Intent.ACTION_DIAL);
(2)点击“拨打”按钮,调用手机拨号程序,直接拨打出去――需要授予权限才可以。
首先,在功能清单文件中添加授权语句:
<!--授权此App访问拨号程序--> <uses-permission android:name="android.permission.CALL_PHONE"/>
AndroidManifest.xml 代码如下:
<?xml version="1.0" encoding="utf-8"?><manifest xmlns:android="http://schemas.android.com/apk/res/android" package="com.xiangdong.intent" > <!--授权此App访问拨号程序--> <uses-permission android:name="android.permission.CALL_PHONE"/> <application android:allowBackup="true" android:icon="@mipmap/ic_launcher" android:label="@string/app_name" android:theme="@style/AppTheme" > <activity android:name=".MainActivity" android:label="@string/app_name" > <intent-filter> <action android:name="android.intent.action.MAIN" /> <category android:name="android.intent.category.LAUNCHER" /> </intent-filter> </activity> </application></manifest>
然后,在doDial()方法中使用这句话:
intent.setAction(Intent.ACTION_CALL);
效果如下:
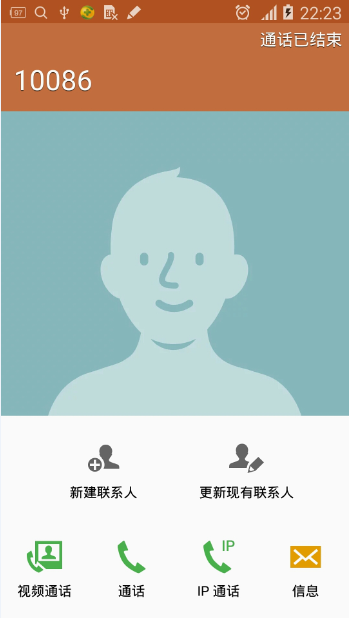
(由于本人的手机没有SIM卡,因此拨不出去)
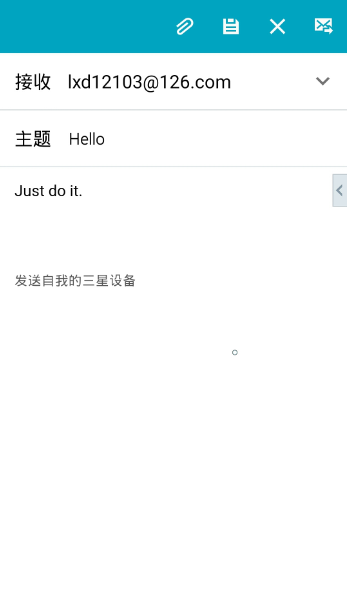
模块2:点击“发送EMAIL”按钮,调用手机默认邮箱客户端,进入将要发送邮件的编辑界面。
/** * 发送Email */ private void doSendTo() { Intent intent = new Intent(); //指定意图的动作:发送信息 intent.setAction(Intent.ACTION_SENDTO); //指定意图的数据(注意数据格式:发送邮件必须是这样的格式。) Uri data = Uri.parse("mailto:[email protected]"); intent.setData(data); //附件信息 //邮件主题 intent.putExtra(Intent.EXTRA_SUBJECT,"Hello"); //邮件内容 intent.putExtra(Intent.EXTRA_TEXT,"Just do it."); //启动意图 startActivity(intent); }效果如下:
模块3:点击“从相册选择一张图片”按钮,弹出手机图库,然后选择一张图片,选好后,返回到主界面,将图片显示到下面。
/** * 从图库选择并取回一张图片 */ private void doPick() { Intent intent = new Intent(); //指定动作,选取数据 intent.setAction(Intent.ACTION_PICK); //统一资源标识符【外部存储中的图片】 Uri data = MediaStore.Images.Media.EXTERNAL_CONTENT_URI; String type = "image/*"; //指定数据及类型【注意:若要同时指定data和type,必须使用该方法】 intent.setDataAndType(data,type); //启动活动并返回结果 //第二个参数 REQUEST_PICK_PIC 是一个自定义的整型变量, //标识请求代号(必须唯一) startActivityForResult(intent,REQUEST_PICK_PIC); } /** * 调用 startActivityForResult 后,会回调该方法,所以重写该方法 * * @param requestCode 请求码:匹配 startActivityForResult 中的第二个参数 * @param resultCode 结果码:系统提供了两个默认值 RESULT_OK、RESULT_CANCEL * @param data 返回的数据:uri 类型 */ @Override protected void onActivityResult(int requestCode, int resultCode, Intent data) { super.onActivityResult(requestCode, resultCode, data); if(requestCode == REQUEST_PICK_PIC){ if(resultCode == RESULT_OK){ // 获得返回的数据:图片的 Uri Uri uri = data.getData(); // 在 ImageView 上显示图片 imageView.setImageURI(uri); } else{ // RESULT_CANCEL Toast.makeText(this,getString(R.string.cancel_pick),Toast.LENGTH_SHORT).show(); } } }(2)项目代码
A. 在 strings.xml 中定义字符串
<resources> <string name="app_name">Intent</string> <string name="action_settings">Settings</string> <string name="phone_hint">请输入手机号码</string> <string name="btn_dial">拨打</string> <string name="btn_send_to">发送Email</string> <string name="btn_pick">从相册选一张图片</string> <string name="cancel_pick">操作取消</string></resources>
B. 在 activity_main.xml 中写主界面布局
<RelativeLayout xmlns:android="http://schemas.android.com/apk/res/android" xmlns:tools="http://schemas.android.com/tools" android:layout_width="match_parent" android:layout_height="match_parent" android:paddingLeft="@dimen/activity_horizontal_margin" android:paddingRight="@dimen/activity_horizontal_margin" android:paddingTop="@dimen/activity_vertical_margin" android:paddingBottom="@dimen/activity_vertical_margin" tools:context=".MainActivity"> <EditText android:id="@+id/txtPhone" android:layout_width="match_parent" android:layout_height="wrap_content" android:hint="@string/phone_hint" android:inputType="phone"/> <Button android:id="@+id/btnDial" android:layout_width="match_parent" android:layout_height="wrap_content" android:layout_below="@+id/txtPhone" android:onClick="onClick" android:text="@string/btn_dial"/> <Button android:id="@+id/btnSendTo" android:layout_width="match_parent" android:layout_height="wrap_content" android:layout_below="@+id/btnDial" android:onClick="onClick" android:text="@string/btn_send_to"/> <Button android:id="@+id/btnPick" android:layout_width="match_parent" android:layout_height="wrap_content" android:layout_below="@+id/btnSendTo" android:onClick="onClick" android:text="@string/btn_pick"/> <ImageView android:id="@+id/imageView" android:layout_width="200dp" android:layout_height="300dp" android:layout_below="@+id/btnPick" android:layout_centerHorizontal="true"/></RelativeLayout>
C. 在 MainActivity 中写事件
package com.xiangdong.intent;import android.app.Activity;import android.content.Intent;import android.net.Uri;import android.os.Bundle;import android.provider.MediaStore;import android.view.Menu;import android.view.MenuItem;import android.view.View;import android.widget.EditText;import android.widget.ImageView;import android.widget.Toast;public class MainActivity extends Activity { private static final int REQUEST_PICK_PIC = 200; private EditText txtPhone; private ImageView imageView; @Override protected void onCreate(Bundle savedInstanceState) { super.onCreate(savedInstanceState); setContentView(R.layout.activity_main); txtPhone = (EditText) findViewById(R.id.txtPhone); imageView = (ImageView) findViewById(R.id.imageView); } /** * 按钮事件 * @param view */ public void onClick(View view){ switch (view.getId()){ case R.id.btnDial: //这些方法只在当前页面有效,因此可定义为私有的。 doDial(); break; case R.id.btnSendTo: doSendTo(); break; case R.id.btnPick: doPick(); break; } } /** * 拨打电话 */ private void doDial() { String phone = txtPhone.getText().toString(); Intent intent = new Intent(); //指定意图的动作:拨号 //intent.setAction(Intent.ACTION_DIAL); intent.setAction(Intent.ACTION_CALL); //指定意图的数据(注意数据格式:打电话必须是这样的格式。) Uri data = Uri.parse("tel:"+phone); intent.setData(data); //隐式启动意图 (没有写跳到哪个界面,因此拨号的时候,就隐式跳到拨打电话页面了。) startActivity(intent); } /** * 发送Email */ private void doSendTo() { Intent intent = new Intent(); //指定意图的动作:发送信息 intent.setAction(Intent.ACTION_SENDTO); //指定意图的数据(注意数据格式:发送邮件必须是这样的格式。) Uri data = Uri.parse("mailto:[email protected]"); intent.setData(data); //附件信息 //邮件主题 intent.putExtra(Intent.EXTRA_SUBJECT,"Hello"); //邮件内容 intent.putExtra(Intent.EXTRA_TEXT,"Just do it."); //启动意图 startActivity(intent); } /** * 从图库选择并取回一张图片 */ private void doPick() { Intent intent = new Intent(); //指定动作,选取数据 intent.setAction(Intent.ACTION_PICK); //统一资源标识符【外部存储中的图片】 Uri data = MediaStore.Images.Media.EXTERNAL_CONTENT_URI; String type = "image/*"; //指定数据及类型【注意:若要同时指定data和type,必须使用该方法】 intent.setDataAndType(data,type); //启动活动并返回结果 //第二个参数 REQUEST_PICK_PIC 是一个自定义的整型变量, //标识请求代号(必须唯一) startActivityForResult(intent,REQUEST_PICK_PIC); } /** * 调用 startActivityForResult 后,会回调该方法,所以重写该方法 * * @param requestCode 请求码:匹配 startActivityForResult 中的第二个参数 * @param resultCode 结果码:系统提供了两个默认值 RESULT_OK、RESULT_CANCEL * @param data 返回的数据:uri 类型 */ @Override protected void onActivityResult(int requestCode, int resultCode, Intent data) { super.onActivityResult(requestCode, resultCode, data); if(requestCode == REQUEST_PICK_PIC){ if(resultCode == RESULT_OK){ // 获得返回的数据:图片的 Uri Uri uri = data.getData(); // 在 ImageView 上显示图片 imageView.setImageURI(uri); } else{ // RESULT_CANCEL Toast.makeText(this,getString(R.string.cancel_pick),Toast.LENGTH_SHORT).show(); } } } // -----以下代码不做更改------------------------------------------------------------ @Override public boolean onCreateOptionsMenu(Menu menu) { // Inflate the menu; this adds items to the action bar if it is present. getMenuInflater().inflate(R.menu.menu_main, menu); return true; } @Override public boolean onOptionsItemSelected(MenuItem item) { // Handle action bar item clicks here. The action bar will // automatically handle clicks on the Home/Up button, so long // as you specify a parent activity in AndroidManifest.xml. int id = item.getItemId(); //noinspection SimplifiableIfStatement if (id == R.id.action_settings) { return true; } return super.onOptionsItemSelected(item); }}2. 显式意图传递和隐式意图传递
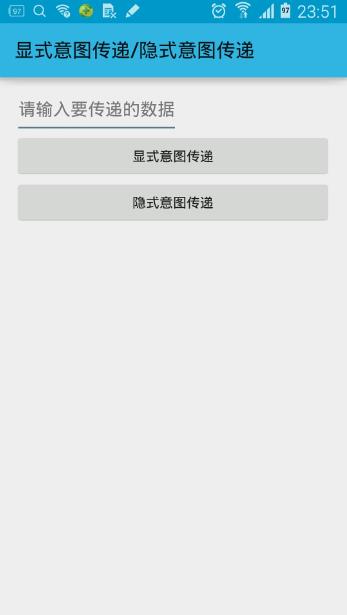
输入要传递的字符:
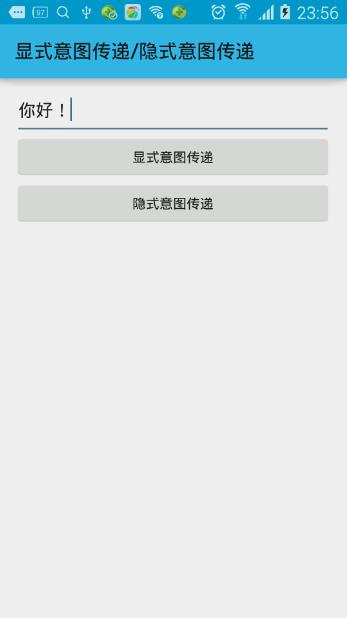
点击“显式意图传递”和“隐式意图传递”按钮,都出现如下效果:

(1)核心功能模块
模块1:显式意图传递。
/** * 显式意图传递 */ private void doShow() { String content = txtContent.getText().toString(); // 清空里面的值 txtContent.setText(""); // 设置显式跳转的页面 //Intent intent = new Intent(this,IntentActivity.class); //getApplicationContext() 获得当前界面的上下文 (和 this是一样的) Intent intent = new Intent(getApplicationContext(), IntentActivity.class); // 设置附加信息(键值对格式) intent.putExtra("KEY_CONTENT",content); startActivity(intent); }补充:设置显式跳转页面的方法:
(1)
Intent intent = new Intent(this, IntentActivity.class);
(2)
Intent intent = new Intent(getApplicationContext(), IntentActivity.class);
(3)
Intent intent = new Intent();intent.setClass(this, IntentActivity.class);
(4)
Intent intent = new Intent();intent.setClass(getApplicationContext(), IntentActivity.class);
模块2:隐式意图传递。
/** * 隐式意图传递 */ private void doHidden() { String content = txtContent.getText().toString(); // 清空里面的值 txtContent.setText(""); // 设置隐式跳转的页面 // 设置意图的动作名 // com.lxd.intent.SHOW_HIDDEN 是在意图过滤器中定义的字符串 Intent intent = new Intent(); intent.setAction("com.lxd.intent.action.SHOW_HIDDEN"); // 设置附加信息(键值对格式) intent.putExtra("KEY_CONTENT",content); startActivity(intent); }在设置意图的动作名之后,要在功能清单文件中创建意图过滤器,这样,当运行设置隐式跳转页面的代码的时候,程序会在功能清单文件中找意图过滤器,进行跳转。
功能清单文件 AndroidManifest.xml 如下:
<?xml version="1.0" encoding="utf-8"?><manifest xmlns:android="http://schemas.android.com/apk/res/android" package="com.xiangdong.intenttwo"> <application android:allowBackup="true" android:icon="@mipmap/ic_launcher" android:label="@string/app_name" android:theme="@style/AppTheme"> <activity android:name=".MainActivity" android:label="@string/app_name"> <intent-filter> <action android:name="android.intent.action.MAIN"/> <category android:name="android.intent.category.LAUNCHER"/> </intent-filter> </activity> <activity android:name=".IntentActivity" android:label="@string/title_activity_intent" android:parentActivityName=".MainActivity"> <intent-filter> <!-- 设置隐式意图的动作名(自定义) --> <action android:name="com.lxd.intent.action.SHOW_HIDDEN"/> <!-- 设置意图的类型 --> <category android:name="android.intent.category.DEFAULT"/> </intent-filter> </activity> </application></manifest>
(2)项目代码
A. 在 strings.xml 中定义字符串
<resources> <string name="app_name">显式意图传递/隐式意图传递</string> <string name="action_settings">Settings</string> <string name="content">请输入要传递的数据</string> <string name="btn_show">显式意图传递</string> <string name="btn_hidden">隐式意图传递</string> <string name="title_activity_intent">接收意图参数</string> <string name="hello_world">Hello world!</string> <string name="title_activity_share">ShareActivity</string></resources>
B. 在 activity_main.xml 中写主界面布局
<RelativeLayout xmlns:android="http://schemas.android.com/apk/res/android" xmlns:tools="http://schemas.android.com/tools" android:layout_width="match_parent" android:layout_height="match_parent" android:paddingLeft="@dimen/activity_horizontal_margin" android:paddingRight="@dimen/activity_horizontal_margin" android:paddingTop="@dimen/activity_vertical_margin" android:paddingBottom="@dimen/activity_vertical_margin" tools:context=".MainActivity"> <EditText android:id="@+id/txtContent" android:layout_width="match_parent" android:layout_height="wrap_content" android:hint="@string/content"/> <Button android:id="@+id/btnShow" android:layout_width="match_parent" android:layout_height="wrap_content" android:layout_below="@+id/txtContent" android:onClick="onClick" android:text="@string/btn_show"/> <Button android:id="@+id/btnHidden" android:layout_width="match_parent" android:layout_height="wrap_content" android:layout_below="@+id/btnShow" android:onClick="onClick" android:text="@string/btn_hidden"/></RelativeLayout>
C. 创建传递后的活动及页面:IntentActivity,其中 activity_intent.xml 做一点修改,如下:
<RelativeLayout xmlns:android="http://schemas.android.com/apk/res/android" xmlns:tools="http://schemas.android.com/tools" android:layout_width="match_parent" android:layout_height="match_parent" android:paddingLeft="@dimen/activity_horizontal_margin" android:paddingRight="@dimen/activity_horizontal_margin" android:paddingTop="@dimen/activity_vertical_margin" android:paddingBottom="@dimen/activity_vertical_margin" tools:context="com.xiangdong.intenttwo.IntentActivity"> <TextView android:id="@+id/tvHello" android:text="@string/hello_world" android:layout_width="wrap_content" android:layout_height="wrap_content"/></RelativeLayout>
D. 在 MainActivity 中写事件
package com.xiangdong.intenttwo;import android.app.Activity;import android.content.Intent;import android.os.Bundle;import android.view.Menu;import android.view.MenuItem;import android.view.View;import android.widget.EditText;public class MainActivity extends Activity { private EditText txtContent; @Override protected void onCreate(Bundle savedInstanceState) { super.onCreate(savedInstanceState); setContentView(R.layout.activity_main); txtContent = (EditText) findViewById(R.id.txtContent); } public void onClick(View view){ switch (view.getId()){ case R.id.btnShow: doShow(); break; case R.id.btnHidden: doHidden(); break; } } /** * 显式意图传递 */ private void doShow() { String content = txtContent.getText().toString(); // 清空里面的值 txtContent.setText(""); // 设置显式跳转的页面 //Intent intent = new Intent(this,IntentActivity.class); //getApplicationContext() 获得当前界面的上下文 (和 this是一样的) Intent intent = new Intent(getApplicationContext(), IntentActivity.class); // 设置附加信息(键值对格式) intent.putExtra("KEY_CONTENT",content); startActivity(intent); } /** * 隐式意图传递 */ private void doHidden() { String content = txtContent.getText().toString(); // 清空里面的值 txtContent.setText(""); // 设置隐式跳转的页面 // 设置意图的动作名 // com.lxd.intent.SHOW_HIDDEN 是在意图过滤器中定义的字符串 Intent intent = new Intent(); intent.setAction("com.lxd.intent.action.SHOW_HIDDEN"); // 设置附加信息(键值对格式) intent.putExtra("KEY_CONTENT",content); startActivity(intent); } //-------以下代码不做修改-------------------------------------------------------------- @Override public boolean onCreateOptionsMenu(Menu menu) { // Inflate the menu; this adds items to the action bar if it is present. getMenuInflater().inflate(R.menu.menu_main, menu); return true; } @Override public boolean onOptionsItemSelected(MenuItem item) { // Handle action bar item clicks here. The action bar will // automatically handle clicks on the Home/Up button, so long // as you specify a parent activity in AndroidManifest.xml. int id = item.getItemId(); //noinspection SimplifiableIfStatement if (id == R.id.action_settings) { return true; } return super.onOptionsItemSelected(item); }}(3)一个活动,注册多个意图过滤器。
功能清单文件 AndroidManifest.xml 如下:
<?xml version="1.0" encoding="utf-8"?><manifest xmlns:android="http://schemas.android.com/apk/res/android" package="com.xiangdong.intenttwo"> <application android:allowBackup="true" android:icon="@mipmap/ic_launcher" android:label="@string/app_name" android:theme="@style/AppTheme"> <activity android:name=".MainActivity" android:label="@string/app_name"> <intent-filter> <action android:name="android.intent.action.MAIN"/> <category android:name="android.intent.category.LAUNCHER"/> </intent-filter> </activity> <activity android:name=".ShareActivity" android:label="@string/title_activity_share" android:parentActivityName=".MainActivity"> <!--处理发送文本的动作--> <intent-filter> <action android:name="android.intent.action.SEND"/> <data android:mimeType="text/plain"/> <category android:name="android.intent.category.DEFAULT"/> </intent-filter> <!--处理发送一个或多个图片的动作--> <intent-filter> <action android:name="android.intent.action.SEND"/> <action android:name="android.intent.action.SEND_MULTIPLE"/> <data android:mimeType="image/*"/> <category android:name="android.intent.category.DEFAULT"/> </intent-filter> </activity> </application></manifest>