什么是Fragment
Fragment的作用像Activity一样,主要用于呈现用户界面,它依附于Activity存在,但比Activity更灵活。
当我们需要创建动态的,多面板的界面的时候就需要使用Fragment。
继承Fragment类
继承Fragment类,并覆盖相应的方法,就可以实现自己的Fragment类。 但是Fragment类是在Android 3.0添加的。
要在低于这个版本下使用Fragment,就需要导入v7 appcompat库。另外,Fragment的容器必须是FragmentActivity,
ActionBarActivity也可以,因为它继承于FragmentActivity。
在使用ActionBarActivity的时候,要想程序正常运行,程序的主题必须基于Theme.AppCompact,否则,程序崩溃。
如下:
<application android:allowBackup="true" android:icon="@drawable/ic_launcher" android:label="@string/app_name" android:theme="@style/Theme.AppCompat.Light" > <activity android:name="com.whathecode.usingfragment.MainActivity" android:label="@string/app_name" > <intent-filter> <action android:name="android.intent.action.MAIN" /> <category android:name="android.intent.category.LAUNCHER" /> </intent-filter> </activity> </application>
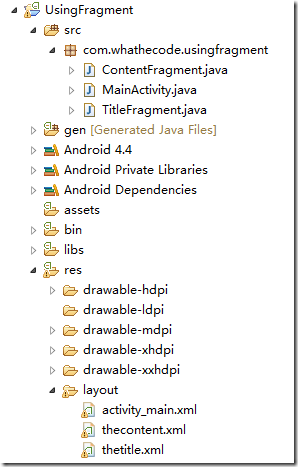
程序布局:
示例代码
TitleFragment:
package com.whathecode.usingfragment;import android.os.Bundle;import android.support.v4.app.Fragment;import android.view.LayoutInflater;import android.view.View;import android.view.ViewGroup;public class TitleFragment extends Fragment{ @Override public View onCreateView(LayoutInflater inflater, ViewGroup container, Bundle savedInstanceState) { return inflater.inflate(R.layout.thetitle, container, false); }}
ContentFragment:
package com.whathecode.usingfragment;import android.os.Bundle;import android.support.v4.app.Fragment;import android.view.LayoutInflater;import android.view.View;import android.view.ViewGroup;public class ContentFragment extends Fragment{ @Override public View onCreateView(LayoutInflater inflater, ViewGroup container, Bundle savedInstanceState) { return inflater.inflate(R.layout.thecontent, container, false); }}
上面两个Fragment类的代码基本一样,只是使用了不同的布局界面。
和Activity不一样的,Fragment是在onCreateView方法中嵌入界面,而Activity是在onCreate方法中使用setContentView方法设置界面布局。
activity_main界面代码
<LinearLayout xmlns:android="http://schemas.android.com/apk/res/android" xmlns:tools="http://schemas.android.com/tools" android:layout_width="match_parent" android:layout_height="match_parent" android:orientation="horizontal" tools:context=".MainActivity" > <LinearLayout android:id="@+id/titleC" android:layout_width="0dp" android:layout_weight="1" android:layout_height="fill_parent" android:orientation="vertical"/> <LinearLayout android:id="@+id/contentC" android:layout_width="0dp" android:layout_weight="2" android:layout_height="fill_parent" android:orientation="vertical"/></LinearLayout>
材料都准备好后,最后一步就是将Fragment添加到Activity上面
package com.whathecode.usingfragment;import android.os.Bundle;import android.support.v4.app.FragmentManager;import android.support.v4.app.FragmentTransaction;import android.support.v7.app.ActionBarActivity;public class MainActivity extends ActionBarActivity{ @Override protected void onCreate(Bundle savedInstanceState) { super.onCreate(savedInstanceState); setContentView(R.layout.activity_main); /** * 使用FragmentTransaction中的add方法将Fragment嵌入到当前的Activity上 */ FragmentManager supportFragmentManager = getSupportFragmentManager(); FragmentTransaction transaction = supportFragmentManager.beginTransaction(); //嵌入TitleFragment transaction.add(R.id.titleC, new TitleFragment()); /** * 当所有的事务完成之后才能调用commit方法。 * commit方法不能多次调用,否则程序崩溃 */ //嵌入ContentFragment transaction.add(R.id.contentC, new ContentFragment()).commit(); }}
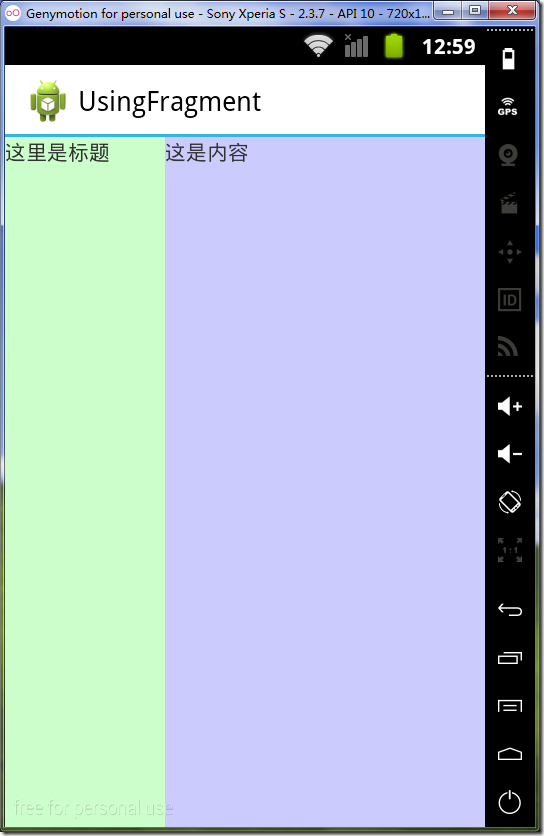
运行效果:
Fragment间通讯
既然,Fragment是依附在Activity上面,那么它必然也是通过Activity作为媒介进行通讯。
假如我想在TitleFragment中获取ContentFragment中的内容,可以这样做:
1. 通过getActivity获得当前Activity的实例
2. 通过Activity的findViewById方法取得想要获取的View
示例代码:
package com.whathecode.usingfragment;import android.os.Bundle;import android.support.v4.app.Fragment;import android.view.LayoutInflater;import android.view.View;import android.view.ViewGroup;import android.widget.Button;import android.widget.TextView;import android.widget.Toast;public class TitleFragment extends Fragment{ @Override public View onCreateView(LayoutInflater inflater, ViewGroup container, Bundle savedInstanceState) { return inflater.inflate(R.layout.thetitle, container, false); } @Override public void onStart() { super.onStart(); //获取界面中的Button按钮 Button btn = (Button) getActivity().findViewById(R.id.getContent); //绑定onClick事件 btn.setOnClickListener(new View.OnClickListener() { @Override public void onClick(View v) { //获取ContentFragment布局中的textView TextView txtView = (TextView) getActivity().findViewById( R.id.content); //获取TextView中的文本内容 String content = txtView.getText().toString(); //显示内容 Toast.makeText(getActivity(), content, Toast.LENGTH_SHORT) .show(); } }); }}
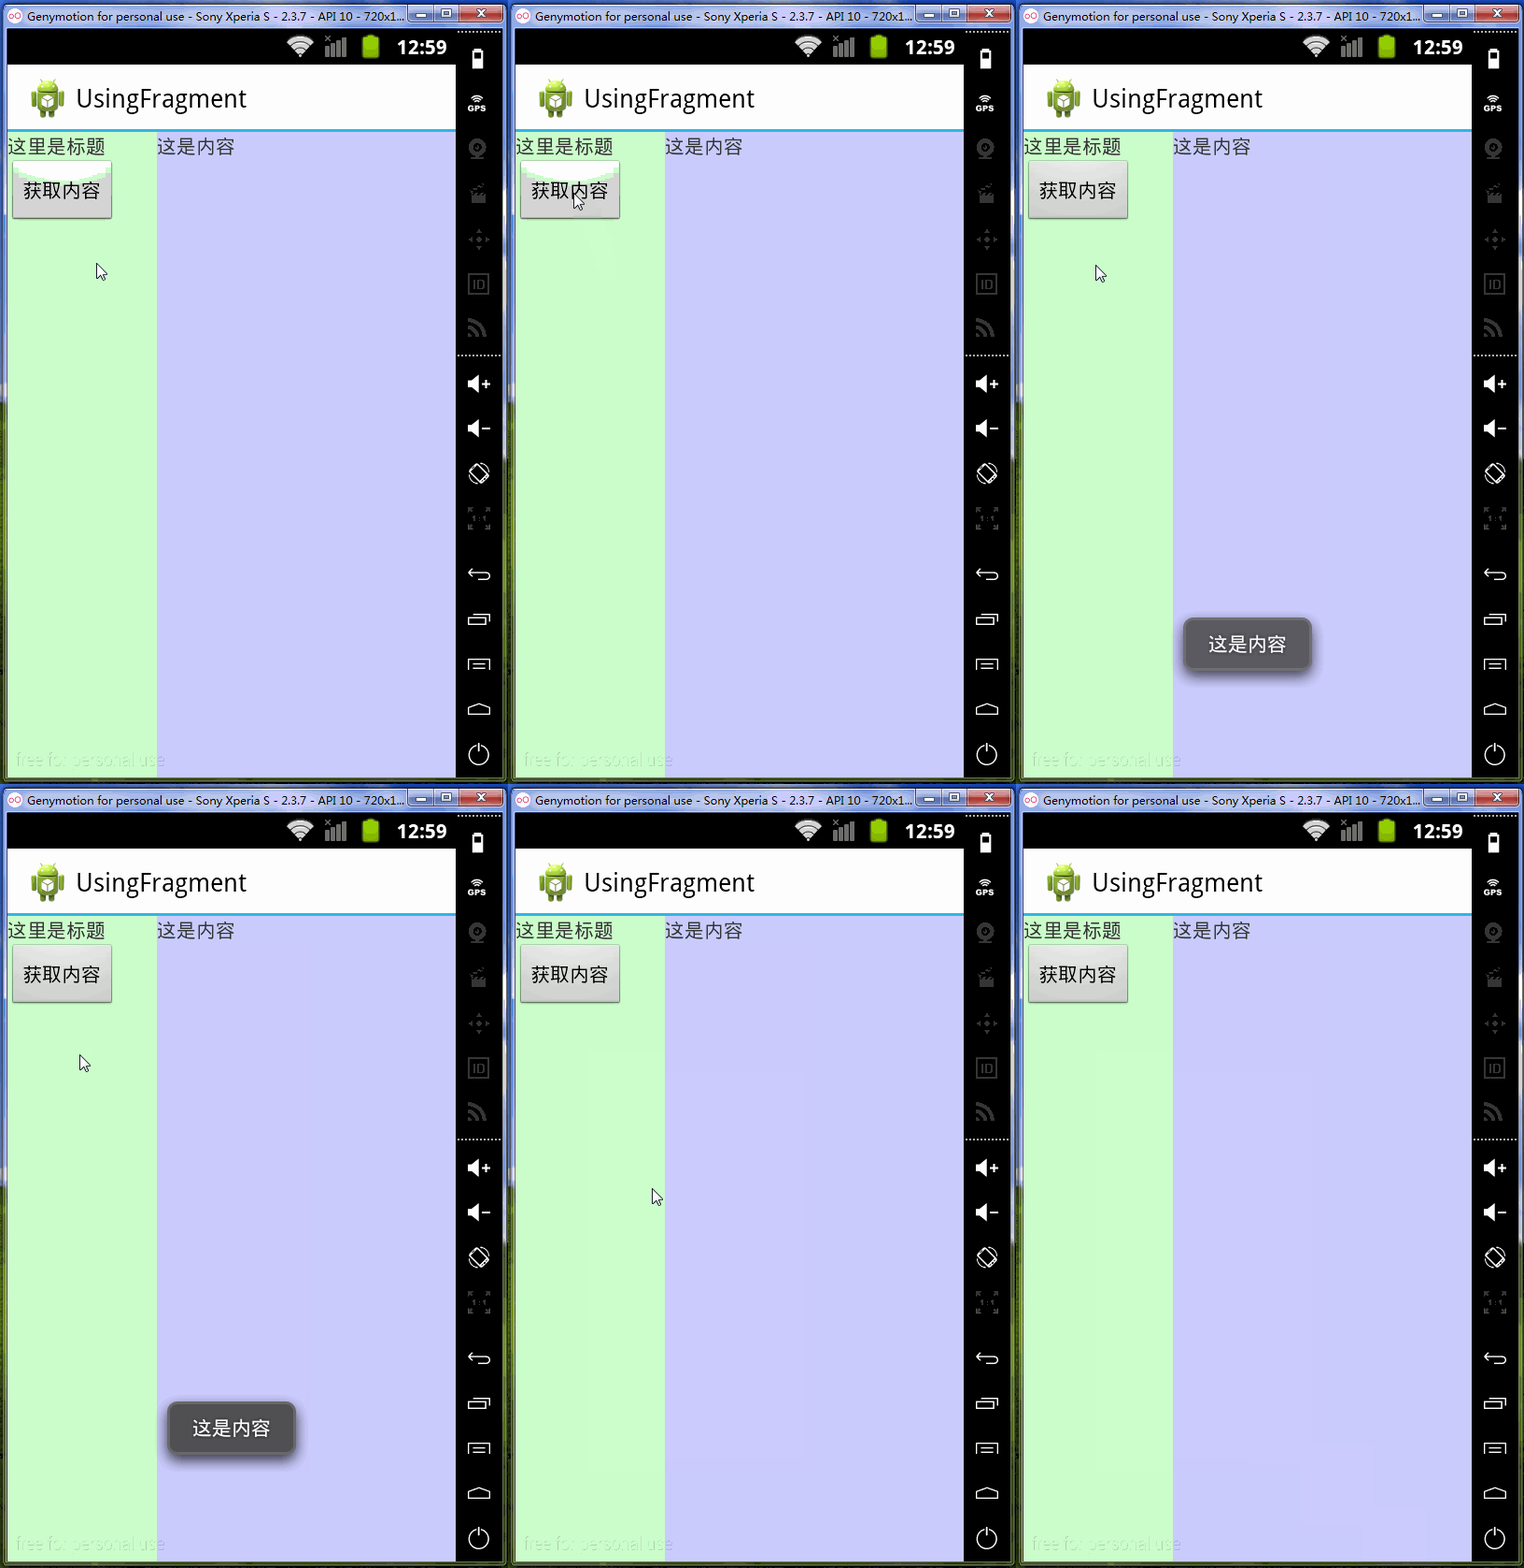
运行结果:
当然,这只是其中一种方法,也是不怎么好的方法。官方建议是在Fragment中定义一个接口,然后由Activity容器实现这个接口。
改良后的代码:
在TitleFragment中添加接口
package com.whathecode.usingfragment;import android.os.Bundle;import android.support.v4.app.Fragment;import android.view.LayoutInflater;import android.view.View;import android.view.ViewGroup;public class TitleFragment extends Fragment{ @Override public View onCreateView(LayoutInflater inflater, ViewGroup container, Bundle savedInstanceState) { return inflater.inflate(R.layout.thetitle, container, false); } /** * * @author Administrator *新添加的接口,由Activity实现 */ public interface onGetContentListener { public void onGetContent(); }}
实现接口:
package com.whathecode.usingfragment;import android.os.Bundle;import android.support.v4.app.FragmentManager;import android.support.v4.app.FragmentTransaction;import android.support.v7.app.ActionBarActivity;import android.view.View;import android.widget.Button;import android.widget.TextView;import android.widget.Toast;public class MainActivity extends ActionBarActivity implements TitleFragment.onGetContentListener{ FragmentManager supportFragmentManager = getSupportFragmentManager(); @Override protected void onCreate(Bundle savedInstanceState) { super.onCreate(savedInstanceState); setContentView(R.layout.activity_main); /** * 使用FragmentTransaction中的add方法将Fragment嵌入到当前的Activity上 */ FragmentTransaction transaction = supportFragmentManager .beginTransaction(); // 嵌入TitleFragment transaction.add(R.id.titleC, new TitleFragment()); /** * 当所有的事务完成之后才能调用commit方法。 commit方法不能多次调用,否则程序崩溃 */ // 嵌入ContentFragment transaction.add(R.id.contentC, new ContentFragment()).commit(); } /** * 只能在Fragment被嵌入到Activity后才能获取Fragment中的控件 * 因此这里在onStart方法中实现逻辑代码 */ @Override protected void onStart() { super.onStart(); Button btn = (Button) findViewById(R.id.getContent); btn.setOnClickListener(new View.OnClickListener() { @Override public void onClick(View v) { onGetContent(); } }); } /** * 实现TitleFragment中内部接口的方法 */ @Override public void onGetContent() { TextView txtView = (TextView) findViewById(R.id.content); Toast.makeText(this, txtView.getText().toString(), Toast.LENGTH_SHORT).show(); }}
运行效果和之前的一样,只是把逻辑都移到了Activity上


