转载请标明出处:http://blog.csdn.net/lmj623565791/article/details/24740977
Android现在实现Tab类型的界面方式越来越多,今天就把常见的实现方式给大家来个总结。目前写了:
1、传统的ViewPager实现
2、FragmentManager+Fragment实现
3、ViewPager+FragmentPagerAdapter实现
4、TabPageIndicator+ViewPager+FragmentPagerAdapter
1、传统的ViewPager实现
主要就是ViewPager+ViewAdapter这个还是比较常见的,就不多说了
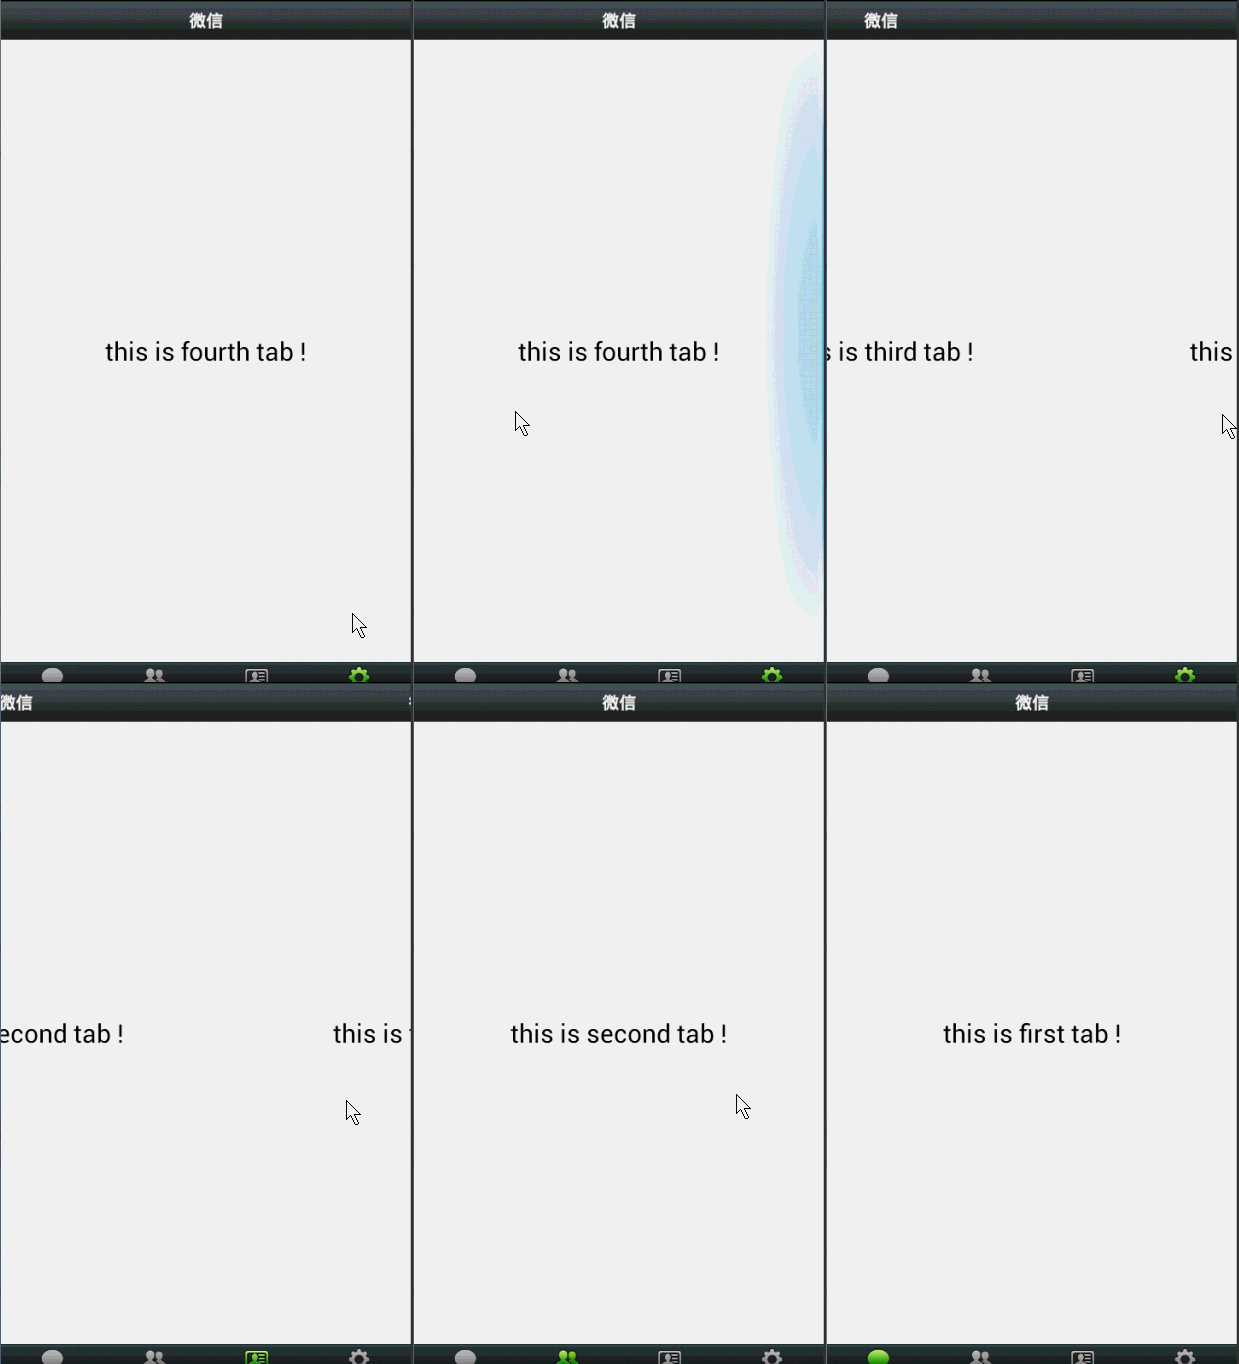
效果图:

代码:
package com.example.mainframework02;import java.util.ArrayList;import java.util.List;import android.app.Activity;import android.os.Bundle;import android.support.v4.view.PagerAdapter;import android.support.v4.view.ViewPager;import android.support.v4.view.ViewPager.OnPageChangeListener;import android.view.LayoutInflater;import android.view.View;import android.view.ViewGroup;import android.widget.ImageButton;import android.widget.ImageView;import android.widget.LinearLayout;public class TraditionalViewPagerAcvitity extends Activity{ /** * ViewPager */ private ViewPager mViewPager; /** * ViewPager的适配器 */ private PagerAdapter mAdapter; private List<View> mViews; private LayoutInflater mInflater; private int currentIndex; /** * 底部四个按钮 */ private LinearLayout mTabBtnWeixin; private LinearLayout mTabBtnFrd; private LinearLayout mTabBtnAddress; private LinearLayout mTabBtnSettings; @Override protected void onCreate(Bundle savedInstanceState) { super.onCreate(savedInstanceState); setContentView(R.layout.activity_main); mInflater = LayoutInflater.from(this); mViewPager = (ViewPager) findViewById(R.id.id_viewpager); /** * 初始化View */ initView(); mViewPager.setAdapter(mAdapter); mViewPager.setOnPageChangeListener(new OnPageChangeListener() { @Override public void onPageSelected(int position) { resetTabBtn(); switch (position) { case 0: ((ImageButton) mTabBtnWeixin.findViewById(R.id.btn_tab_bottom_weixin)) .setImageResource(R.drawable.tab_weixin_pressed); break; case 1: ((ImageButton) mTabBtnFrd.findViewById(R.id.btn_tab_bottom_friend)) .setImageResource(R.drawable.tab_find_frd_pressed); break; case 2: ((ImageButton) mTabBtnAddress.findViewById(R.id.btn_tab_bottom_contact)) .setImageResource(R.drawable.tab_address_pressed); break; case 3: ((ImageButton) mTabBtnSettings.findViewById(R.id.btn_tab_bottom_setting)) .setImageResource(R.drawable.tab_settings_pressed); break; } currentIndex = position; } @Override public void onPageScrolled(int arg0, float arg1, int arg2) { } @Override public void onPageScrollStateChanged(int arg0) { } }); } protected void resetTabBtn() { ((ImageButton) mTabBtnWeixin.findViewById(R.id.btn_tab_bottom_weixin)) .setImageResource(R.drawable.tab_weixin_normal); ((ImageButton) mTabBtnFrd.findViewById(R.id.btn_tab_bottom_friend)) .setImageResource(R.drawable.tab_find_frd_normal); ((ImageButton) mTabBtnAddress.findViewById(R.id.btn_tab_bottom_contact)) .setImageResource(R.drawable.tab_address_normal); ((ImageButton) mTabBtnSettings.findViewById(R.id.btn_tab_bottom_setting)) .setImageResource(R.drawable.tab_settings_normal); } private void initView() { mTabBtnWeixin = (LinearLayout) findViewById(R.id.id_tab_bottom_weixin); mTabBtnFrd = (LinearLayout) findViewById(R.id.id_tab_bottom_friend); mTabBtnAddress = (LinearLayout) findViewById(R.id.id_tab_bottom_contact); mTabBtnSettings = (LinearLayout) findViewById(R.id.id_tab_bottom_setting); mViews = new ArrayList<View>(); View first = mInflater.inflate(R.layout.main_tab_01, null); View second = mInflater.inflate(R.layout.main_tab_02, null); View third = mInflater.inflate(R.layout.main_tab_03, null); View fourth = mInflater.inflate(R.layout.main_tab_04, null); mViews.add(first); mViews.add(second); mViews.add(third); mViews.add(fourth); mAdapter = new PagerAdapter() { @Override public void destroyItem(ViewGroup container, int position, Object object) { container.removeView(mViews.get(position)); } @Override public Object instantiateItem(ViewGroup container, int position) { View view = mViews.get(position); container.addView(view); return view; } @Override public boolean isViewFromObject(View arg0, Object arg1) { return arg0 == arg1; } @Override public int getCount() { return mViews.size(); } }; }}评价:所有的代码都集中在一个Activity中,显得代码比较乱。2、FragmentManager+Fragment实现
主要利用了Fragment在主内容界面对Fragment的add,hide等事务操作。
效果图:

代码:
主Activity
package com.example.mainframework02.fragment;import android.annotation.SuppressLint;import android.app.Activity;import android.app.FragmentManager;import android.app.FragmentTransaction;import android.os.Bundle;import android.view.View;import android.view.View.OnClickListener;import android.widget.ImageButton;import android.widget.LinearLayout;import com.example.mainframework02.R;public class FragmentMainActivity extends Activity implements OnClickListener{ private MainTab02 mTab02; private MainTab01 mTab01; private MainTab03 mTab03; private MainTab04 mTab04; /** * 底部四个按钮 */ private LinearLayout mTabBtnWeixin; private LinearLayout mTabBtnFrd; private LinearLayout mTabBtnAddress; private LinearLayout mTabBtnSettings; /** * 用于对Fragment进行管理 */ private FragmentManager fragmentManager; @SuppressLint("NewApi") @Override protected void onCreate(Bundle savedInstanceState) { super.onCreate(savedInstanceState); setContentView(R.layout.fragment_main); initViews(); fragmentManager = getFragmentManager(); setTabSelection(0); } private void initViews() { mTabBtnWeixin = (LinearLayout) findViewById(R.id.id_tab_bottom_weixin); mTabBtnFrd = (LinearLayout) findViewById(R.id.id_tab_bottom_friend); mTabBtnAddress = (LinearLayout) findViewById(R.id.id_tab_bottom_contact); mTabBtnSettings = (LinearLayout) findViewById(R.id.id_tab_bottom_setting); mTabBtnWeixin.setOnClickListener(this); mTabBtnFrd.setOnClickListener(this); mTabBtnAddress.setOnClickListener(this); mTabBtnSettings.setOnClickListener(this); } @Override public void onClick(View v) { switch (v.getId()) { case R.id.id_tab_bottom_weixin: setTabSelection(0); break; case R.id.id_tab_bottom_friend: setTabSelection(1); break; case R.id.id_tab_bottom_contact: setTabSelection(2); break; case R.id.id_tab_bottom_setting: setTabSelection(3); break; default: break; } } /** * 根据传入的index参数来设置选中的tab页。 * */ @SuppressLint("NewApi") private void setTabSelection(int index) { // 重置按钮 resetBtn(); // 开启一个Fragment事务 FragmentTransaction transaction = fragmentManager.beginTransaction(); // 先隐藏掉所有的Fragment,以防止有多个Fragment显示在界面上的情况 hideFragments(transaction); switch (index) { case 0: // 当点击了消息tab时,改变控件的图片和文字颜色 ((ImageButton) mTabBtnWeixin.findViewById(R.id.btn_tab_bottom_weixin)) .setImageResource(R.drawable.tab_weixin_pressed); if (mTab01 == null) { // 如果MessageFragment为空,则创建一个并添加到界面上 mTab01 = new MainTab01(); transaction.add(R.id.id_content, mTab01); } else { // 如果MessageFragment不为空,则直接将它显示出来 transaction.show(mTab01); } break; case 1: // 当点击了消息tab时,改变控件的图片和文字颜色 ((ImageButton) mTabBtnFrd.findViewById(R.id.btn_tab_bottom_friend)) .setImageResource(R.drawable.tab_find_frd_pressed); if (mTab02 == null) { // 如果MessageFragment为空,则创建一个并添加到界面上 mTab02 = new MainTab02(); transaction.add(R.id.id_content, mTab02); } else { // 如果MessageFragment不为空,则直接将它显示出来 transaction.show(mTab02); } break; case 2: // 当点击了动态tab时,改变控件的图片和文字颜色 ((ImageButton) mTabBtnAddress.findViewById(R.id.btn_tab_bottom_contact)) .setImageResource(R.drawable.tab_address_pressed); if (mTab03 == null) { // 如果NewsFragment为空,则创建一个并添加到界面上 mTab03 = new MainTab03(); transaction.add(R.id.id_content, mTab03); } else { // 如果NewsFragment不为空,则直接将它显示出来 transaction.show(mTab03); } break; case 3: // 当点击了设置tab时,改变控件的图片和文字颜色 ((ImageButton) mTabBtnSettings.findViewById(R.id.btn_tab_bottom_setting)) .setImageResource(R.drawable.tab_settings_pressed); if (mTab04 == null) { // 如果SettingFragment为空,则创建一个并添加到界面上 mTab04 = new MainTab04(); transaction.add(R.id.id_content, mTab04); } else { // 如果SettingFragment不为空,则直接将它显示出来 transaction.show(mTab04); } break; } transaction.commit(); } /** * 清除掉所有的选中状态。 */ private void resetBtn() { ((ImageButton) mTabBtnWeixin.findViewById(R.id.btn_tab_bottom_weixin)) .setImageResource(R.drawable.tab_weixin_normal); ((ImageButton) mTabBtnFrd.findViewById(R.id.btn_tab_bottom_friend)) .setImageResource(R.drawable.tab_find_frd_normal); ((ImageButton) mTabBtnAddress.findViewById(R.id.btn_tab_bottom_contact)) .setImageResource(R.drawable.tab_address_normal); ((ImageButton) mTabBtnSettings.findViewById(R.id.btn_tab_bottom_setting)) .setImageResource(R.drawable.tab_settings_normal); } /** * 将所有的Fragment都置为隐藏状态。 * * @param transaction * 用于对Fragment执行操作的事务 */ @SuppressLint("NewApi") private void hideFragments(FragmentTransaction transaction) { if (mTab01 != null) { transaction.hide(mTab01); } if (mTab02 != null) { transaction.hide(mTab02); } if (mTab03 != null) { transaction.hide(mTab03); } if (mTab04 != null) { transaction.hide(mTab04); } }}各个TabFragment,一共四个TabFragment,下面贴出两个,基本都一样。
package com.example.mainframework02.fragment;import android.annotation.SuppressLint;import android.app.Fragment;import android.os.Bundle;import android.view.LayoutInflater;import android.view.View;import android.view.ViewGroup;@SuppressLint("NewApi")public class MainTab01 extends Fragment{ @Override public View onCreateView(LayoutInflater inflater, ViewGroup container, Bundle savedInstanceState) { return inflater.inflate(com.example.mainframework02.R.layout.main_tab_01, container, false); }}package com.example.mainframework02.fragment;import android.annotation.SuppressLint;import android.app.Fragment;import android.os.Bundle;import android.view.LayoutInflater;import android.view.View;import android.view.ViewGroup;import com.example.mainframework02.R;@SuppressLint("NewApi")public class MainTab02 extends Fragment{ public View onCreateView(LayoutInflater inflater, ViewGroup container, Bundle savedInstanceState) { return inflater.inflate(R.layout.main_tab_02, container, false); }}评价:每个Fragment中的控件的处理,都是独立到各自的类中,相对来说主Activity简化了不少,可惜没有左右滑动的效果了。3、ViewPager+Fragment实现
主要通过ViewPager和FragmentPagerAdapter一起来实现。
效果图:

代码:
主Activity
package com.example.mainframework03;import java.util.ArrayList;import java.util.List;import android.os.Bundle;import android.support.v4.app.Fragment;import android.support.v4.app.FragmentActivity;import android.support.v4.app.FragmentPagerAdapter;import android.support.v4.view.ViewPager;import android.support.v4.view.ViewPager.OnPageChangeListener;import android.widget.ImageButton;import android.widget.LinearLayout;public class MainActivity extends FragmentActivity{ private ViewPager mViewPager; private FragmentPagerAdapter mAdapter; private List<Fragment> mFragments = new ArrayList<Fragment>(); /** * 底部四个按钮 */ private LinearLayout mTabBtnWeixin; private LinearLayout mTabBtnFrd; private LinearLayout mTabBtnAddress; private LinearLayout mTabBtnSettings; @Override protected void onCreate(Bundle savedInstanceState) { super.onCreate(savedInstanceState); setContentView(R.layout.activity_main); mViewPager = (ViewPager) findViewById(R.id.id_viewpager); initView(); mAdapter = new FragmentPagerAdapter(getSupportFragmentManager()) { @Override public int getCount() { return mFragments.size(); } @Override public Fragment getItem(int arg0) { return mFragments.get(arg0); } }; mViewPager.setAdapter(mAdapter); mViewPager.setOnPageChangeListener(new OnPageChangeListener() { private int currentIndex; @Override public void onPageSelected(int position) { resetTabBtn(); switch (position) { case 0: ((ImageButton) mTabBtnWeixin.findViewById(R.id.btn_tab_bottom_weixin)) .setImageResource(R.drawable.tab_weixin_pressed); break; case 1: ((ImageButton) mTabBtnFrd.findViewById(R.id.btn_tab_bottom_friend)) .setImageResource(R.drawable.tab_find_frd_pressed); break; case 2: ((ImageButton) mTabBtnAddress.findViewById(R.id.btn_tab_bottom_contact)) .setImageResource(R.drawable.tab_address_pressed); break; case 3: ((ImageButton) mTabBtnSettings.findViewById(R.id.btn_tab_bottom_setting)) .setImageResource(R.drawable.tab_settings_pressed); break; } currentIndex = position; } @Override public void onPageScrolled(int arg0, float arg1, int arg2) { } @Override public void onPageScrollStateChanged(int arg0) { } }); } protected void resetTabBtn() { ((ImageButton) mTabBtnWeixin.findViewById(R.id.btn_tab_bottom_weixin)) .setImageResource(R.drawable.tab_weixin_normal); ((ImageButton) mTabBtnFrd.findViewById(R.id.btn_tab_bottom_friend)) .setImageResource(R.drawable.tab_find_frd_normal); ((ImageButton) mTabBtnAddress.findViewById(R.id.btn_tab_bottom_contact)) .setImageResource(R.drawable.tab_address_normal); ((ImageButton) mTabBtnSettings.findViewById(R.id.btn_tab_bottom_setting)) .setImageResource(R.drawable.tab_settings_normal); } private void initView() { mTabBtnWeixin = (LinearLayout) findViewById(R.id.id_tab_bottom_weixin); mTabBtnFrd = (LinearLayout) findViewById(R.id.id_tab_bottom_friend); mTabBtnAddress = (LinearLayout) findViewById(R.id.id_tab_bottom_contact); mTabBtnSettings = (LinearLayout) findViewById(R.id.id_tab_bottom_setting); MainTab01 tab01 = new MainTab01(); MainTab02 tab02 = new MainTab02(); MainTab03 tab03 = new MainTab03(); MainTab04 tab04 = new MainTab04(); mFragments.add(tab01); mFragments.add(tab02); mFragments.add(tab03); mFragments.add(tab04); }}还有4个TabFragment,下面贴一个,四个基本一样
package com.example.mainframework03;import android.os.Bundle;import android.support.v4.app.Fragment;import android.view.LayoutInflater;import android.view.View;import android.view.ViewGroup;public class MainTab01 extends Fragment{ @Override public View onCreateView(LayoutInflater inflater, ViewGroup container, Bundle savedInstanceState) { return inflater.inflate(R.layout.main_tab_01, container, false); }}评价:实现效果和第一种效果一模一样,每个Fragment独自处理自己内部的逻辑,代码整洁很多,并且支持左右滑动。感觉是第一种和第二种的结合版本。4、TabPageIndicator+ViewPager+FragmentPagerAdapter
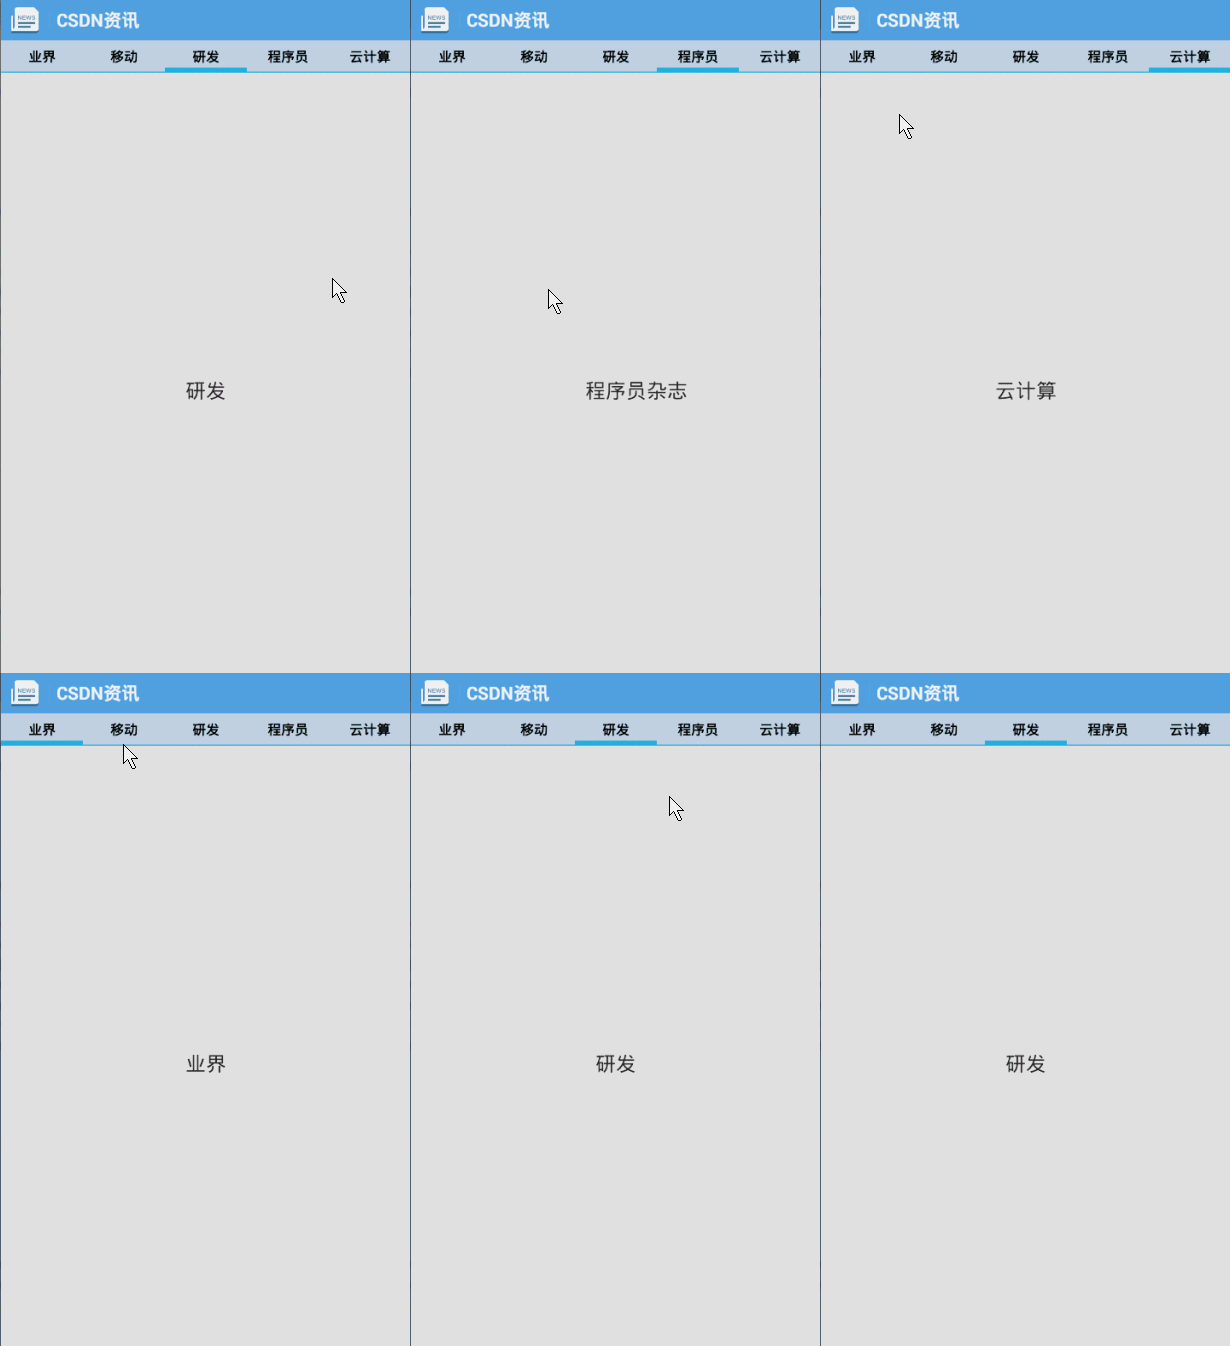
实现方式和3是一致的,但是使用了TabPageIndicator作为tab的指示器,效果还是不错的,这个之前写过,就不再贴代码了。
效果图:

参考:Android 使用Fragment,ViewPagerIndicator 制作csdn app主要框架
好了,就总结了这么多,肯定还有很多别的实现方式,大家可以留言,有时间会继续完善这篇总结的。