最近没有啥idea,借着文献笔记《AppIntent - Analyzing Sensitive Data Transmission in Android for Privacy Leakage Detection》的评论疑问,自己也来体验一下文中行为触发所所用到的InstrumentationTestRunner吧。
由于对测试并没有太多的概念,一不小心搜索到各种前缀:Instrumentation、InstrumentationTestCase、InstrumentationTestSuite、InstrumentationTestRunner 傻了眼,但仔细一看把前缀去掉后大致就分类为了这三类:TestCase、TestSuite、TestRunner。用中文来翻译应该可以认为是测试样例,测试集合,测试运行工具吧。之后再官方文档中搜索InstrumentationTestRunner,用法介绍http://developer.android.com/reference/android/test/InstrumentationTestRunner.html
常规Android自动化方法分3步走:
1、先继承各种****TestCase完成测试样例的编写(这里有很多***TestCase,适用于不用场景,都可以使用,对于broadcastreceiver用intent可以触发)
2、在Andriodmanifest中需要加入<instrumentation> 并配置些啥
3、完成之后可以adb shell am instrument ****执行我们的自动化测试
下面用一个小demo来完成入门,主要还是自己单独建立一个测试项目,但重做安全的角度来说,我们更多的是在做黑盒测试,那么就会产生了不少疑问,在下面阐述。
1.先是需要测试的app,我这里简单写了一个
package com.example.hello;import com.example.hello.R;import android.app.Activity;import android.os.Bundle;import android.util.Log;import android.view.Menu;import android.view.View;import android.view.View.OnClickListener;import android.widget.Button;import android.widget.EditText;import android.widget.Toast;public class HelloActivity extends Activity { final String TAG = "helloactivity"; Button mButton; EditText mEditText; @Override protected void onCreate(Bundle savedInstanceState) { super.onCreate(savedInstanceState); Log.i(TAG, "hello onCreate"); setContentView(R.layout.activity_hello_test); mButton = (Button) findViewById(R.id.Button1); mEditText = (EditText) findViewById(R.id.EditText1); mEditText.setHint("INPUT"); mButton.setOnClickListener(new OnClickListener(){ public void onClick(View v){ String msg = mEditText.getText().toString(); if (msg.equals("1")) { Toast.makeText(getApplicationContext(), "hello_1", Toast.LENGTH_LONG).show(); } else if(msg.equals("2")){ Toast.makeText(getApplicationContext(), "hello_2", Toast.LENGTH_SHORT).show(); } else { Toast.makeText(getApplicationContext(), "hello_nothing", Toast.LENGTH_SHORT).show(); } } }); } @Override public boolean onCreateOptionsMenu(Menu menu) { getMenuInflater().inflate(R.menu.hello_test, menu); return true; } @Override protected void onDestroy() { super.onDestroy(); Log.i(TAG,"hello onDestroy"); }功能就是输入1、2、其他字符串之后onClick之后会走不同路径

2、编写自动化测试的TestCase
官方推荐测试样例项目建立路径最好满足一下规范(刚开始以为这样子是为了更好的找到测试APP中相应的类,后来想想也不对,不是同一个项目,为啥能直接导入测试APP的类import com.example.hello.HelloActivity呢,自己还索性在其他路径建了一个测试项目,发现com.example.hello.HelloActivity确实能导入,而其他项目的类则不行,后来想想应该是target的原因,ADT检测该项目没有该类,便自动以target为目标匹配吧):
MyProject/ AndroidManifest.xml res/ ... (resources for main application) src/ ... (source code for main application) ... tests/ AndroidManifest.xml res/ ... (resources for tests) src/ ... (source code for tests)
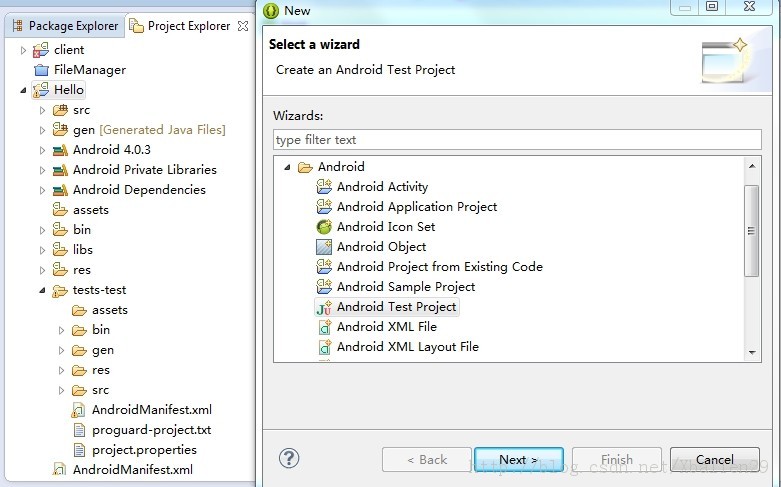
之后可以选择需要测试的目标APP:

我们这里需要测试的是Hello,这样自动生成后,ADT自动帮我们完成了第二步中在AndroiManifest里加入需要声明的东西
<?xml version="1.0" encoding="utf-8"?><manifest xmlns:android="http://schemas.android.com/apk/res/android" package="com.example.hello.test" android:versionCode="1" android:versionName="1.0" > <uses-sdk android:minSdkVersion="8" /> <instrumentation android:name="android.test.InstrumentationTestRunner" android:targetPackage="com.example.hello" android:label="the hello test" /> <application android:icon="@drawable/ic_launcher" android:label="@string/app_name" > <uses-library android:name="android.test.runner" /> </application></manifest>
target指明了需要测试的目标,label为测试的标签(在模拟器中使用dev tool可以看到对应的标签),这里写了个一个简单的测试样例,自动向编辑框中输入1,2,3然后分别自动点击按钮
package com.example.hello.test;import android.app.Instrumentation;import android.content.Intent;import android.os.SystemClock;import android.test.InstrumentationTestCase;import android.util.Log;import android.widget.Button;import android.widget.EditText;import com.example.hello.HelloActivity;import com.example.hello.R;public class TestHelloActiviry extends InstrumentationTestCase { final String TAG = "TestHelloAppTestHelloApp"; Button mHelloTestButton; EditText mHelloEditText; HelloActivity mHelloTestActivity; Instrumentation mInstrumentation; public void testHelloActivity() { Log.i(TAG, "call testHelloActivity()"); mHelloTestButton = (Button)mHelloTestActivity.findViewById(R.id.Button1); mHelloEditText = (EditText)mHelloTestActivity.findViewById(R.id.EditText1); for (int i = 0; i < 3; i++) { //设置事件在主线程中执行 mInstrumentation.runOnMainSync(new Click(mHelloTestButton,mHelloEditText,Integer.toString(i))); SystemClock.sleep(3000); } } public void testHelloActivity2() { } private class Click implements Runnable{ Button button; EditText editText; String str; Click(Button b,EditText e,String s){ button = b; editText = e; str = s; } @Override public void run() { editText.setText(str); button.performClick(); } } //负责testcase开始前的初始化工作 @Override protected void setUp() throws Exception { super.setUp(); Log.i(TAG, "call setUp()"); mInstrumentation = getInstrumentation(); Intent intent = new Intent(); intent.setClassName("com.example.hello", "com.example.hello.HelloActivity"); intent.setFlags(Intent.FLAG_ACTIVITY_NEW_TASK); //通过intent触发activity mHelloTestActivity = (HelloActivity)mInstrumentation.startActivitySync(intent); } @Override protected void tearDown() throws Exception { super.tearDown(); Log.i(TAG, "tearDown()"); } }3、运行起来吧
接下来要么直接在ADT中run as-》Android jUnit test,但这样太智能了,我们并不知道实际上做了什么,对于我们安全来说,我们肯定不能开个ADT直接点点点吧。索性跟踪了一下console发现如下:
trouble writing output: already prepared[2014-03-15 18:40:42 - tests] ------------------------------[2014-03-15 18:40:42 - tests] Android Launch![2014-03-15 18:40:42 - tests] adb is running normally.[2014-03-15 18:40:42 - tests] Performing android.test.InstrumentationTestRunner JUnit launch[2014-03-15 18:40:42 - tests] Automatic Target Mode: using device '?'[2014-03-15 18:40:42 - tests] Uploading tests.apk onto device '?'[2014-03-15 18:40:42 - tests] Installing tests.apk...[2014-03-15 18:41:09 - tests] Success![2014-03-15 18:41:09 - tests] Project dependency found, installing: Hello[2014-03-15 18:41:14 - Hello] Uploading Hello.apk onto device '?'[2014-03-15 18:41:14 - Hello] Installing Hello.apk...[2014-03-15 18:41:41 - Hello] Success![2014-03-15 18:41:41 - tests] Launching instrumentation android.test.InstrumentationTestRunner on ?[2014-03-15 18:41:43 - tests] Sending test information to Eclipse
其实是在安装tests.apk时候,ADT根据target检测到依赖关系,接着自动安装了Hello.apk。接着运行instrumentation,也就是之前提到的命令
am instrument -w com.example.hello.test/android.test.InstrumentationRunner
然后这条am是不需要ROOT权限的,具体命令深入研究的话查看相关文档,你懂得我懂得
顺便补充一条命令:
pm list instrumentation
可以查看手机目前装了那些instrumentation
4.回到正题
前面介绍了那么多,其实只是为了搞安全行为触发做铺垫,为了解决之前开篇的论文疑惑做铺垫。假设我们接触不到源码,假设我们也需要脚本自动化完成触发,那这时候不肯能在ADT ADT的叫叫叫了!
走到这里,有没有发现其实不需要什么重打包,被测试APP,测试样例APP是分开的。但是为了提示数据被传输,需要Toast,或许重打包就在这吧,数据触发的时候把相应的事件打印出来(因为测试样例的APP是不能弹出来的,最多log),暂时只能这么认为那论文的重打包干嘛了,或者就是他们采用的方法不一样,是把测试样例smali放入被测试smali文件夹,修改打印内容下并修改AndroidManifest(都是猜测,但目前简单的功能来看,除了Toast打印数据确实不需要重打包)
通过一些自动化逆向工具,分析被测试APP自然能看到一些有用的信息,通过AndroidManifest可以看到组件、intent。或许我们还需要view控件,那么我们可以通过解析出来的文件查看:
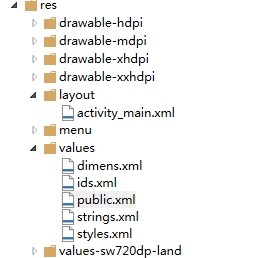
layout->activity_main可以看到控件信息主要是id,通过values的public我们可以找到对应id的数值,那么这时候就不存在R.id.xxxxx了,填入解析出来的数字就好了
mHelloTestButton = (Button)mHelloTestActivity.findViewById(xxxxx); mHelloEditText = (EditText)mHelloTestActivity.findViewById(xxxxx);逆向看了一下,暂时没有什么特别的地方,要有问题也就是能不能找到target对应的import 类了,毕竟有时候需要里面的内容,暂时只思考到了这里,还有很多API是很有用的,期待下次继续吧!