Android记录8--简单自定义Launcher实现
实现Launcher还是比较容易,我想做手机桌面的这个点应该用得比较多,最近看到一个自定义launcher的效果不会实现,是一种圆弧形的,我还要去想想怎么布局还有用什么控件去实现,这里我就简单实现一个launcher。
界面效果如图:
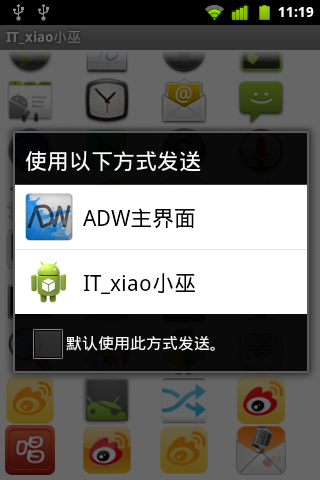
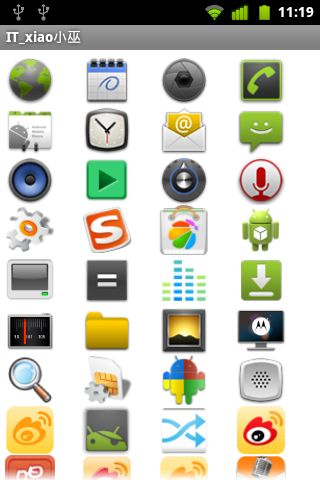
点击菜单键就好出现launcher的发送方式,如果设置为默认,每次启动都是右边的界面了。
下面看具体是实现:
先在AndroidMenifest.xml增加两行
<?xml version="1.0" encoding="utf-8"?><manifest xmlns:android="http://schemas.android.com/apk/res/android" package="com.wwj.launcher" android:versionCode="1" android:versionName="1.0" > <uses-sdk android:minSdkVersion="8" android:targetSdkVersion="17" /> <application android:allowBackup="true" android:icon="@drawable/ic_launcher" android:label="@string/app_name" android:theme="@style/AppTheme" > <activity android:name="com.wwj.launcher.HeyWwj" android:label="@string/app_name" > <intent-filter> <action android:name="android.intent.action.MAIN" /> <category android:name="android.intent.category.LAUNCHER" /> <!-- 增加以下两行 --> <category android:name="android.intent.category.HOME"/> <category android:name="android.intent.category.DEFAULT"/> </intent-filter> </activity> </application></manifest>
/LanchuerTest/src/com/wwj/launcher/HeyWwj.java
Activity
package com.wwj.launcher;import java.util.List;import android.app.Activity;import android.content.ComponentName;import android.content.Intent;import android.content.pm.ResolveInfo;import android.os.Bundle;import android.view.View;import android.widget.AdapterView;import android.widget.AdapterView.OnItemClickListener;import android.widget.GridView;public class HeyWwj extends Activity { private GridView mGridView; private List<ResolveInfo> mApps; @Override protected void onCreate(Bundle savedInstanceState) { super.onCreate(savedInstanceState); setContentView(R.layout.activity_main); loadApps(); mGridView = (GridView) findViewById(R.id.gridView1); mGridView.setAdapter(new AppAdapter(this, mApps)); mGridView.setOnItemClickListener(new OnItemClickListener() { @Override public void onItemClick(AdapterView<?> parent, View view, int position, long id) { ResolveInfo info = mApps.get(position); // 应用的包名 String pkg = info.activityInfo.packageName; // 应用的主Activity String cls = info.activityInfo.name; ComponentName componentName = new ComponentName(pkg, cls); Intent intent = new Intent(); intent.setComponent(componentName); startActivity(intent); } }); } /** * 加载app */ private void loadApps() { Intent intent = new Intent(Intent.ACTION_MAIN, null); intent.addCategory(Intent.CATEGORY_LAUNCHER); mApps = getPackageManager().queryIntentActivities(intent, 0); }}自定义适配器
/LanchuerTest/src/com/wwj/launcher/AppAdapter.java
package com.wwj.launcher;import java.util.List;import android.content.Context;import android.content.pm.ResolveInfo;import android.view.View;import android.view.ViewGroup;import android.widget.BaseAdapter;import android.widget.GridView;import android.widget.ImageView;import android.widget.ImageView.ScaleType;public class AppAdapter extends BaseAdapter { List<ResolveInfo> mApps; Context context; public AppAdapter(Context context, List<ResolveInfo> apps) { super(); this.context = context; this.mApps = apps; } @Override public int getCount() { return mApps.size(); } @Override public Object getItem(int position) { return mApps.get(position); } @Override public long getItemId(int position) { return position; } @Override public View getView(int position, View convertView, ViewGroup parent) { ImageView iv; if (convertView == null) { iv = new ImageView(context); iv.setScaleType(ScaleType.FIT_CENTER); iv.setLayoutParams(new GridView.LayoutParams(50,50)); } else { iv = (ImageView) convertView; } ResolveInfo info = mApps.get(position); iv.setImageDrawable(info.activityInfo.loadIcon(context.getPackageManager())); return iv; }}以上就大功告成了,是不是比较简单。不过一般涉及到复杂的需求,也就是比较复杂的界面效果就没那么容易了,这就要靠你们自己的聪明才智了,做出炫丽酷的效果,小巫在这方面就显得力不从心。