前记:手头一直有一个网易新闻客户端的框架(只是一个空架子),基本在上面进行修改,就可以作出自己的东西。里面的主框架是使用TabActivity和TabHost。
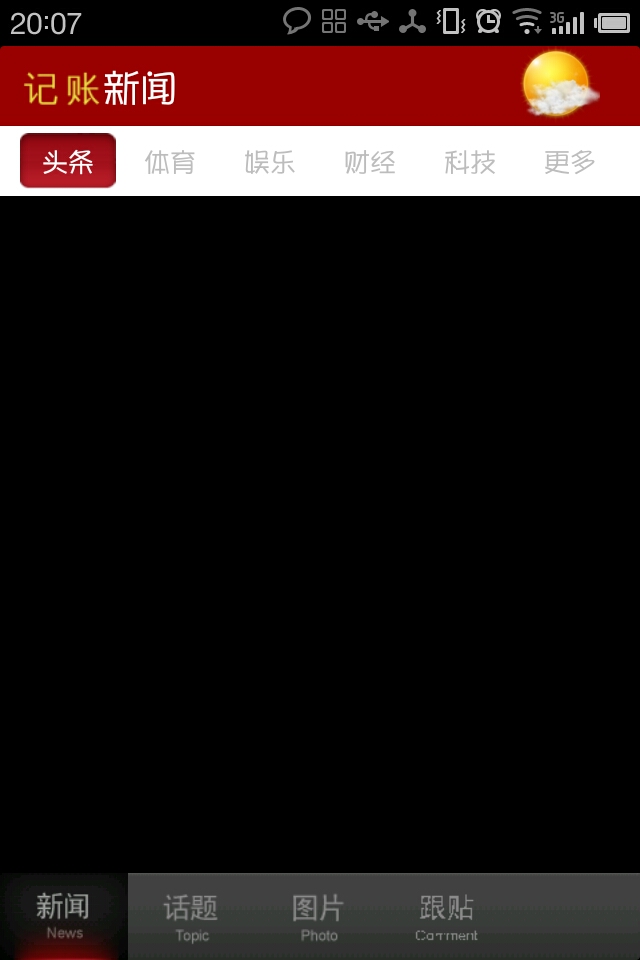
近日打开项目发现,TabActivity已然被谷歌取消了,虽然可以继续用,但是谷歌取消它自有取消它的理由。去Doc中一看,TabActivity建议用Fragment代替。于是开始研究这个Fragment使用,一看才知道,这个Fragment是个好东西。具体怎么用可以参照这个帖子:http://www.eoeandroid.com/thread-71642-1-1.html 讲的很好,所以我就不怎么重复了。这里着重讲一下使用Fragments取代tabActivity开发网易新闻客户端框架。这是截图:
原版的源代码下载:http://download.csdn.net/detail/w553000664/4491229 (注意这个是使用TabHost+TabActivity实现的,不推荐,但是可以作为一个学习的案例)
下面主要讲解如何使用Fragment来实现上述框架
1.分析一下底部使用TabHost来实现没有问题,在原来的项目中,TabHost来管理5个Activity,在这5个Activity中进行切换,来显示不同的功能。所以上面的界面是由每个Activity来提供的。现在改用Fragment后,TabHost切换的不再是Activity,而是Fragment中的内容。所以可以这样布局主Activity:
activity_main.xml:
<?xml version="1.0" encoding="utf-8"?><LinearLayout xmlns:android="http://schemas.android.com/apk/res/android" style="@style/layout_full" android:orientation="vertical" > <TabHost android:id="@+id/tabhost" style="@style/layout_full" > <LinearLayout android:layout_width="match_parent" android:layout_height="match_parent" android:orientation="vertical" > <FrameLayout android:id="@android:id/tabcontent" android:layout_width="fill_parent" android:layout_height="0.0dip" android:layout_weight="1.0" > <LinearLayout android:id="@+id/linearlayout" style="@style/layout_full" android:orientation="vertical" > <fragment android:id="@+id/content_fragment_top" android:name="fragment_content.TopBarFragment" style="@style/layout_vertical" android:layout_weight="1" /> <fragment android:id="@+id/content_fragment" android:name="fragment_content.Contentfragment" style="@style/layout_vertical" android:layout_weight="8" /> </LinearLayout> </FrameLayout> <TabWidget android:id="@android:id/tabs" android:layout_width="fill_parent" android:layout_height="wrap_content" android:visibility="gone" /> <FrameLayout android:id="@android:id/tabcontent" style="@style/layout_vertical" android:layout_height="wrap_content" > <RelativeLayout android:id="@+id/layout_bottom" android:layout_width="fill_parent" android:layout_height="wrap_content" > <RadioGroup android:id="@+id/radiogroup" android:layout_width="fill_parent" android:layout_height="wrap_content" android:layout_gravity="bottom" android:background="@drawable/bottombg" android:gravity="center_vertical" android:orientation="horizontal" > <RadioButton android:id="@+id/radio_news" android:layout_width="wrap_content" android:background="@drawable/tab_selector_news" android:button="@null" android:checked="true" /> <RadioButton android:id="@+id/radio_topic" android:layout_width="wrap_content" android:background="@drawable/tab_selector_topic" android:button="@null" /> <RadioButton android:id="@+id/radio_pic" android:layout_width="wrap_content" android:background="@drawable/tab_selector_pic" android:button="@null" /> <RadioButton android:id="@+id/radio_follow" android:layout_width="wrap_content" android:background="@drawable/tab_selector_follow" android:button="@null" /> <RadioButton android:id="@+id/radio_vote" android:layout_width="wrap_content" android:background="@drawable/tab_selector_vote" android:button="@null" /> </RadioGroup> </RelativeLayout> </FrameLayout> </LinearLayout> </TabHost></LinearLayout>
可以看到布局中使用了两个Fragment,上面一个Fragment来显示标题,下面的Fragment来显示内容:
下面是两个Fragment的布局:很简单:
fragment_content.xml
<?xml version="1.0" encoding="utf-8"?><RelativeLayout xmlns:android="http://schemas.android.com/apk/res/android" android:id="@+id/layout_content" android:layout_width="match_parent" android:layout_height="40dip" android:background="#990000" > <ImageView android:id="@+id/img_netease_top" android:layout_width="wrap_content" android:layout_height="wrap_content" android:layout_centerVertical="true" android:layout_marginLeft="10dip" android:src="@drawable/netease_top" /> <TextView android:id="@+id/fragment_context_context" android:layout_width="wrap_content" android:layout_height="wrap_content" android:layout_centerVertical="true" android:layout_toRightOf="@+id/img_netease_top" android:text="@string/picture_top_left_text" android:textColor="@android:color/white" android:textSize="20sp" /></RelativeLayout>
fragment_topbar.xml
<?xml version="1.0" encoding="utf-8"?><RelativeLayout xmlns:android="http://schemas.android.com/apk/res/android" android:id="@+id/layout_top" android:layout_width="match_parent" android:layout_height="40dip" android:background="#999999" > <ImageView android:id="@+id/img_netease_top" android:layout_width="wrap_content" android:layout_height="wrap_content" android:layout_centerVertical="true" android:layout_marginLeft="10dip" android:src="@drawable/netease_top" /> <TextView android:id="@+id/fragment_topbar_topic" android:layout_width="wrap_content" android:layout_height="wrap_content" android:layout_centerVertical="true" android:layout_toRightOf="@+id/img_netease_top" android:text="@string/picture_top_left_text" android:textColor="@android:color/white" android:textSize="20sp" /></RelativeLayout>
下面来看主Activity:
MainActivity.java
package com.gracker.tabfragment;import android.app.Activity;import android.os.Bundle;import android.view.Menu;import android.widget.ImageView;import android.widget.RadioGroup;import android.widget.RadioGroup.OnCheckedChangeListener;import android.widget.RelativeLayout;import android.widget.TabHost;import com.and.netease.utils.MoveBg;import fragment_content.Contentfragment;import fragment_content.TopBarFragment;public class MainActivity extends Activity { RadioGroup radioGroup; ImageView img; TabHost tabHost; int startLeft; RelativeLayout bottom_layout; @Override public void onCreate(Bundle savedInstanceState) { super.onCreate(savedInstanceState); setContentView(R.layout.activity_main); tabHost = (TabHost) findViewById(R.id.tabhost); bottom_layout = (RelativeLayout) findViewById(R.id.layout_bottom); radioGroup = (RadioGroup) findViewById(R.id.radiogroup); radioGroup.setOnCheckedChangeListener(checkedChangeListener); img = new ImageView(this); img.setImageResource(R.drawable.tab_front_bg); bottom_layout.addView(img); } @Override public boolean onCreateOptionsMenu(Menu menu) { getMenuInflater().inflate(R.menu.activity_main, menu); return true; } // 当Tab发生变化时,改变tab的标签的显示图片 private OnCheckedChangeListener checkedChangeListener = new OnCheckedChangeListener() { @Override public void onCheckedChanged(RadioGroup group, int checkedId) { Contentfragment fragment = (Contentfragment) getFragmentManager() .findFragmentById(R.id.content_fragment); TopBarFragment fragmentTopic = (TopBarFragment) getFragmentManager() .findFragmentById(R.id.content_fragment_top); switch (checkedId) { case R.id.radio_news: fragment.changeContent(0); fragmentTopic.changeContent(0); tabHost.setCurrentTabByTag("news"); MoveBg.moveFrontBg(img, startLeft, 0, 0, 0); startLeft = 0; break; case R.id.radio_topic: fragment.changeContent(1); fragmentTopic.changeContent(1); tabHost.setCurrentTabByTag("topic"); MoveBg.moveFrontBg(img, startLeft, img.getWidth(), 0, 0); startLeft = img.getWidth(); break; case R.id.radio_pic: fragment.changeContent(2); fragmentTopic.changeContent(2); tabHost.setCurrentTabByTag("picture"); MoveBg.moveFrontBg(img, startLeft, img.getWidth() * 2, 0, 0); startLeft = img.getWidth() * 2; break; case R.id.radio_follow: fragment.changeContent(3); fragmentTopic.changeContent(3); tabHost.setCurrentTabByTag("follow"); MoveBg.moveFrontBg(img, startLeft, img.getWidth() * 3, 0, 0); startLeft = img.getWidth() * 3; break; case R.id.radio_vote: fragment.changeContent(4); fragmentTopic.changeContent(4); tabHost.setCurrentTabByTag("vote"); MoveBg.moveFrontBg(img, startLeft, img.getWidth() * 4, 0, 0); startLeft = img.getWidth() * 4; break; default: break; } } };}核心就在check监听器中,这里获取两个Fragment的实例,并修改其中的内容。
下面是两个Fragment的代码:
Contentfragment.java
package fragment_content;import android.app.Fragment;import android.os.Bundle;import android.util.Log;import android.view.LayoutInflater;import android.view.View;import android.view.ViewGroup;import android.widget.TextView;import com.gracker.tabfragment.R;public class Contentfragment extends Fragment { TextView mTextView; // 显示的内容 @Override public void onCreate(Bundle savedInstanceState) { // TODO Auto-generated method stub Log.v("Contentfragment", "Contentfragment_onCreate"); super.onCreate(savedInstanceState); } @Override public void onDestroy() { // TODO Auto-generated method stub super.onDestroy(); } @Override public View onCreateView(LayoutInflater inflater, ViewGroup container, Bundle savedInstanceState) { Log.v("Contentfragment", "Contentfragment_onCreateView"); // super.onCreateView(inflater, container, savedInstanceState); // Inflate the layout for this fragment // TextView testText = (TextView)findViewById(R.id.item_detail); return inflater.inflate(R.layout.fragment_content, container, false); } public void changeContent(int index) { mTextView = (TextView) getActivity().findViewById( R.id.fragment_context_context); switch (index) { case 0: mTextView.setText("1"); break; case 1: mTextView.setText("2"); break; case 2: mTextView.setText("3"); break; case 3: mTextView.setText("4"); break; case 4: mTextView.setText("5"); break; default: break; } }}TopBarFragment.java:
package fragment_content;import com.gracker.tabfragment.R;import android.os.Bundle;import android.app.Fragment;import android.util.Log;import android.view.LayoutInflater;import android.view.View;import android.view.ViewGroup;import android.widget.TextView;public class TopBarFragment extends Fragment { TextView mTextView; @Override public void onCreate(Bundle savedInstanceState) { // TODO Auto-generated method stub Log.v("Contentfragment", "Contentfragment_onCreate"); super.onCreate(savedInstanceState); } @Override public void onDestroy() { // TODO Auto-generated method stub super.onDestroy(); } @Override public View onCreateView(LayoutInflater inflater, ViewGroup container, Bundle savedInstanceState) { Log.v("Contentfragment", "Contentfragment_onCreateView"); //super.onCreateView(inflater, container, savedInstanceState); // Inflate the layout for this fragment// TextView testText = (TextView)findViewById(R.id.item_detail); return inflater.inflate(R.layout.fragment_topbar, container, false); } public void changeContent(int index) { mTextView = (TextView) getActivity().findViewById( R.id.fragment_topbar_topic); switch (index) { case 0: mTextView.setText("1"); break; case 1: mTextView.setText("2"); break; case 2: mTextView.setText("3"); break; case 3: mTextView.setText("4"); break; case 4: mTextView.setText("5"); break; default: break; } }}核心代码就这么多,其实里面还有很多小细节,比如Tabhost切换是,背景的滑动,selector的使用等。
这个例子只是讲解初级的Fragment的使用,Fragment的另一个好处就是屏幕适配,可以让程序在平板和手机上显示不同的效果,仔细研究一下也是很有好处的
下面是 这个修改过的源码:http://download.csdn.net/detail/w553000664/4491272