转:http://www.iteye.com/topic/1111847
?
列表的显示需要三个元素:1.ListVeiw 用来展示列表的View。2.适配器 用来把数据映射到ListView上的中介。3.数据 具体的将被映射的字符串,图片,或者基本组件。根据列表的适配器类型,列表分为三种,ArrayAdapter,SimpleAdapter和SimpleCursorAdapter其中以ArrayAdapter最为简单,只能展示一行字。SimpleAdapter有最好的扩充性,可以自定义出各种效果。 SimpleCursorAdapter可以认为是SimpleAdapter对数据库的简单结合,可以方便的把数据库的内容以列表的形式展示出来。?
?
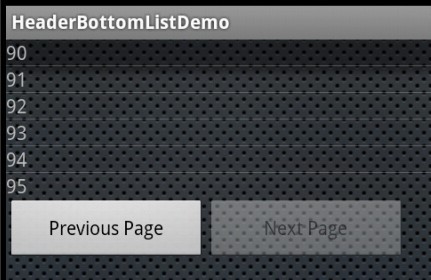
分页效果图:
?
<ListView android:id="@+id/list" android:layout_width="fill_parent" android:layout_height="wrap_content" /> <LinearLayout xmlns:android="http://schemas.android.com/apk/res/android" android:orientation="horizontal" android:layout_width="fill_parent" android:layout_height="wrap_content" android:gravity="bottom"> <Button android:id="@+id/btnLeft" android:layout_width="150dip" android:layout_height="wrap_content" android:text="Previous Page" /> <Button android:id="@+id/btnRight" android:layout_width="150dip" android:layout_height="wrap_content" android:text="Next Page" /> </LinearLayout>
?
import android.app.Activity;import android.os.Bundle;import android.view.Gravity;import android.view.View;import android.view.ViewGroup;import android.widget.BaseAdapter;import android.widget.Button;import android.widget.ListView;import android.widget.TextView;public class listMoreTest extends Activity { int VIEW_COUNT = 10; int index = 0; ListView listView; Button btnLeft, btnRight; View.OnClickListener clickListener; MyAdapter myAdapter; String[] data = { "0", "1", "2", "3", "4", "5", "6", "7", "8", "9", "10", "11", "12", "13", "14", "15", "16", "17", "18", "19", "20", "21", "22", "23", "24", "25", "26", "27", "28", "29", "30", "31", "32", "33", "34", "35", "36", "37" }; @Override public void onCreate(Bundle savedInstanceState) { super.onCreate(savedInstanceState); setContentView(R.layout.listview); initView(); // 设置ListView的Adapter myAdapter = new MyAdapter(this); // TODO 此处是双向绑定吗? listView.setAdapter(myAdapter); clickListener = new Button.OnClickListener() { @Override public void onClick(View v) { switch (v.getId()) { case R.id.btnLeft: leftView(); break; case R.id.btnRight: rightView(); break; } } }; btnLeft.setOnClickListener(clickListener); btnRight.setOnClickListener(clickListener); changeButtonStatus(); } public void initView() { listView = (ListView) findViewById(R.id.list); btnLeft = (Button) findViewById(R.id.btnLeft); btnRight = (Button) findViewById(R.id.btnRight); } /** * 点击左边的Button,表示向前翻页,索引值要减1. */ public void leftView() { index--; // 刷新ListView里面的数值。 myAdapter.notifyDataSetChanged(); changeButtonStatus(); } /** * 点击右边的Button,表示向后翻页,索引值要加1. */ public void rightView() { index++; // 刷新ListView里面的数值。 myAdapter.notifyDataSetChanged(); changeButtonStatus(); } /** * 变更btnLeft与btnRight按钮是否可用。 */ public void changeButtonStatus() { if (index <= 0) { btnLeft.setEnabled(false); } else if (data.length - index * VIEW_COUNT <= VIEW_COUNT) { btnRight.setEnabled(false); } else { btnLeft.setEnabled(true); btnRight.setEnabled(true); } } // ListView的Adapter,这个是关键的导致可以分页的根本原因。 public class MyAdapter extends BaseAdapter { Activity activity; public MyAdapter(Activity a) { activity = a; } /** * 设置每一页的长度,默认的是View_Count的值。 */ @Override public int getCount() { // ori表示到目前为止的前几页的总共的个数。 int ori = VIEW_COUNT * index; if (data.length - ori < VIEW_COUNT) { return data.length - ori; } else { return VIEW_COUNT; } } /** * 显示TextView data。 */ @Override public View getView(int position, View convertView, ViewGroup parent) { // return addTestView(position); TextView textView = new TextView(activity); textView.setGravity(Gravity.LEFT); textView.setText(data[position + index * VIEW_COUNT]); return textView; } @Override public Object getItem(int position) { return position; } @Override public long getItemId(int position) { return position; } }}?