要使用Struts2,首先到官网(http://struts.apache.org/)下载个,最好把lib、doc、apps、src全部down下来,这里是以Struts2.2.1.1为例.
先把Struts2的lib解压到一个地方,打开一看里面有几十个jar包,其实示例应用并不需要这么多,这只需要以下的这几个就OK了
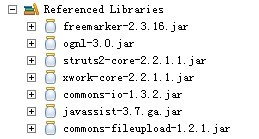
可能你会发现lib下面没有javassist-3.7.ga.jar这个包,把apps解压到一个地方,把struts2-blank.war放到tomcat的webapps下面,开启tomcat,在webapps下打开struts2-blank\WEB-INF\lib,这里有你想要的jar包.
准备工作做好了,现在正式开始:
一、在MyEclipse下新建一个Web Project,将struts2-blank\WEB-INF\lib下的全部jar包copy到新建项目的WebRoot/WEB-INF/lib下面.
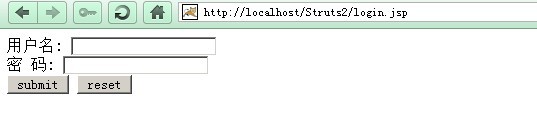
二、在WebRoot下面新建一个login.jsp
<%@ page language="java" import="java.util.*" pageEncoding="utf-8"%><%String path = request.getContextPath();String basePath = request.getScheme()+"://"+request.getServerName()+":"+request.getServerPort()+path+"/";%><!DOCTYPE HTML PUBLIC "-//W3C//DTD HTML 4.01 Transitional//EN"><html> <head> <base href="<%=basePath%>"> <title>My JSP 'login.jsp' starting page</title> <meta http-equiv="pragma" content="no-cache"> <meta http-equiv="cache-control" content="no-cache"> <meta http-equiv="expires" content="0"> <meta http-equiv="keywords" content="keyword1,keyword2,keyword3"> <meta http-equiv="description" content="This is my page"> <!-- <link rel="stylesheet" type="text/css" href="styles.css"> --> </head> <body> <form action="login" method="post"> 用户名: <input name="username" type="text"><br> 密 码: <input name="password" type="password"><br> <input type="submit" value="submit"> <input type="reset" value="reset"> </form> </body></html>
三、配置web.xml文件
<?xml version="1.0" encoding="UTF-8"?><web-app version="2.4" xmlns="http://java.sun.com/xml/ns/j2ee" xmlns:xsi="http://www.w3.org/2001/XMLSchema-instance" xsi:schemaLocation="http://java.sun.com/xml/ns/j2ee http://java.sun.com/xml/ns/j2ee/web-app_2_4.xsd"> <filter> <filter-name>struts2</filter-name> <!-- 过滤调度器 --> <filter-class> org.apache.struts2.dispatcher.FilterDispatcher </filter-class> </filter> <filter-mapping> <filter-name>struts2</filter-name> <!-- 过滤所有请求 --> <url-pattern>/*</url-pattern> </filter-mapping> <welcome-file-list> <welcome-file>index.jsp</welcome-file> </welcome-file-list></web-app>
四、在src下新建一个LoginAction的Class
public class LoginAction { // 对应表单上的属性 private String username; private String password; public String getUsername() { return username; } public void setUsername(String username) { this.username = username; } public String getPassword() { return password; } public void setPassword(String password) { this.password = password; } /** * Action中必须有execute方法 * @return * @throws Exception */ public String execute() throws Exception { return "success"; }}五、在src下新建struts2的配置文件struts.xml
<?xml version="1.0" encoding="UTF-8"?><!DOCTYPE struts PUBLIC "-//Apache Software Foundation//DTD Struts Configuration 2.0//EN" "http://struts.apache.org/dtds/struts-2.0.dtd"><struts> <package name="struts2" extends="struts-default"> <action name="login" class="czc.action.LoginAction"> <!-- result的name属性默认名字是success --> <result name="success">/result.jsp</result> </action> </package></struts>
六、在WebRoot下面新建一个result.jsp
<%@ page language="java" import="java.util.*" pageEncoding="utf-8"%><%String path = request.getContextPath();String basePath = request.getScheme()+"://"+request.getServerName()+":"+request.getServerPort()+path+"/";%><!DOCTYPE HTML PUBLIC "-//W3C//DTD HTML 4.01 Transitional//EN"><html> <head> <base href="<%=basePath%>"> <title>My JSP 'result.jsp' starting page</title> <meta http-equiv="pragma" content="no-cache"> <meta http-equiv="cache-control" content="no-cache"> <meta http-equiv="expires" content="0"> <meta http-equiv="keywords" content="keyword1,keyword2,keyword3"> <meta http-equiv="description" content="This is my page"> <!-- <link rel="stylesheet" type="text/css" href="styles.css"> --> </head> <body> 用户名: ${requestScope.username}<br> 密码: ${requestScope.password} </body></html>到此编码工作就完成了,下面就来看下效果
对于原理我也还不太懂,先跑起来在慢慢研究吧.