springMVC�Ĵ����
?
һ�����ܣ������½�һ����Ŀ����

ֱ����һ������ɼ��ɡ�
?
�����������jar�����뵽��Ŀ��
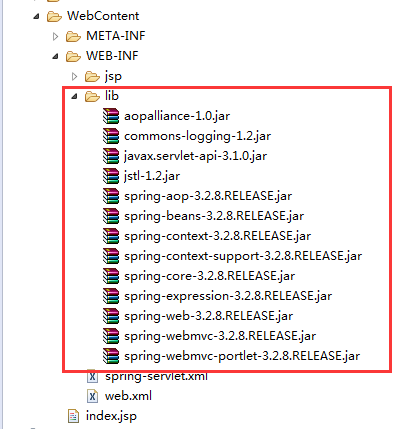
����Ȼ������web.xml
<?xml version="1.0" encoding="UTF-8"?>
<web-app xmlns:xsi="http://www.w3.org/2001/XMLSchema-instance"
xmlns="http://java.sun.com/xml/ns/javaee"
xmlns:web="http://java.sun.com/xml/ns/javaee/web-app_2_5.xsd"
xsi:schemaLocation="http://java.sun.com/xml/ns/javaee http://java.sun.com/xml/ns/javaee/web-app_2_5.xsd"
id="WebApp_ID" version="2.5">
<display-name>Spring3MVC</display-name>
<welcome-file-list>
<welcome-file>index.jsp</welcome-file>
</welcome-file-list>
?
<servlet>
<servlet-name>spring</servlet-name>
<servlet-class>
org.springframework.web.servlet.DispatcherServlet
</servlet-class>
<load-on-startup>1</load-on-startup>
</servlet>
<servlet-mapping>
<servlet-name>spring</servlet-name>
<url-pattern>/</url-pattern>
</servlet-mapping>
</web-app>
�ġ�����spring-servlet.xml
<?xml version="1.0" encoding="UTF-8"?>
<beans xmlns="http://www.springframework.org/schema/beans"
xmlns:xsi="http://www.w3.org/2001/XMLSchema-instance" xmlns:p="http://www.springframework.org/schema/p"
xmlns:context="http://www.springframework.org/schema/context"
xmlns:mvc="http://www.springframework.org/schema/mvc"
xsi:schemaLocation="
? ? ? ? ? ?http://www.springframework.org/schema/beans ??
? ? ? ? ? ?http://www.springframework.org/schema/beans/spring-beans-3.2.xsd ??
? ? ? ? ? ?http://www.springframework.org/schema/context ??
? ? ? ? ? ?http://www.springframework.org/schema/context/spring-context-3.2.xsd ?
? ? ? ? ? ?http://www.springframework.org/schema/mvc ??
? ? ? ? ? ?http://www.springframework.org/schema/mvc/spring-mvc-3.2.xsd">
?
<!-- <mvc:annotation-driven /> -->
<context:component-scan
base-package="net.viralpatel.spring3.controller" />
?
<bean id="viewResolver"
class="org.springframework.web.servlet.view.UrlBasedViewResolver">
<property name="viewClass"
value="org.springframework.web.servlet.view.JstlView" />
<property name="prefix" value="/WEB-INF/jsp/" />
<property name="suffix" value=".jsp" />
</bean>
</beans>
�塢����jsp����
index.jsp��jsp/hello.jsp
index.jsp���棺
<html>
<head>
<title>Spring 3.0 MVC Series: Index - ViralPatel.net</title>
</head>
<body>
<a href="hello">Say Hello</a>
</body>
</html>
jsp/hello.jsp
<html>
<head>
<title>Spring 3.0 MVC Series: Hello World - ViralPatel.net</title>
</head>
<body>
${message}
</body>
</html>
��������controller����
HelloWorldController.java����
package net.viralpatel.spring3.controller;
?
import org.springframework.stereotype.Controller;
import org.springframework.web.bind.annotation.RequestMapping;
import org.springframework.web.servlet.ModelAndView;
?
@Controller
public class HelloWorldController {
?
@RequestMapping("/hello")
public ModelAndView helloWorld() {
?
String message = "Hello World, Spring 3.0!";
System.out.println(message);
return new ModelAndView("hello", "message", message);
}
?
}
���̵Ľṹͼ���£�
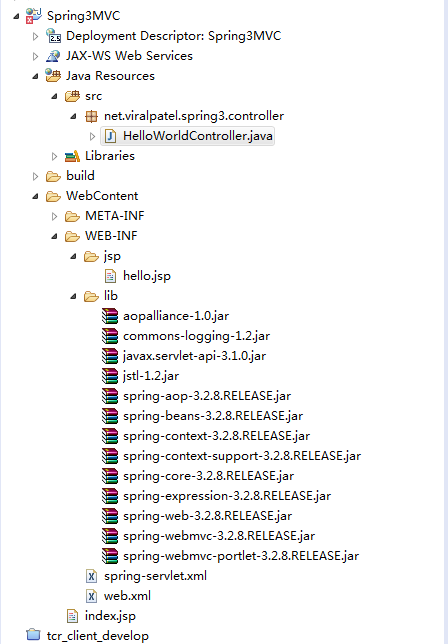
?
���м��ɡ�
?
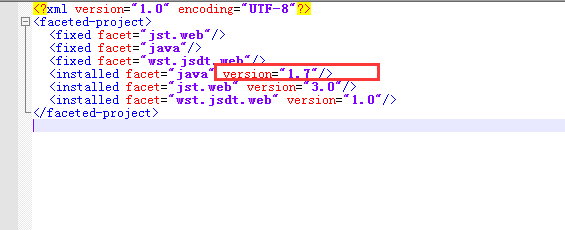
�������õ���tomcat8.0.28,jdk��1.8����������֮��Ĭ�ϱ������汾Ϊ1.8�����Ǹ���Ŀֻ����1.7�汾�ı��룬����������´���
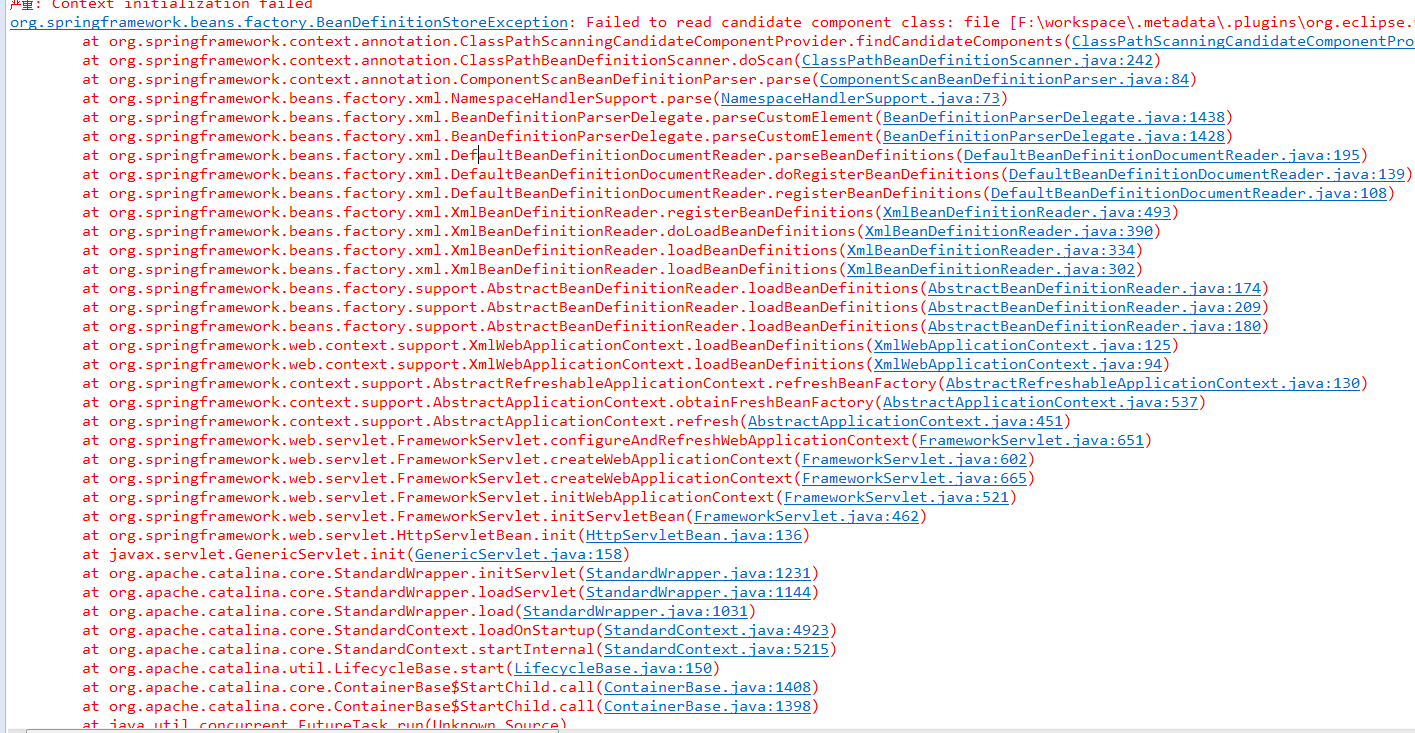
?
?������汾����1.7�������У�����ͼ��
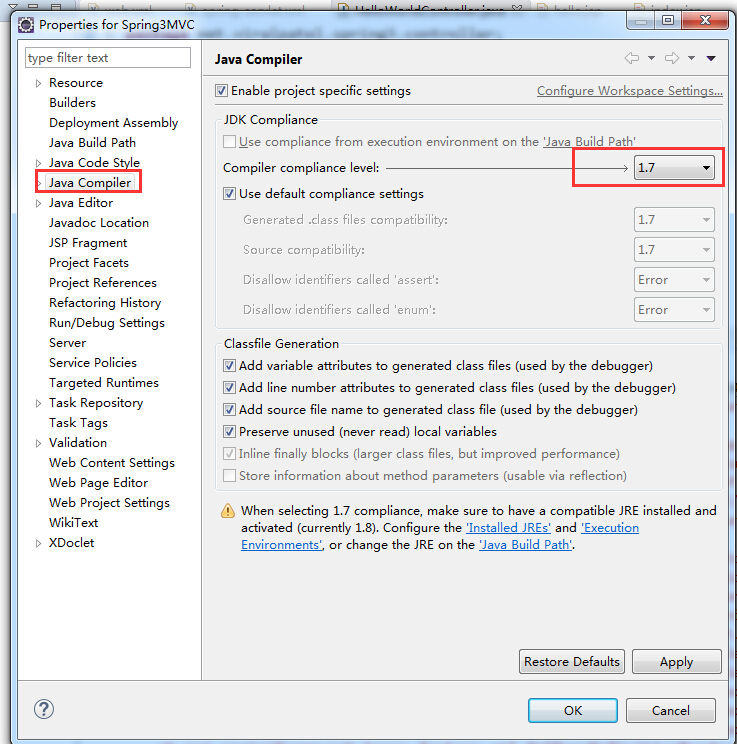
?
�ĺ�Ӱ��ʹ�ã���������Ŀ�������ֺ�ɫ��棬����Ŀ�ļ���.settings�ļ����е�org.eclipse.wst.common.project.facet.core.xml,�ĸ��ļ��еı���汾Ϊ���ĵ�ֵ����
?
���ڲ�����һ����Ŀ��
�ο����ϣ�http://viralpatel.net/blogs/spring-3-mvc-create-hello-world-application-spring-3-mvc/
?�������ϴ���Դ��Spring3MVC-part1.rar
?
?
?
?