配置
测试服务器配置
- 阿里云服务器
- Ubuntu 16.04 64位
- 1 vCPU 2 GB
- 1Mbps
- 使用XShell连接服务器
- 用户root
- 在/root/rtmp(这里你可以使用自定义目录)目录下进行操作进行操作
Nginx下载
下载地址 :http://nginx.org/download/
服务器下载Nginx:
wget http://nginx.org/download/nginx-1.15.3.tar.gz
下载完成后解压:
tar xvf nginx-1.15.3.tar.gz
下载Nginx RTMP模块
wget https://codeload.github.com/arut/nginx-rtmp-module/tar.gz/v1.2.1
下载完成后解压
tar xvf v1.2.1
通过上面两步之后可以看到在/root/rtmp下有两个目录(压缩包我已经手动删除)

编译
进入nginx目录
cd nginx-1.15.3
执行一下命令将rtmp模块添加到nginx配置中
./configure --prefix=./bin --add-module=../nginx-rtmp-module-1.2.1
若提示缺少pcre、openssl、zlib的话,需要手动安装这些库
//安装pcre库
sudo apt-get install libpcre3 libpcre3-dev   //安装openssl库
sudo apt-get install openssl libssl-dev//安装zlib库
sudo apt-get install zlib1g-dev
环境配置好之后执行一下命令进行编译:
make && make install
编译完成之后,会安装在当前目录的bin目录下

nginx.conf 配置
编译完成后,我们要到首先到nginx-rtmp-module-1.2.1/test/目录下拷贝nginx.conf文件内容

worker_processes  1;error_log  logs/error.log debug;events {worker_connections  1024;
}rtmp {server {listen 1935;# myapp这个名称可以随便起application myapp {live on;#record keyframes;#record_path /tmp;#record_max_size 128K;#record_interval 30s;#record_suffix .this.is.flv;#on_publish http://localhost:8080/publish;#on_play http://localhost:8080/play;#on_record_done http://localhost:8080/record_done;}}
}http {server {listen      8080;location /stat {rtmp_stat all;rtmp_stat_stylesheet stat.xsl;}location /stat.xsl {root /path/to/nginx-rtmp-module/;}location /control {rtmp_control all;}#location /publish {#    return 201;#}#location /play {#    return 202;#}#location /record_done {#    return 203;#}location /rtmp-publisher {root /path/to/nginx-rtmp-module/test;}location / {root /path/to/nginx-rtmp-module/test/www;}}
}
将以上内容拷贝复制到nginx-1.15.3/bin/conf/nginx.conf文件内
nginx-1.15.3/bin/conf


vim nginx.conf
将其修改为:
#定义Nginx运行的用户和用户组
user root;#nginx进程数,建议设置为等于CPU总核心数。
worker_processes  1;error_log logs/error.log debug;#单个进程最大连接数(最大连接数=连接数*进程数)
events {worker_connections  1024;
}rtmp {server {#监听端口listen 1935;#上面为myapp,这里我自定义了一个名称application live{live on;#丢弃闲置5s的连接drop_idle_publisher 5s;}}
}http {server {#监听端口listen      8080;location /stat {rtmp_stat all;rtmp_stat_stylesheet stat.xsl;}# 这里注意目录location /stat.xsl {root /root/rtmp/nginx-rtmp-module-1.2.1/;}location /control {rtmp_control all;}# 这里注意目录location /rtmp-publisher {root /root/rtmp/nginx-rtmp-module-1.2.1/test;}# 这里注意目录location / {root /root/rtmp/nginx-rtmp-module-1.2.1/test/www;}}
}
错误日志配置
error_log (file) (level);
- 关键字:其中关键字error_log不能改变
- 日志文件:可以指定任意存放日志的目录
- 错误日志级别:常见的错误日志级别有[debug | info | notice | warn | error | crit | alert | emerg],级别越高记录的信息越少。
注意
上面的错误日志配置
error_log logs/error.log debug;
会去执行命令的目录下查找 logs
因此这里要注意出现error.log not found的情况
另外,要注意服务器端口是否向外开放,我这里使用的阿里云服务器,开放8080端口尽可以访问了

启动
配置完成之後,就可以启动nginx了
这里要注意端口占用情况,可以使用一下命令进行检查,判断端口是否被占用
lsof -i:8080

上面红色框为进程号
若端口被占用,可以使用一下命令将进程杀掉:
kill -9 1671
kill -9 1672
在当前目录我这里为/root/rtmp/nginx-1.15.3 执行以下命令启动
bin/sbin/nginx
以下为停止命令
bin/sbin/nginx -s stop
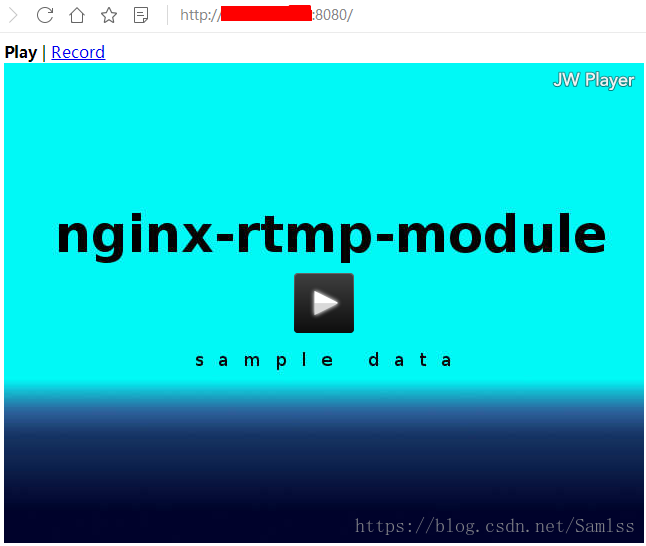
在浏览器访问
[服務器ip]:8080
能访问就表示配置完成了。
以下为访问成功图片: