三款ionic的扫描插件。
各大博客都有他们的介绍,我也不想赘述多少。
总结了下各大博主说的,反正是好坏都有,我给各位列个表格自己判断吧
| Barcode Scanner | 速度慢,样式机会为零 |
| Zbar | 速度快,ios样式几乎为零(槽点:连文字和木纹都会被扫描出信息被我们项目总监笑了多久。。。尴尬) |
| QR Scanner | 速度快,(点评:先抑后扬款扫描,好的东西都是最后说的,最重要是样式可定制。) |
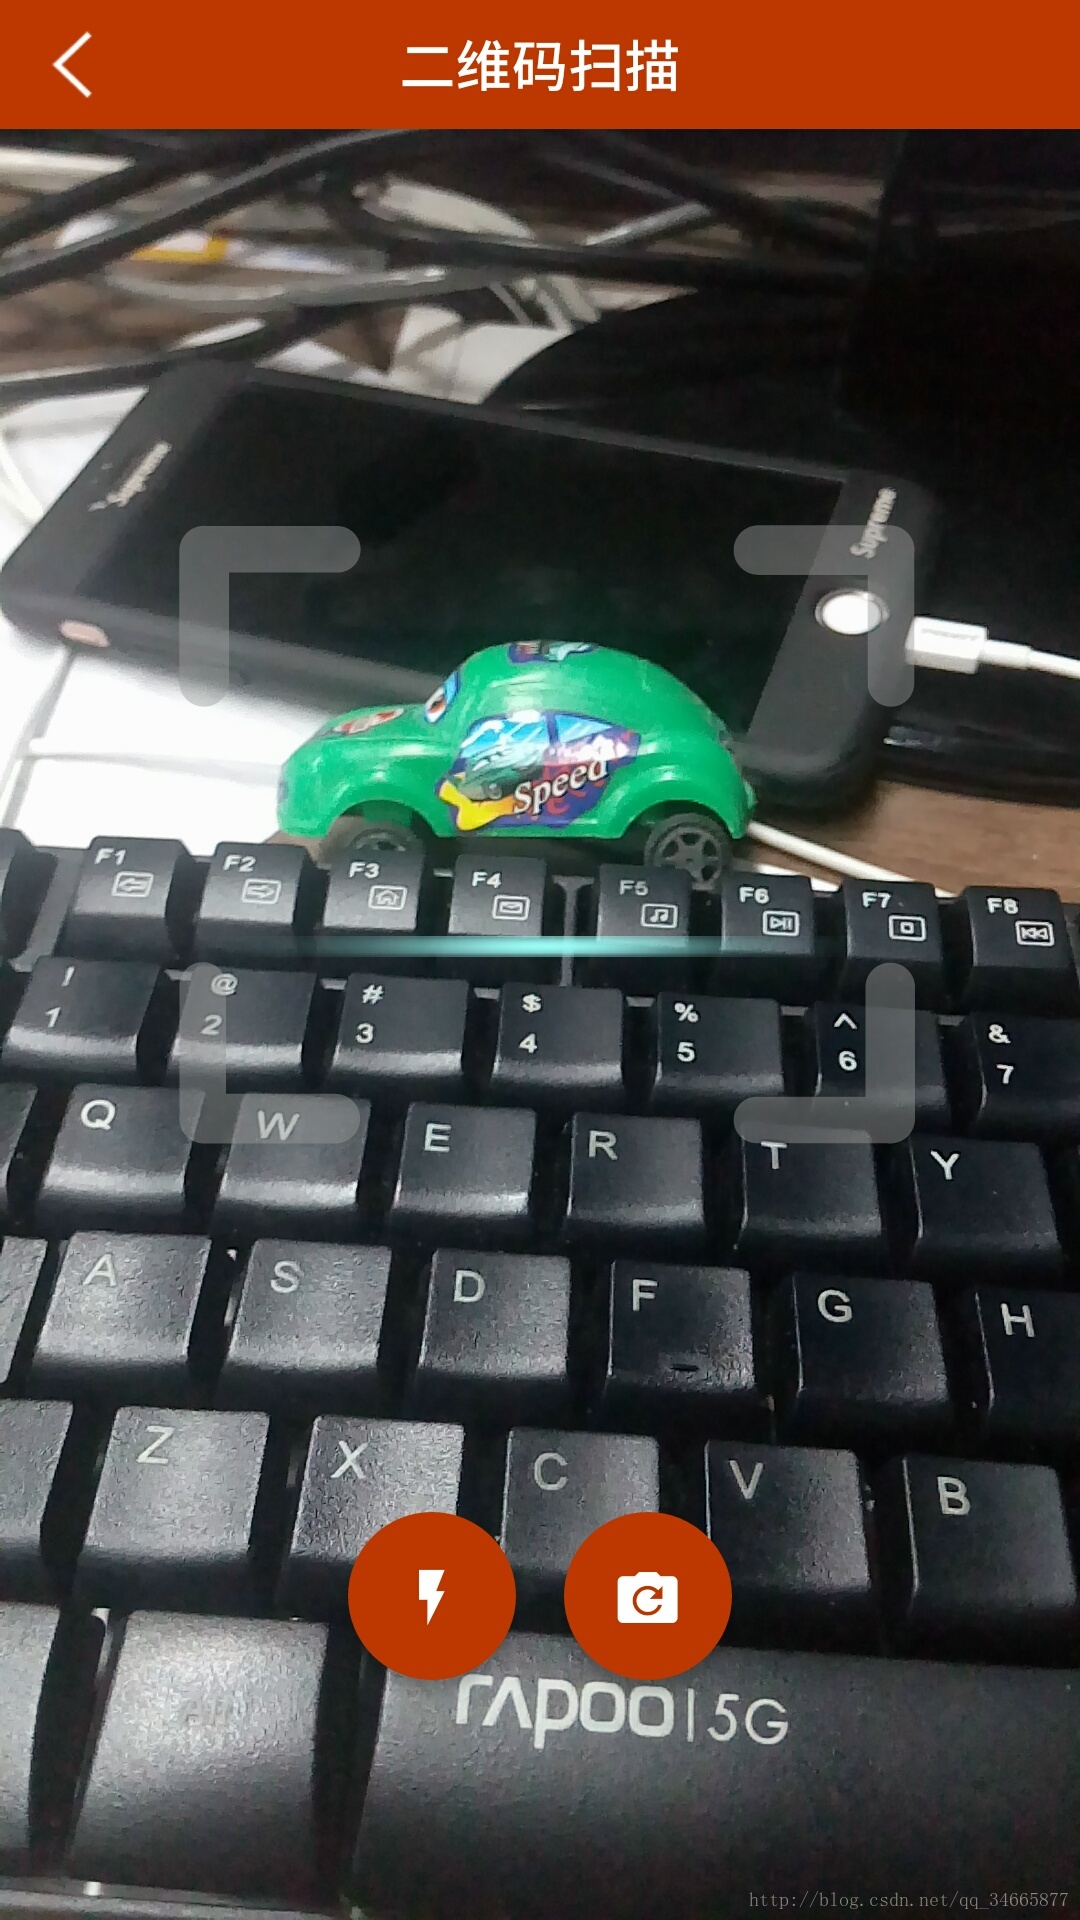
话不多说,用插件肯定用好的,最稳定的。先上图
第一步:
$ ionic cordova plugin add cordova-plugin-qrscanner
$ npm install --save @ionic-native/qr-scanner
以上两条是安装插件命令
第二步:
<ion-app style="background: none transparent;"></ion-app>
就是这个鬼东西,是在dom元素最底层,必须加一个透明通道。
第三步:
1)ts文件
ionViewDidLoad() {
this.qrScanNerMethod();
}
/**
* 【手机扫描方法qrscanner插件】
* @param{object} callBack
*/
public qrScanNerMethod(callBack?: any): void {
this.qrScanner.prepare()
.then((status:QRScannerStatus) => {
if (status.authorized) {
// 相机扫描信息承诺
// 开始扫描
let scanSub = this.qrScanner.scan().subscribe((text:string) => {
//alert(text);
console.log("deatilText",text);
this.qrScanner.hide();// 隐藏相机
scanSub.unsubscribe();// 停止扫描事件
callBack &&callBack(1,text);
});
// 显示相机预览
this.qrScanner.show();
callBack &&callBack(2);
// 等待用户扫描某个东西,然后就会调用可观察的回调
} else if (status.denied) {
// camera permission was permanently denied
// you must use QRScanner.openSettings() method to guide the user to the settings page
// then they can grant the permission from there
callBack &&callBack(3);
} else {
// permission was denied, but not permanently. You can ask for permission again at a later time.
}
})
.catch((e:any) => console.log('Error is',e));
}
/**
* 切换灯光
*/
public toggleLight(): void {
this.light = !this.light;
if (this.light) {
this.qrScanner.enableLight();
} else {
this.qrScanner.disableLight();
}
}
/**
* 切换相机
*/
public toggleCamera(): void {
this.light =true;
this.frontCamera = !this.frontCamera;
if (this.frontCamera) {
this.qrScanner.useFrontCamera();
} else {
this.qrScanner.useBackCamera();
}
}
2)css文件
自己写,不会就去看别人的
3)html文件
自己写,不会就用别人的
4.第四步,
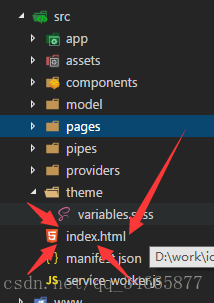
ios兼容问题,记得在全局样式里面加入下面样式,不然看不到摄像头我可不管(app.scss或者variables.scss)
html,
body.transparent-body,
.transparent-body,
.transparent-body ion-app,
.transparent-body .app-root,
.transparent-body ion-nav,
.transparent-body .ion-page,
.transparent-body .nav-decor,
.transparent-body ion-content,
.transparent-body .viewscan,
.transparent-body .fixed-content,
.transparent-body .scroll-content {
background-color: transparent !important;
background: transparent!important;
}
然后就可以打包了,看看效果吧界面
如果不行可以给我留言,让我看看是谁这么棒棒这样清楚的文档都整不出来!!!
后续:因为测试中发现了一个bug...
当二维码扫描插件结束,退出页面后相机没有关闭的问题,在ionic或者angular 的生命周期内加入一个方法
/**
* 销毁事件
*/
public ionViewDidLeave() {
console.log("销毁相机");
this.qrScanner.hide(); // 隐藏相机
this.qrScanner.destroy();//销毁相机
}
我使用的是ionic的页面关闭后出发销毁相机事件.