虚拟主机
认识
1个虚拟主机 相当于是1个网站
Nginx多个server标签
不同虚拟主机
虚拟主机(必备)
不同的域名不同的网站
1.Nginx的server标签
[8:55 root@web01 ~]# mkdir -p /usr/share/nginx/html/{
    www,blog}  \\创建www与blog站点目录
[09:00 root@web01 ~]# for n in www blog ;do echo $n.oldboy.com >/usr/share/nginx/html/$n/index.html ;done\\给俩个站点目录index.html文件 添加内容
[09:00 root@web01 ~]# cat /usr/share/nginx/html/{
    www,blog}/index.html
www.oldboy.com
blog.oldboy.com
[09:01 root@web01 ~]# vim /etc/hosts    \\添加域名解析
127.0.0.1   localhost localhost.localdomain localhost4 localhost4.loca
ldomain4
::1         localhost localhost.localdomain localhost6 localhost6.loca
ldomain6
172.16.1.5      lb01
172.16.1.6      lb02
172.16.1.7      web01 www.oldboy.com  blog.oldboy.com   \\添加域名解析
172.16.1.8      web02
172.16.1.31     nfs01
172.16.1.41     backup
172.16.1.51     db01 db01.etiantian.org
172.16.1.61     m01[09:03 root@web01 ~]# systemctl restart nginx    \\重启nginx服务
[09:03 root@web01 ~]# curl www.oldboy.com    \\curl一下www的域名
www.oldboy.com
[09:04 root@web01 ~]# curl blog.oldboy.com    \\curl一下blog的域名
blog.oldboy.com
[09:04 root@web01 ~]#
※【不同的虚拟主机】
基于域名的虚拟主机(必备)不同的域名访问不同虚拟主机(网站)
基于端口的虚拟主机不同的端口访问不同的虚拟主机正常端口   80 443网站后台人员 使用特殊端口
基于ip的虚拟主机
nginx处理用户请求过程
http://nginx.org/en/docs/http/request_processing.html
3. 基于端口的虚拟主机
用81和82端口测试一下
修改端口为81 82
     server   {
    listen       81;server_name  www.oldboy.com;location / {
    root   /usr/share/nginx/html/www;index  index.html index.htm;}}server   {
    listen       82;server_name  blog.oldboy.com;location / {
    root   /usr/share/nginx/html/blog;index  index.html index.htm;}}
}
[10:14 root@web01 ~]# curl http://10.0.0.7
curl: (7) Failed connect to 10.0.0.7:80; Connection refused
[10:14 root@web01 ~]# curl http://10.0.0.7:81
www.oldboy.com
[10:14 root@web01 ~]# curl http://10.0.0.7:82
blog.oldboy.com
4.基于ip的虚拟主机
nginx.conf中添加一个新的ip
     server   {
    listen       10.0.0.9:80;server_name  blog.oldboy.com;location / {
    root   /usr/share/nginx/html/blog;index  index.html index.htm;}}
修改之后直接重启或者检查语法会报错
因为没有注册ip
[10:30 root@web01 ~]# systemctl restart nginx
Job for nginx.service failed because the control process exited with error code. See "systemctl status nginx.service" and "journalctl -xe" for details.
[10:30 root@web01 ~]# nginx -t
nginx: the configuration file /etc/nginx/nginx.conf syntax is ok
nginx: [emerg] bind() to 10.0.0.66:81 failed (99: Cannot assign requested address)
nginx: configuration file /etc/nginx/nginx.conf test failed
添加ip地址
[10:30 root@web01 ~]# ip addr add 10.0.0.9/24 dev eth0 label eth0:1
[10:31 root@web01 ~]# ip a
.....
....
2: eth0: <BROADCAST,MULTICAST,UP,LOWER_UP> mtu 1500 qdisc pfifo_fast state UP group default qlen 1000link/ether 00:0c:29:68:78:4f brd ff:ff:ff:ff:ff:ffinet 10.0.0.7/24 brd 10.0.0.255 scope global noprefixroute eth0valid_lft forever preferred_lft foreverinet 10.0.0.9/24 scope global secondary eth0:1valid_lft forever preferred_lft forever
systemctl重启nginx
curl看一下
[10:31 root@web01 ~]# systemctl restart nginx
[10:35 root@web01 ~]# curl 10.0.0.9:80
blog.oldboy.com
[10:38 root@web01 ~]# curl 10.0.0.7
www.oldboy.com
5.nginx配置默认访问第一个
在此配置中,nginx仅测试请求的标头字段“Host”,以确定请求应路由到哪个服务器。如果其值与任何服务器名称都不匹配,或者请求根本不包含此标头字段,则nginx会将请求路由到此端口的默认服务器。在上面的配置中,默认服务器是第一个 - 这是nginx的标准默认行为。它也可以default_server使用listen指令中的参数明确设置哪个服务器应该是默认的:
> <pre style="padding: 0px; margin: 0px;">
server { listen 80 **default_server** ;
server_name example.net www.example.net;
...
}</pre>
※6.nginx的日志
/var/log/nginx/access.log
Nginx内置变量

'$remote_addr             客户端ip地址
$remote_user              远程用户(空)
[$time_local]             时间
"$request"                请求报文的起始行 $request_uri 只取出uri
'$status                  状态码
$body_bytes_sent          身体 字节 发送 服务端发给客户端大小(每个文件的大小)
"$http_referer"           记录着用户从哪里跳转过来的
'"$http_user_agent"       用户浏览器
"$http_x_forwarded_for"'; 负载均衡: web服务器用来记录用户真实ip地址
日志格式:
10.0.0.7 - - [05/Jun/2019:11:06:14 +0800] "GET /index.html HTTP/1.1" 200 15 "-" "curl/7.29.0" "-"
"$http_referer"记录的用户从哪里跳转过来的
百度搜索本地ip

304 Not Modifed 用户读取浏览器缓存

ip访问量:
awk ‘{print $1}’ /var/log/nginx/access.log |sort |uniq -c
pv访问量:
wc -l /var/log/nginx/access.log


8.Nginx日志格式
access_log
nginx配置文件中添加配置日志access_log
[11:48 root@web01 ~]# vim /etc/nginx/nginx.conf
....server   {listen       80;server_name  www.oldboy.com;access_log /var/log/nginx/access_www.log main;  \\日志location / {root   /usr/share/nginx/html/www;index  index.html index.htm;}}server   {listen       80;server_name  blog.oldboy.com;access_log /var/log/nginx/access_blog.log main;   \\日志location / {root   /usr/share/nginx/html/blog;index  index.html index.htm;}}
}
去/etc/hosts添加域名解析
[root@m01 /usr/share/nginx/html]# vim /etc/hosts
10.0.0.7     www.oldboy.com  blog.oldboy.com status.oldboy.com
重启nginx后检查语法 查看日志路径下的内容:
[11:52 root@web01 ~]# systemctl reload nginx.service
[11:52 root@web01 ~]# nginx -t
nginx: the configuration file /etc/nginx/nginx.conf syntax is ok
nginx: configuration file /etc/nginx/nginx.conf test is successful
[11:52 root@web01 ~]# ll /var/log/nginx/access*
-rw-r--r-- 1 root  root     0 Jun  5 11:48 /var/log/nginx/access_blog.log
-rw-r----- 1 nginx adm  12983 Jun  5 11:36 /var/log/nginx/access.log
-rw-r--r-- 1 root  root     0 Jun  5 11:48 /var/log/nginx/access_www.log
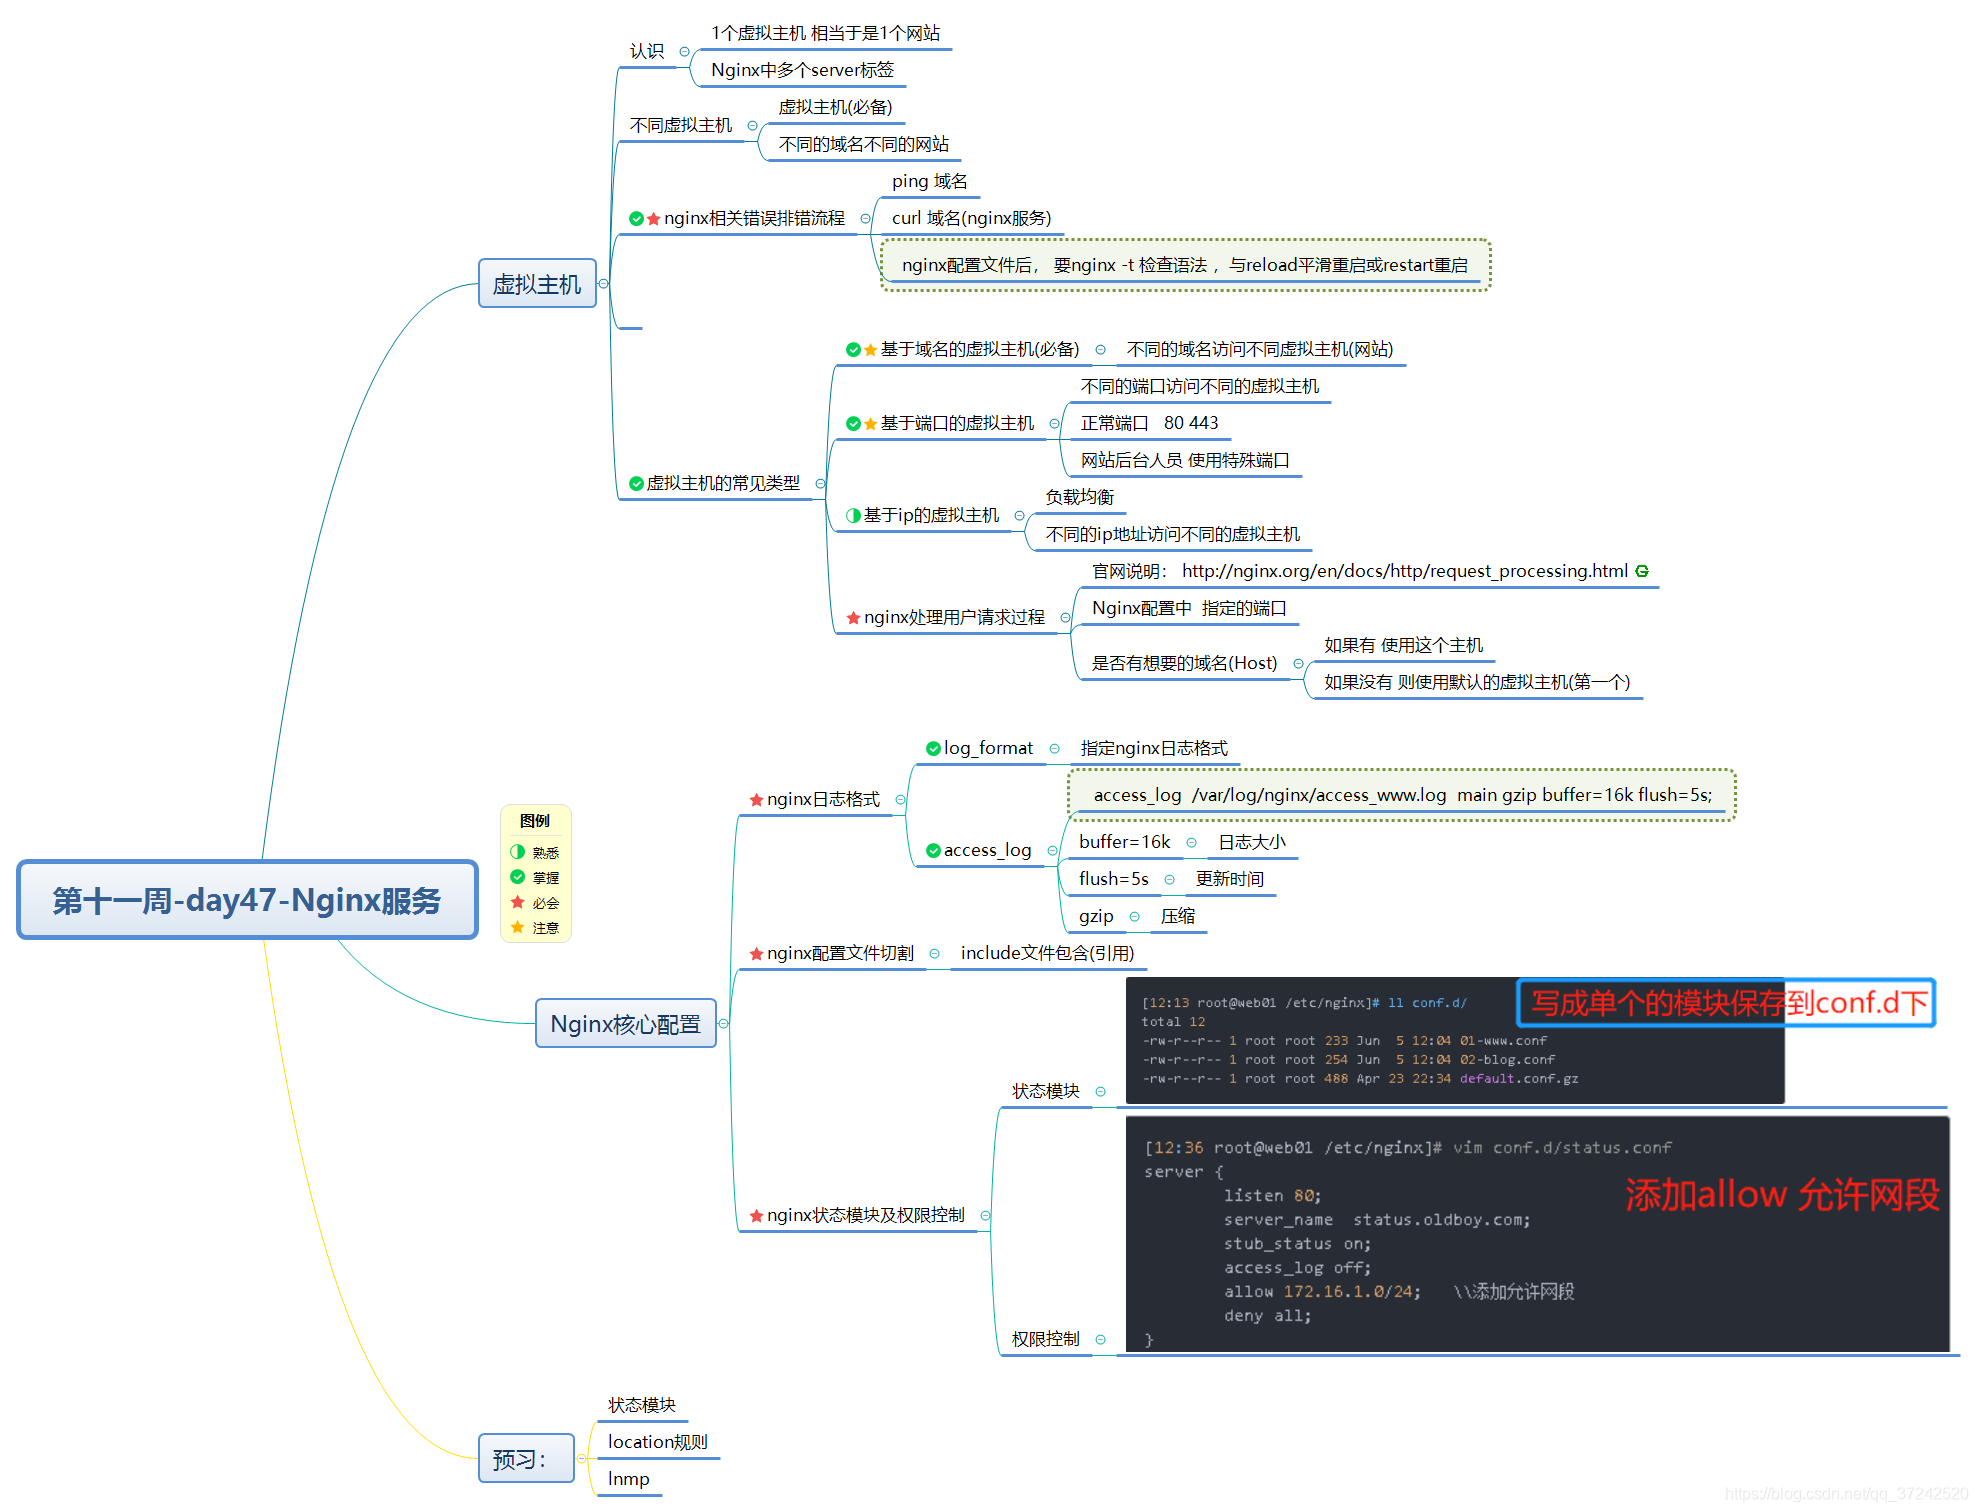
nginx状态模块及权限控制
状态模块
权限控制
7.将配置中的模块单独写出来放到conf.d下
最好将站点目录的默认
zcat zless zmore zgrep zegrep
压缩gzip 解压 gzip -d
[12:13 root@web01 /etc/nginx]# ll conf.d/
total 12
-rw-r--r-- 1 root root 233 Jun  5 12:04 01-www.conf
-rw-r--r-- 1 root root 254 Jun  5 12:04 02-blog.conf
-rw-r--r-- 1 root root 488 Apr 23 22:34 default.conf.gz
8.添加status.oldboy.com域名
配置status.conf添加到conf.d下
重启nginx检查语法 curl一下status.conf中添加的域名
[12:22 root@web01 /etc/nginx]# cat conf.d/status.conf
server {
    listen 80;server_name  status.oldboy.com;stub_status on;access_log off;
}
[12:22 root@web01 /etc/nginx]# ll conf.d/
total 16
-rw-r--r-- 1 root root 233 Jun  5 12:04 01-www.conf
-rw-r--r-- 1 root root 254 Jun  5 12:04 02-blog.conf
-rw-r--r-- 1 root root 488 Apr 23 22:34 default.conf.gz
-rw-r--r-- 1 root root  90 Jun  5 12:21 status.conf
[12:26 root@web01 /etc/nginx]# systemctl restart nginx
[12:26 root@web01 /etc/nginx]# nginx -t
nginx: the configuration file /etc/nginx/nginx.conf syntax is ok
nginx: configuration file /etc/nginx/nginx.conf test is successful
[12:26 root@web01 /etc/nginx]# curl status.oldboy.com
Active connections: 1
server accepts handled requests1 1 1
Reading: 0 Writing: 1 Waiting: 0
9.添加allow 允许网段
不要写错格式
检查语法后重启 curl一下status.oldboy.com
[12:36 root@web01 /etc/nginx]# vim conf.d/status.conf
server {
    listen 80;server_name  status.oldboy.com;stub_status on;access_log off;allow 172.16.1.0/24;   \\添加允许网段deny all;
}
[12:37 root@web01 /etc/nginx]# nginx -t
nginx: [emerg] unexpected "}" in /etc/nginx/conf.d/status.conf:8
nginx: configuration file /etc/nginx/nginx.conf test failed
[12:37 root@web01 /etc/nginx]# systemctl reload nginx
[12:37 root@web01 /etc/nginx]# curl status.oldboy.com
Active connections: 1
server accepts handled requests7 7 7
Reading: 0 Writing: 1 Waiting: 0
浏览器看一下今天配置的这几个域名可不可以访问


10.curl -H的用法
curl -H Host:status.oldboy.com 10.0.0.7
[12:45 root@web01 /etc/nginx]# curl -H Host:status.oldboy.com 10.0.0.7
<html>
<head><title>403 Forbidden</title></head>
<body>
<center><h1>403 Forbidden</h1></center>
<hr><center>nginx/1.16.0</center>
</body>
</html>
预习:
状态模块
location规则
lnmp
未完待续…