免责声明:本文章由fengyun1989创作,采用知识共享署名-非商业性使用-相同方式共享 2.5 中国大陆许可协议进行许可。
下面,我们添加Appbar,AppBar大家应该都很熟悉了,wp7里面运用多了去了,不过,这里的AppBar和WP7里面的用法不太一样,有WP7开发经验的从下面的教程就能够看出差别,大同小异。
在MainPage页面的Grid后面添加如下代码:
<Page.BottomAppBar> <AppBar> <Grid> <Button x:Name="Save" Style="{StaticResource SaveAppBarButtonStyle}" AutomationProperties.Name="保存课表" HorizontalAlignment="Center" Click="Save_Click"/> </Grid> </AppBar> </Page.BottomAppBar> <Page.TopAppBar> <AppBar> <Grid> <Button x:Name="About" Style="{StaticResource HelpAppBarButtonStyle}" AutomationProperties.Name="关于我们" HorizontalAlignment="Center" Click="AboutClick"/> </Grid> </AppBar> </Page.TopAppBar></Page>上面我们添加了ButtonAppBar(底部AppBar)和TopAppBar(顶部AppBar),这里的AppBar支持随意布局,什么ColumnDefinition都是可以实现的。不过win8和wp7不一样的是底部Appbar没有了下拉菜单。
另外,里面的Button的样式也有区别,在wp7里面我们都是从SDK内部获取Icon图片来实现button的样式,在win8,这些样式是用style来实现,这些Style都定义在了Common/StandardStyles.xaml里面,我们可以根据文件名来获取相应样式,AutomationProperties.Name是用来按钮显示的文字。当然,Button的style也可以自己定义。
推荐关于AppBar的文章:http://www.devdiv.com/_DevDiv原创_Windows_8_Metro_App开发之应用程序栏_AppBar_的使用-thread-130752-1-1.html
接下来实现按钮的click事件,先来实现AboutClick方法。
private void AboutClick(object sender, RoutedEventArgs e) { this.Frame.Navigate(typeof(AboutPage)); }click方法就实现了一个导航,导航至AboutPage。我们要往Pages里面添加一个空白页AboutPage来实现“关于我们”的实现。
AboutPage.xaml前台:
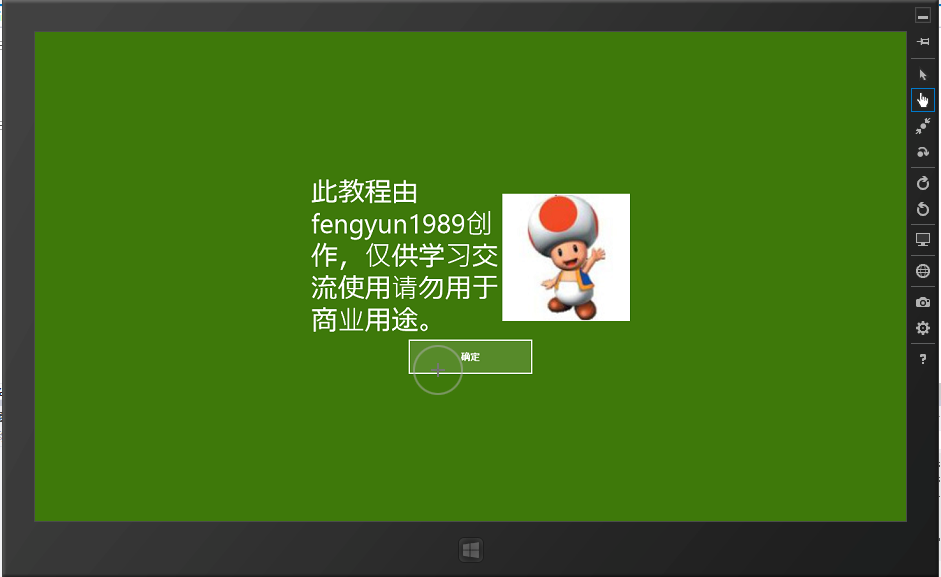
<Grid Background="{StaticResource AppBackgroundColor}"> <StackPanel HorizontalAlignment="Center" VerticalAlignment="Center"> <Grid> <Grid.RowDefinitions> <RowDefinition Height="*" /> <RowDefinition Height="*" /> <RowDefinition Height="*" /> </Grid.RowDefinitions> <Grid.ColumnDefinitions> <ColumnDefinition Width="300"/> <ColumnDefinition Width="*"/> </Grid.ColumnDefinitions> <TextBlock FontSize="42" TextWrapping="Wrap" Grid.RowSpan="2" Grid.Column="0" Grid.Row="0"> 此教程由fengyun1989创作,仅供学习交流使用请勿用于商业用途。 </TextBlock> <Image Source="/Assets/120.jpg" Grid.Column="1" Grid.RowSpan="2" Grid.Row="0" Height="200" Width="200"/> <Button Content="确定" Width="200" Height="60" HorizontalAlignment="Center" Grid.Row="2" Grid.ColumnSpan="2" Grid.Column="0" Click="Button_Click_1"/> </Grid> </StackPanel> </Grid>后台就只实现了确定按钮的click方法,也就是实现了一个导航,导航回MainPge页面。
private void Button_Click_1(object sender, RoutedEventArgs e) { this.Frame.Navigate(typeof(MainPage)); }接下来实现Save按钮,我打算把课表保存为XML数据,并且用FIlePicker来实现路径的选择。
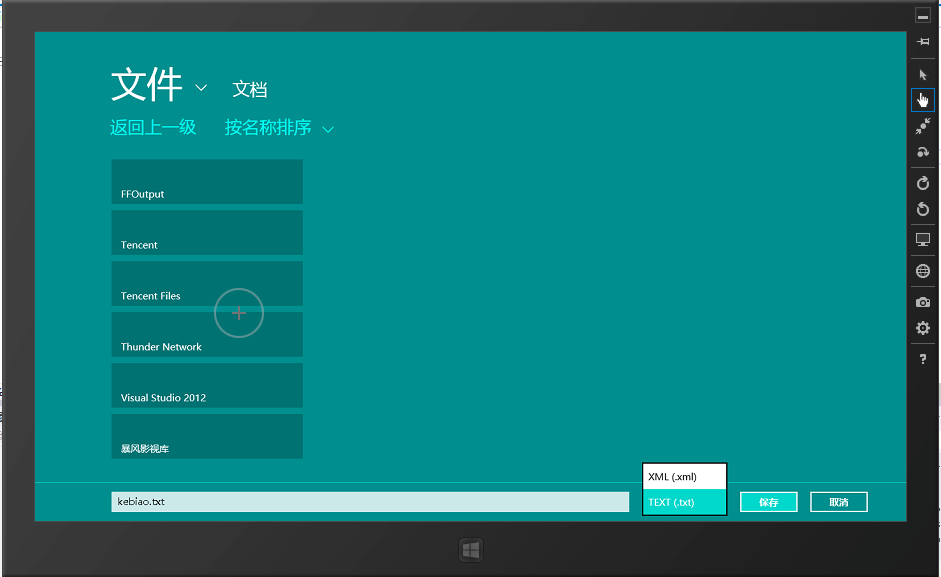
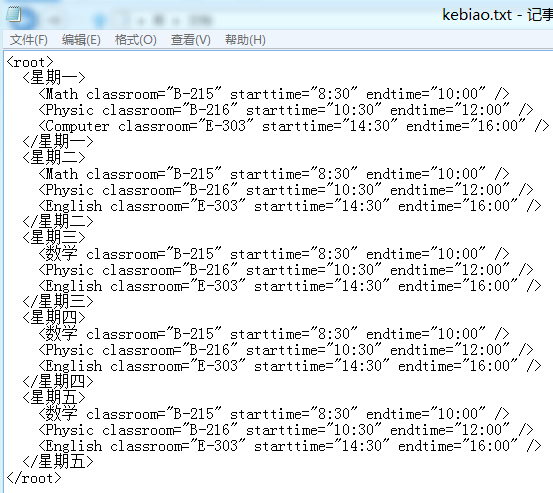
private async void Save_Click(object sender, RoutedEventArgs e) { FileSavePicker openPicker = new FileSavePicker(); openPicker.SuggestedStartLocation = PickerLocationId.PicturesLibrary; openPicker.FileTypeChoices.Add("XML", new List<string>() { ".xml" }); openPicker.FileTypeChoices.Add("TEXT", new List<string>() { ".txt" }); openPicker.DefaultFileExtension = ".xml"; openPicker.SuggestedFileName = "kebiao"; openPicker.SuggestedStartLocation = PickerLocationId.DocumentsLibrary; StorageFile file = await openPicker.PickSaveFileAsync(); if (file != null) { // Application now has read/write access to the picked file // Prevent updates to the remote version of the file until we finish making changes and call CompleteUpdatesAsync. CachedFileManager.DeferUpdates(file); // write to file await FileIO.WriteTextAsync(file, ConvertViewModel()); // Let Windows know that we're finished changing the file so the other app can update the remote version of the file. // Completing updates may require Windows to ask for user input. FileUpdateStatus status = await CachedFileManager.CompleteUpdatesAsync(file); if (status == FileUpdateStatus.Complete) { MessageDialog msgDlg = new MessageDialog("保存成功!"); await msgDlg.ShowAsync(); } } } /// <summary> /// Convert ViewModel to XML string /// </summary> /// <returns></returns> string ConvertViewModel() { XDocument xml = new XDocument(); XElement root = new XElement("root"); foreach (var item in viewModel.WeekdayList) { XElement weekday = new XElement(item.Weekday); foreach (var scheduleItem in item.ScheduleList) { XElement lessonName = new XElement(scheduleItem.LessonName); lessonName.SetAttributeValue("classroom", scheduleItem.ClassRoom); lessonName.SetAttributeValue("starttime", scheduleItem.StartTime); lessonName.SetAttributeValue("endtime", scheduleItem.EndTime); weekday.Add(lessonName); } root.Add(weekday); } xml.Add(root); return xml.ToString(); }我添加了一个方法ConvertViewModel来实现viewModel转换成XML。在Save_Click中,我们实现了FilePicker。大家如果有window开发经验,应该对上面的代码很熟悉,和window上文件保存的Dialog差不多,都是设定好拓展名,初始命名等,和window上的编程是不是一样?如果路径选择好了,就把数据保存到文件。文件保存成功后就显示一个弹窗,这个弹窗和以前WP7,window的弹窗用法。都不太一样,虽然都是message弹窗。可以添加一些按钮命令等。详细请看:http://msdn.microsoft.com/en-us/library/windows/apps/windows.ui.popups.messagedialog.aspx
另外,FilePicker还有其他的用法,比如FileOpenPicker,不过用法也大同小异。详细请看微软官方例子:http://code.msdn.microsoft.com/windowsapps/File-picker-sample-9f294cba
而且,记得修改方法为异步方法。因为FilePicker和MessageDialog的展示的时候都是异步的,要用await关键字来修饰,那么整个方法也要修改成异步方法。不要使用编译器智能生成代码习惯了。到头来调试半天都没发现哪里错了。我有时候就是这样。。。
编译后我们运行,就可以得到预想的结果。
注意,在模拟器里面,要用手势才能启动AppBar.
动态启动画面
还记得设置静态的启动画面么,是在Package.appxmanifest里面设置的,图片大小为620*300.下面就是我们设置过的静态启动页面。
不过,我们需要动态启动画面,就要用一个页面来实现了,另外,我们要动态,就要制作动画,好像现在都没有在win8制作动画的例子,不过,到现在了,大家有没有发现win8开发和Wp7开发方式大同小异,那么,我可以大胆的猜测,Wp7中制作动画的方法在win8也是适用的。那么添加这么一个SplashPage页面到Pages文件夹吧。
修改前台代码如下:
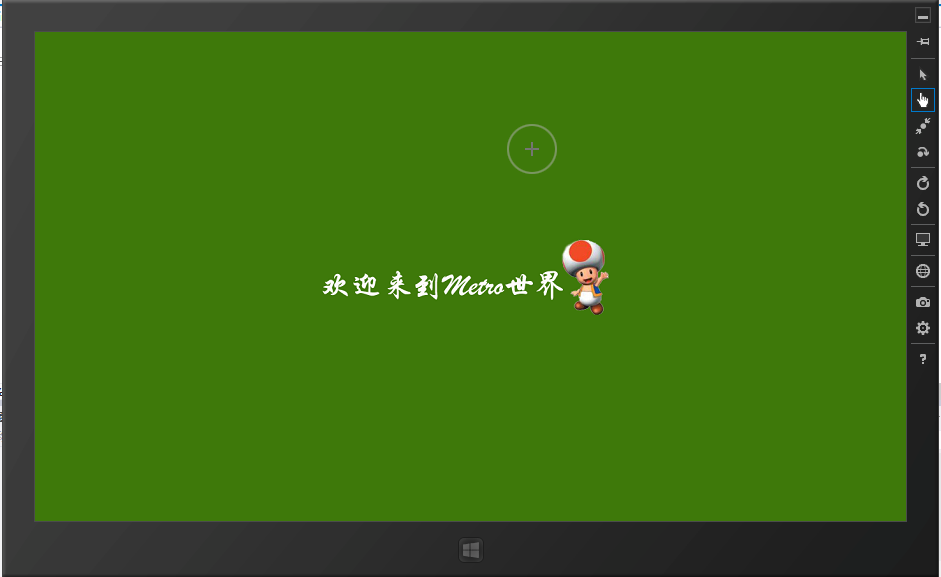
<Grid Background="{StaticResource AppBackgroundColor}"> <TextBlock Text="fengyun1989欢迎您!" FontSize="72" HorizontalAlignment="Center" VerticalAlignment="Center" x:Name="welcomeText"> <TextBlock.RenderTransform> <RotateTransform /> </TextBlock.RenderTransform> </TextBlock> </Grid>然后在后台代码的构造函数修改如下:
public SplashPage() { this.InitializeComponent(); RotateTransform rotateTransform = welcomeText.RenderTransform as RotateTransform; DoubleAnimation anima = new DoubleAnimation(); anima.From = 0; anima.To = 1080; anima.Duration = new Duration(TimeSpan.FromSeconds(2)); Storyboard.SetTarget(anima, rotateTransform); Storyboard.SetTargetProperty(anima, "Angle"); Storyboard storyboard = new Storyboard(); storyboard.Children.Add(anima); storyboard.Completed += storyboard_Completed; storyboard.Begin(); } void storyboard_Completed(object sender, object e) { this.Frame.Navigate(typeof(MainPage)); }我们添加了一个旋转动画,使TextBlock旋转,然后等旋转结束后,导航到MainPage页面。如果大家对动画不太熟悉,建议去学习下Silverlight或者Wp7的动画制作。
不过,现在我们还不能实现启动画面,那么我们要修改入口类App,打开App.XAML.cs文件。找到OnLaunched方法,修改代码如下:
// Create a Frame to act navigation context and navigate to the first page //var rootFrame = new Frame(); //if (!rootFrame.Navigate(typeof(MainPage))) //{ // throw new Exception("Failed to create initial page"); //} //// Place the frame in the current Window and ensure that it is active //Window.Current.Content = rootFrame; if (Window.Current.Content == null) { Frame frame = new Frame(); frame.Navigate(typeof(Pages.SplashPage), args.SplashScreen); Window.Current.Content = frame; } Window.Current.Activate();我们主要在启动的时候判断一下是否已经启动了。如果已经启动了(是从后台启动),那么Window.Curent.Content就不为空。如果为空,就先导航到启动动画页面。这样我们就能看到启动动画了。一般情况下,修改注释掉的那行有MainPage的那行,修改那里就能改变启动页面了。
现在编译运行,就能看到静态启动页面后就有动态的动画了。

微软启动画面例子:http://code.msdn.microsoft.com/windowsapps/Splash-screen-sample-89c1dc78
墓碑机制
win8程序的生命周期:http://msdn.microsoft.com/en-us/library/windows/apps/hh464925.aspx
从我们的Wp7经验,我们可以在App.xaml.cs文件里面实现墓碑机制。但是,由于我们这个程序过小,并且我觉得不需要墓碑机制,所以没有做。从微软提供的程序的生命周期来看,的确是需要墓碑机制的,但是,我尝试多次,多个程序,没有试出我这个程序是否进入后台休眠了。感觉还是在后台运行中,可能是由于占用内存过小,所以没有必要休眠吧。如果有朋友有研究或者有相关资料希望能够共享下。
写在最后
到这里,我们这个系列教程到这里就结束了,虽然这个程序很小,但是基本的功能还是具有的,虽然我想把大部分特点都集结进来,但是细想这个程序的功能,那些实在是没有必要,所以就到这了。那么那些比较有趣,并且win8独有的,可能在以后在写些实例教程吧。
我想,通过这么一个教程,大家都基本能够了解到win8程序开发了,虽然win8开发的资料很少,不过我想,大家可以充分发挥想象,找寻与Wp7编程与之的微小差异之处,并且可以充满想象力的大胆猜测,多多参照微软提供的例子,我想,开发一个有趣的程序没有太大的问题。
快速找到不同之处,熟悉相同之处,我想,这样就是一通百通了。那么,接下来,Wp8不久就要发布了。一通百通的方法,肯定是适用的。其实我感觉,微软的东西就是如此,编程的东西就是如此。本教程的主要目的就是希望能够抛砖引玉,希望大家在win8,wp8的开发能够迅速上手,开发出的好程序越多,市场越大,我们才越有活头嘛。
本次工程并且是最终工程下载:http://115.com/file/dp4ccv61#TimeTable-chapter5AndTheLast.zip