在android5.0中增加了一些特性,之前很早的时候只是简单的学习了一个RecyclerView,今天的学习分为以下几个知识点:
Material Theme
在5.0中为我们增加了一个Material Theme,使用了该样式的应用,用户体验会更加的好。在android中,Material Theme主要分为以下三种:
1. @android:style/Theme.Material
2. @android:style/Theme.Material.Light
3. @android:style/Theme.Material.Light.DarkActionBar
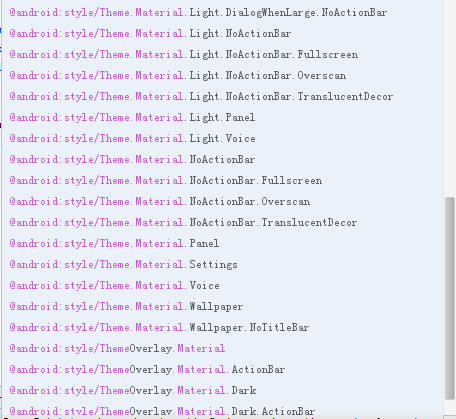
下面是列出的所有样式:
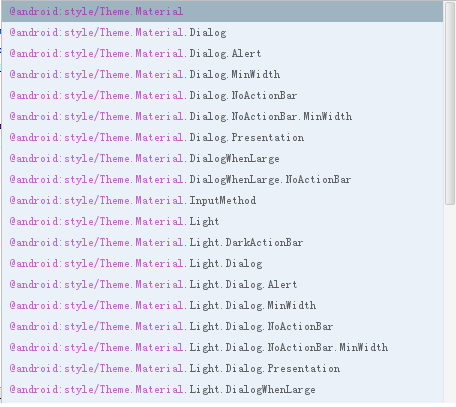
先来看看如何使用Material Theme,其实很简单:
直接在application节点上增加样一个样式来替换原有的样式:
@android:style/Theme.Material
<application android:allowBackup="true" android:icon="@mipmap/ic_launcher" android:label="@string/app_name" android:theme="@android:style/Theme.Material" >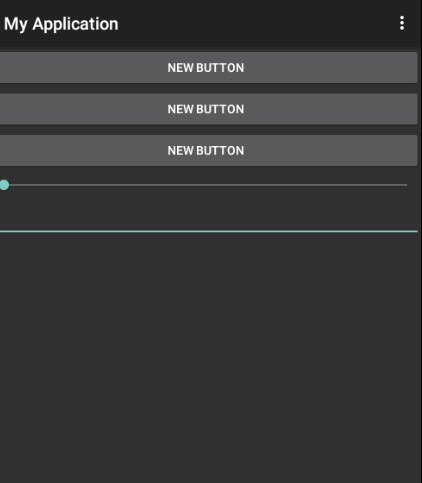
可以看到默认的样式是比较偏黑色风格的,并且点击以后会有触摸反馈的效果。
@android:style/Theme.Material.Light
[email protected]:style/Theme.Material.Light样式的效果如下: 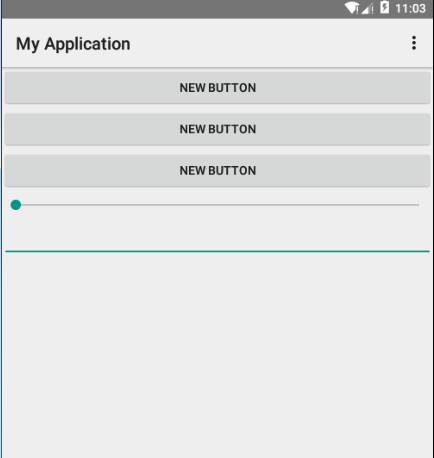
@android:style/Theme.Material.Light.DarkActionBar
[email protected]:style/Theme.Material.Light.DarkActionBar效果如下: 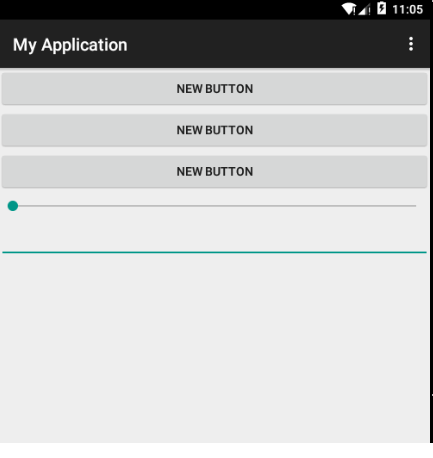
[email protected]:[email protected]淡。
自定义样式
[email protected]:style/Theme.Material,并且复写其中的一些样式属性来定义自己的样式,这里我以几个常见的属性为栗子: 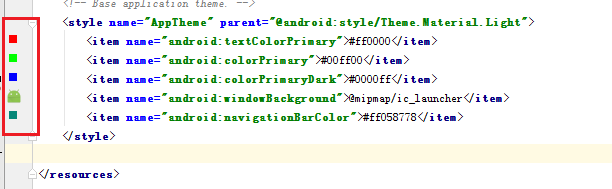
这里我复写了下面这几种样式属性,并且每个值对应的预览效果都使用红线进行标注了。下面看下运行后的预览效果: 
每个属性对应的效果,我都已经标注出来了,需要注意一点,在5.0之后将程序的启动图标放到了”mipmap”开头的文件夹中。
触摸的波纹效果
另外在5.0中还增加了下面这两种属性,分别用来设置不同的触摸反馈效果:
1. ?android:attr/selectableItemBackground
2. ?android:attr/selectableItemBackgroundBorderless
先看下效果: 
上面的BTN1和BTN2分别对应第一和第二个属性,第三个是默认的效果
另外我们也可以在style.xml中增加android:colorControlHighlight这个属性来设置点击时候的反馈效果的颜色:
<style name="AppTheme" parent="@android:style/Theme.Material.Light"> <item name="android:colorControlHighlight">#ffbaffa8</item></style>
另外还可以使用”android:colorAccent”来设置checkbox等选中样式:
<CheckBox android:layout_width="90dp" android:layout_height="60dp" android:text="btn1" android:background="?android:attr/selectableItemBackground" /> <CheckBox android:layout_width="90dp" android:layout_height="60dp" android:text="btn2" android:background="?android:attr/selectableItemBackgroundBorderless"/> <CheckBox android:layout_width="90dp" android:layout_height="60dp" android:text="btn3"/>style.xml
<style name="AppTheme" parent="@android:style/Theme.Material.Light"> <item name="android:colorControlHighlight">#ffbaffa8</item> <item name="android:colorAccent">#f87569</item></style>
圆形显示隐藏
在android开发中,我们经常会用到显示和隐藏控件的API,在android5.0中为我们增加了一个ViewAnimationUtil.createCircularReveal方法,来控制控件的隐藏和显示,可以设置duration,所以看起来会有一个过程,象动画一样。先看下效果 :
上面三种动画效果分别对应如下代码:
mSeven.setOnClickListener(new View.OnClickListener() { @Override public void onClick(View v) { int centerX = mSeven.getWidth() / 2; int centerY = mSeven.getHeight() / 2; Animator animator = ViewAnimationUtils.createCircularReveal(mSeven, centerX, centerY, mSeven.getWidth(), 0); animator.setDuration(3000); animator.setStartDelay(1000); animator.setInterpolator(new LinearOutSlowInInterpolator()); animator.start(); animator.addListener(new AnimatorListenerAdapter() { @Override public void onAnimationEnd(Animator animation) { super.onAnimationEnd(animation); //mSeven.setVisibility(View.INVISIBLE); } }); } }); mThree.setOnClickListener(new View.OnClickListener() { @Override public void onClick(View v) { Animator animator = ViewAnimationUtils.createCircularReveal( mThree, 0, 0, 0, (float) Math.hypot(mThree.getWidth(), mThree.getHeight())); animator.setInterpolator(new LinearInterpolator()); animator.setDuration(2000); animator.start(); } }); mFour.setOnClickListener(new View.OnClickListener() { @Override public void onClick(View v) { int centerX = mSeven.getWidth() / 2; int centerY = mSeven.getHeight() / 2; Animator animator = ViewAnimationUtils.createCircularReveal(mFour,centerX,centerY,0,centerX); animator.setDuration(3000); animator.start(); animator.addListener(new AnimatorListenerAdapter() { @Override public void onAnimationEnd(Animator animation) { super.onAnimationEnd(animation); mFour.setVisibility(View.VISIBLE); } }); } });看下createCircularReveal方法的参数: 
view:对那个控件执行动画
centerX:动画的中心点所在横坐标
centerY:动画中心店所在纵坐标
startRadius:表示动画起始的半径
endRadius:表示动画结束的半径
比如:将第三个图片的起始和结束半径都进行更改:
Animator animator = ViewAnimationUtils.createCircularReveal(mFour,centerX,centerY,20,50);此时效果改变如下: 
可以看到起始动画和结束动画的半径都做了改变.
关于5.0新特性学习第一篇就到这里了,希望大家喜欢。
源码下载
版权声明:本文为博主原创文章,未经博主允许不得转载。