һ�����ذ�װ
svn��apache��һ����Դ��Ŀ��ȫ��Ϊsubversion����һ�����ڰ汾����Ŀ����������һ���ڶ��˿�������Ŀ��ʹ�ã�Ŀǰsvn�Ѿ������ԭ����cvs�����������£�svn����װ��linux�������ϡ������˵һ��svn��windows�����ϵİ�װ��
1����svn�İ�װ�ļ�
����http://subversion.apache.org/packages.html#windows ����svn�İ�װ�ļ���
����ͼ��

2��������ɺ�
����Ӧ���̷��л���һ��Setup-Subversion-1.8.5.msi���ļ���Ȼ��˫����װ�ļ����а�װ���Ұ�װ��D:\Program Files (x86)\SubversionĿ¼�����ͼ��
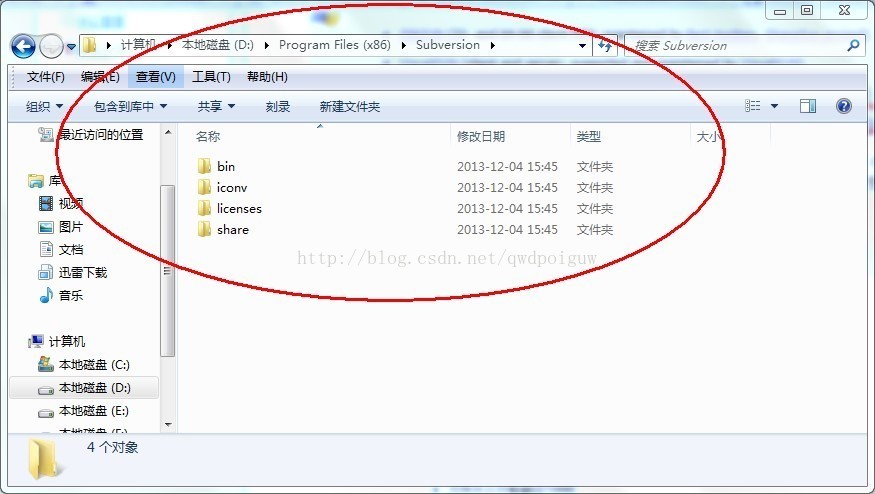
3����svn��װĿ¼���binĿ¼���ӵ�path·���С�
����D:\Program Files (x86)\Subversion\bin���ӵ�path�Ļ�����ȥ��������ɺ��������д��������� svnserve --help ���������ʾ�������ݣ�֤��svn�Ѿ���path·�������óɹ� ��ͬʱ�������Դ�svn�İ�����Ϣ������ͼ��
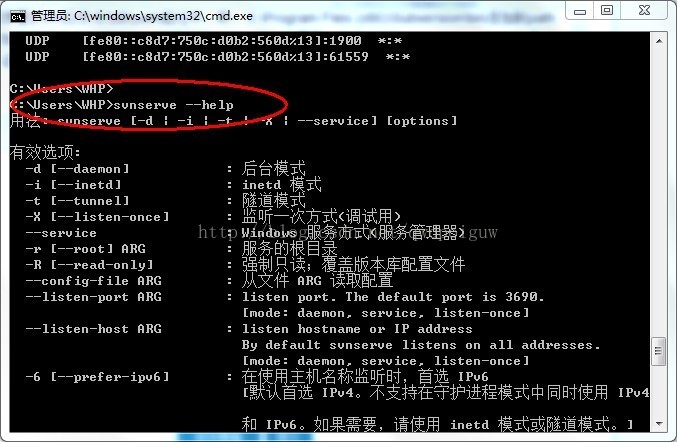
�����˻�����
1������svn�������ǰ�װ����ˣ�
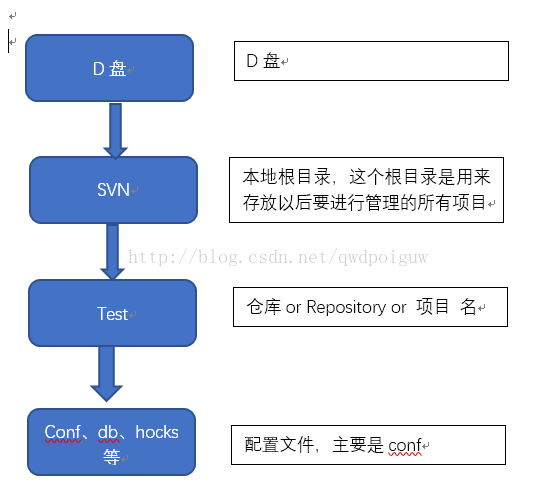
svn��װ��ɺ�Ҫ��svn�������ã�����Ҫ����һ�����ظ�Ŀ¼�������Ŀ¼����������Ժ�Ҫ���й�����������Ŀ�������ӽ�svn�ĸ�Ŀ¼������ d:\svn\���棬������Ӧ���̷������ļ��оͿ����ˡ�
2�������ֿ�
svnadmin create d:/svn/test
3���İ汾���ÿ��ļ�
svnserve.conf
### This file controls the configuration of the svnserve daemon, if you
### use it to allow access to this repository. (If you only allow
### access through http: and/or file: URLs, then this file is
### irrelevant.)### Visit http://subversion.tigris.org/ for more information.[general]
### These options control access to the repository for unauthenticated
### and authenticated users. Valid values are "write", "read",
### and "none". The sample settings below are the defaults.
anon-access = none # ע������������ã����������û���������Ϳ��Է��� auth-access = write
### The password-db option controls the location of the password
### database file. Unless you specify a path starting with a /,
### the file's location is relative to the directory containing
### this configuration file.
### If SASL is enabled (see below), this file will NOT be used.
### Uncomment the line below to use the default password file.
password-db = passwd
### The authz-db option controls the location of the authorization
### rules for path-based access control. Unless you specify a path
### starting with a /, the file's location is relative to the the
### directory containing this file. If you don't specify an
### authz-db, no path-based access control is done.
### Uncomment the line below to use the default authorization file.
authz-db = authz
### This option specifies the authentication realm of the repository.
### If two repositories have the same authentication realm, they should
### have the same password database, and vice versa. The default realm
### is repository's uuid.
realm = test[sasl]
### This option specifies whether you want to use the Cyrus SASL
### library for authentication. Default is false.
### This section will be ignored if svnserve is not built with Cyrus
### SASL support; to check, run 'svnserve --version' and look for a line
### reading 'Cyrus SASL authentication is available.'
# use-sasl = true
### These options specify the desired strength of the security layer
### that you want SASL to provide. 0 means no encryption, 1 means
### integrity-checking only, values larger than 1 are correlated
### to the effective key length for encryption (e.g. 128 means 128-bit
### encryption). The values below are the defaults.
# min-encryption = 0
# max-encryption = 256���û������ļ�������������Ч�ģ���������svn��
4����ʼ����passwd�û��˺���Ϣ
����֮����������£�
### This file is an example password file for svnserve.
### Its format is similar to that of svnserve.conf. As shown in the
### example below it contains one section labelled [users].
### The name and password for each user follow, one account per line.
### �����������û������룬ÿ��һ��username = password
[users]
# harry = harryssecret
# sally = sallyssecret
###===========�����������ӵ��û���Ϣ========#######
iitshare = password1
itblood = password25����ʼ����authz. �û�����Ȩ��
authz
����֮����������£�
### This file is an example authorization file for svnserve.
### Its format is identical to that of mod_authz_svn authorization
### files.
### As shown below each section defines authorizations for the path and
### (optional) repository specified by the section name.
### The authorizations follow. An authorization line can refer to:
### - a single user,
### - a group of users defined in a special [groups] section,
### - an alias defined in a special [aliases] section,
### - all authenticated users, using the '$authenticated' token,
### - only anonymous users, using the '$anonymous' token,
### - anyone, using the '*' wildcard.
###
### A match can be inverted by prefixing the rule with '~'. Rules can
### grant read ('r') access, read-write ('rw') access, or no access
### ('').[aliases]
# joe = /C=XZ/ST=Dessert/L=Snake City/O=Snake Oil, Ltd./OU=Research Institute/CN=Joe Average# [groups]
# harry_and_sally = harry,sally
# harry_sally_and_joe = harry,sally,&joe# [/foo/bar]
# harry = rw
# &joe = r
# * =# [repository:/baz/fuz]
# @harry_and_sally = rw
# * = r###--------------------�������¼ӵ�------------------------###
###��������[groups] ��������������[groups]
devteam = iitshare, itblood #devteam ��Ŀ����������û�iitshare,itblood[/]
iitshare = rw
itblood =
[test:/tb2c]
@devteam = rw
itblood =[test:/tb2b2c]
@devteam = rw
itblood = r���У�1���û��������1�������û����û����Զ��ŷָ���
˵����
devteam = iitshare, itblood #devteam ��Ŀ����������û�iitshare,itblood
[/]
iitshare = rw #iitshare �Ը�Ŀ¼�ж�дȨ��
itblood = #itblood �Ը�Ŀ¼û���κ�Ȩ��
####�����Ҫ����tb2c��tb2b2c��Ŀ��Ȩ�ޣ�ǰ��������test�ֿ�������Ҫ����������Ŀ
####���û�еĻ���test�������ܷ���
[tshop:/tb2c] #��test�ֿ��tb2c��Ŀ����Ȩ����
@devteam = rw #���� devteam ���tb2c��Ŀ�ж�дȨ��
itblood = #���� itblood ����Ȩ�ޣ������û��ж�дȨ��
[tshop:/tb2b2c] #�� test: �ֿ�� tb2b2c ��Ŀ����Ȩ����
@devteam = rw #���� devteam ���tb2b2c��Ŀ�ж�дȨ��
itblood = r #���� itblood ֻ�ж�Ȩ�ޣ������û��ж�дȨ��6��ע�⣺
* Ȩ�������ļ��г��ֵ��û������������û������ļ��ж��塣
* ��Ȩ�������ļ�����������Ч����������svn��
�û����ʽ��
[groups]
= ,
���У�1���û��������1�������û����û����Զ��ŷָ���
�汾��Ŀ¼��ʽ��
[<�汾��>:/��Ŀ/Ŀ¼]
@<�û�����> = <Ȩ��>
<�û���> = <Ȩ��>���У�������ڲ��ֿ����ж���д��:
[/],��ʾ��Ŀ¼�����£���Ŀ¼��svnserve����ʱָ���ģ�����ָ��Ϊ/home/svndata��[/]���DZ�ʾ��ȫ���汾������Ȩ�ޡ�
[tshop:/] ��ʾ�汾��tshop����Ȩ�ޣ�
[tshop:/abc] ��ʾ�汾��tshop�е�abc��Ŀ����Ȩ�ޣ�
[tshop:/abc/aaa] ��ʾ�汾��tshop�е�abc��Ŀ��aaaĿ¼����Ȩ�ޣ�
Ȩ������������û��顢�û���*���û�����ǰ���@��*��ʾȫ���û���
Ȩ������w��r��wr�Ϳգ��ձ�ʾû���κ�Ȩ�ޡ�
������������
1��ͨ��������
��windwos������svn�����ַ�ʽ��һ��������������ֱ��ʹ��svnserve -d -r d:/svn ������Ŀ¼���ɣ������Ϳ�������svn�ˣ�����ͼ��

�س����������������ô֤��svn�Ѿ��ɹ���������ʱ���������´�һ�������д��ڣ�Ȼ���ڴ���������netstat -na�������鿴��Ӧ�Ķ˿ڣ�����ͼ��

2�����ӵ�windows����
��������svn�ķ�ʽ����һ�����⣬����svn�������д���һֱ���ܹص�������ص���svn�����ֹͣ�ˣ������ܲ����㣬��Ϊ�����������⣬���Ծ�����svn�ĵڶ���������ʽ�ˡ�����svn�������������ӵ�windows������ȥ���������£�
����������������������
C:\Users\WHP>sc create svnserve binPath= "D:/Program Files (x86)/Subversion/bin/
svnserve  -r  d:/svn --service"
Ȼ��س����������������ʽ��windows�̶��ĸ�ʽ��
sc create������windows����������һ������sc deleteɾ��windows�����е�һ������
binPath��Ҫ���÷����������ڵ�λ�á�
-r����svn����ĸ�Ŀ¼λ�á�
--service��˼��Ҫ�����������windows�������ʽ����������������windows�ķ���������һ������Ϊsvnserve���������ͼ��ʾ��
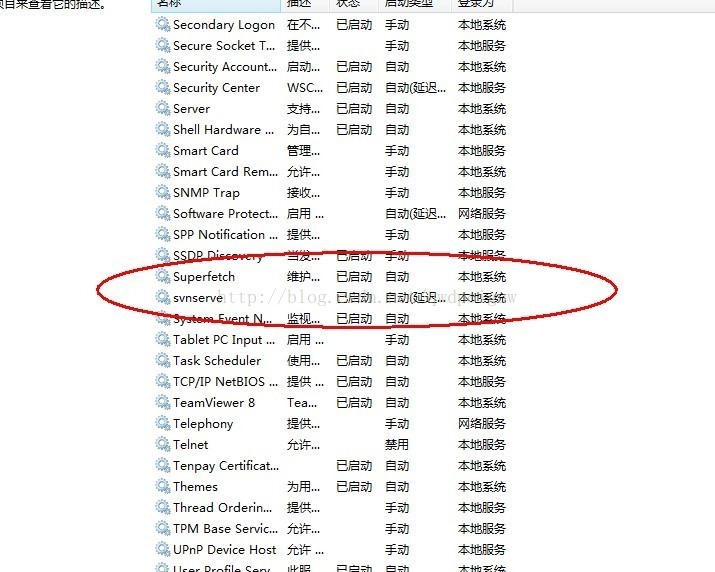
ִ�����ϵͳ���أ�[SC] CreateService SUCCESS����ʾ�����ɹ���
����Ӧ�ķ������ó��Զ�����������svn����windows���������ӳɹ��ˡ�
�ġ��ͻ���
1����װ
�ȴ���վ��������svn�汾���Ӧ��tortoisesvn�����������а�װ����1.8.5�汾����������Ҳ����1.8.5�汾��tortoisesvn��http://tortoisesvn.net/downloads.html �������վ�������Ӧ�İ汾��
������ɺ���а�װ����װ����ɵ��ʽ�İ�װ�����ø��κζ�������װ��ɺ���windows���Ҽ��˵��оͿ��Զ��һЩsvn��ѡ����������ͼ��ʾ��

2��checkout
�Ҽ����SVN checkout
url������svn://SVNserver IP/�ֿ���
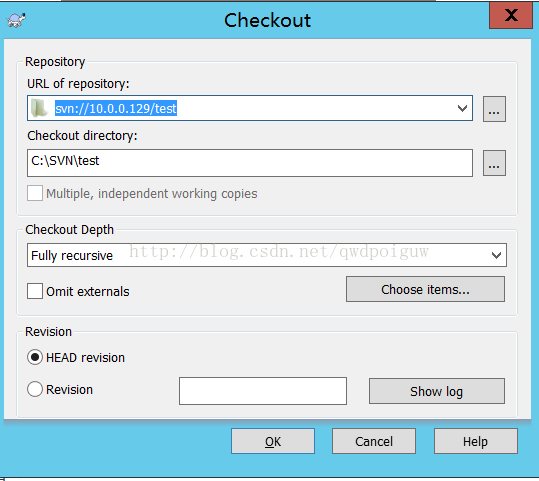
�����˺š����뼴�ɡ�
3���ļ�ͼ��
�Ҽ�tortoiseSVN->setting->icon oveylays->overlay handlers->start registry editor���ᷢ��Tortoiseǰ��һЩ�ļ���ѡ���Ҽ�����������ǰ��Ӹ��ո�Ϳ����ŵ���ǰ���ˣ�����ͼ��
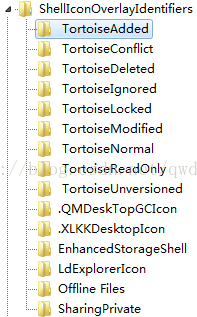
��ʱͼ�껹��û�г�������Ҫ������explorer.exe���̣�
������������Ľ������ҵ�explorer.exe���������̣�
Ȼ�� �ļ�>�½���������...��������explorer.exe��ͼ��ͻ���ʾ�����ˡ�