Qt5.7 + OpenCV3.2开启多线程调用系统摄像头并实现视频录制与回放、图片截取与保存(一)
一、创建新的工程
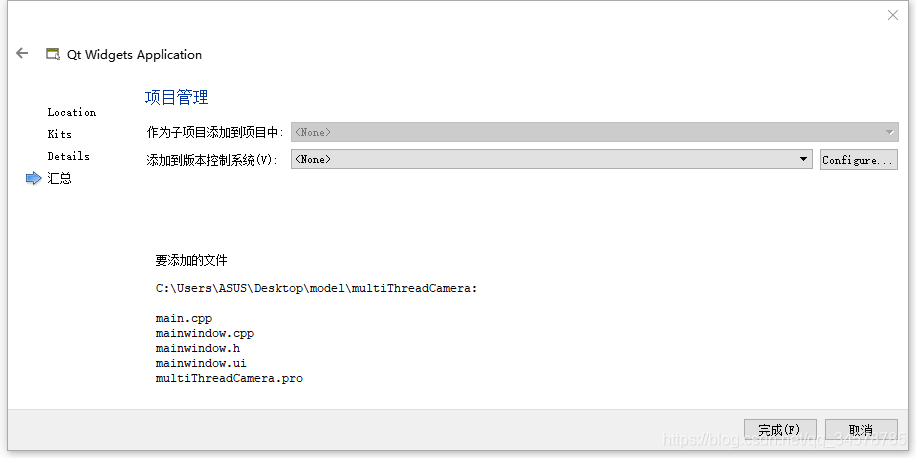
首先创建一个新的工程,命名为multiThreadCamera,如下图所示。
在Pro文件中加入动态链接库:`
== 具体文件库的地址应以自己环境配置情况为准 ==
INCLUDEPATH += C:/opencv/build/include
win32:CONFIG(release, debug|release): LIBS += -LC:/opencv/build/x64/vc14/lib/ -lopencv_world320
else:win32:CONFIG(debug, debug|release): LIBS += -LC:/opencv/build/x64/vc14/lib/ -lopencv_world320d
else:unix: LIBS += -LC:/opencv/build/x64/vc14/lib/ -lopencv_world320INCLUDEPATH += C:/opencv/build/x64/vc14
DEPENDPATH += C:/opencv/build/x64/vc14win32-g++:CONFIG(release, debug|release): PRE_TARGETDEPS += C:/opencv/build/x64/vc14/lib/libopencv_world320.a
else:win32-g++:CONFIG(debug, debug|release): PRE_TARGETDEPS += C:/opencv/build/x64/vc14/lib/libopencv_world320d.a
else:win32:!win32-g++:CONFIG(release, debug|release): PRE_TARGETDEPS += C:/opencv/build/x64/vc14/lib/opencv_world320.lib
else:win32:!win32-g++:CONFIG(debug, debug|release): PRE_TARGETDEPS += C:/opencv/build/x64/vc14/lib/opencv_world320d.lib
else:unix: PRE_TARGETDEPS += C:/opencv/build/x64/vc14/lib/libopencv_world320.a
然后qmake一下,保证编译通过,到这里第一步完成。
二、项目文件编写
首先在mainwindow.h中加入OpenCV相关头文件
#include <opencv2/core/core.hpp>
#include <opencv2/highgui.hpp>
#include <opencv2/opencv.hpp>
#include <opencv2/imgproc.hpp>
并加上cv命名空间
using namespace cv;
在进行相关函数编写之前,对我们要用到的一些OpenCV中的类稍作介绍:
像我们对其他的一些硬件操作一样,要想调用系统中的摄像头,无非就两个操作――一个读,一个写,那么OpenCV这个开源库就为我们对摄像头的读写操作编写了两个类――
- VideoCapture 用于视频的读操作(这里的读包括两个方面,一个是对摄像头画面的读取,另一个是对视频文件帧的读取)
- VideoWriter 用于视频的写操作(主要用于将获取的画面以帧的形式写入视频文件中,实现视频的保存)
另外,在从获取视频的帧,到画面的显示,这个过程中画面 都是以矩阵的形式进行传递与转换,这就用到了另外一个类 Mat。
可以说,从一开始加载图片,到我们最终实现多线程调用摄像头、保存、回放视频,都是这三个类中相关函数的作用。接下来就开始我们的第一步,首先实现加载计算机本地的一张图片。
在mainwindow.cpp构造函数中加入下面这段代码:
Mat picture = imread("C:\\Users\\ASUS\\Pictures\\001.jpg",1);namedWindow("window",WINDOW_NORMAL);imshow("window",picture);
编译运行,先来看一下效果:

mainwindow窗口是项目创建的,我们没有加任何控件,所以是一个空窗口;
左边window窗口是OpenCV生成的,它将本地的图片001.jpg显示了出来。
代码分析――
其实就三个函数:
-
imread() 这是OpenCV提供的读取本地图片的函数,右击看一下函数定义――
Mat imread( const String& filename, int flags = IMREAD_COLOR );其实一目了然,两个参数:
const String& filename即文件名,注意它的类型为String,像我们程序中直接用"C:\\Users\\ASUS\\Pictures\\001.jpg"来表示是没问题的,但是如果我们先定义了QString类型的变量,然后再引用(比如我们经常使用系统时间来当作文件名来保存,需要将时间转为QString类型),则要先将QString转为String类型,否则直接引用会报错;另外,文件名包括文件的绝对地址与文件格式,而且不同编译器中对文件路径的要求不同,Qt Creator中绝对路径每一级都是两道斜杠,这在我们之后保存文件时也是同样的要求,注意不要写错;int flags = IMREAD_COLOR即图像颜色,我们把参数改为 0 ,再运行一次程序,发现图像变成了灰色!
函数还有一个返回值为
Mat类型,前面已经介绍过,我们可以理解为在OpenCV中Mat就是图片在计算中的一种传递与存储形式。那么这段程序就透了,意思是我们在C:\\Users\\ASUS\\Pictures\\001.jpg处读取一张彩色图片,放到Mat型变量picture中 -
namedWindow() 即给一个窗口命名,同样的右击 follow symbol可以看到函数定义――
void namedWindow(const String& winname, int flags = WINDOW_AUTOSIZE);两个参数分别为
const String& winname即窗口名,String类型int flags = WINDOW_AUTOSIZE,是一个标志位,我们右击WINDOW_AUTOSIZE找到其定义,是在highui.hpp文件下的一个枚举类型,每一个类别都有说明:
	 	 //! Flags for cv::namedWindowenum WindowFlags {
      WINDOW_NORMAL     = 0x00000000, //!< the user can resize the window (no constraint) / also use to switch a fullscreen window to a normal size.WINDOW_AUTOSIZE   = 0x00000001, //!< the user cannot resize the window, the size is constrainted by the image displayed.WINDOW_OPENGL     = 0x00001000, //!< window with opengl support.WINDOW_FULLSCREEN = 1,          //!< change the window to fullscreen.WINDOW_FREERATIO  = 0x00000100, //!< the image expends as much as it can (no ratio constraint).WINDOW_KEEPRATIO  = 0x00000000, //!< the ratio of the image is respected.WINDOW_GUI_EXPANDED=0x00000000, //!< status bar and tool barWINDOW_GUI_NORMAL = 0x00000010, //!< old fashious way};
可以看到每一种类型对应的解释,如果有兴趣可以自己改参数试一下.
-
imshow() 即图片显示,相比之下就更简单了,右击查看定义――
void imshow(const String& winname, const ogl::Texture2D& tex);两个参数分别为
const String& winname即窗口名,类型为String.const ogl::Texture2D& tex即要显示的图片,它也是一种图片在计算机中的存储格式,具体内容可以参照这篇文章Texture2D详解
三、总结
到这里我们项目的第一步――显示一张图片就完成了,因为我也是刚刚接触OpenCV才几天的时间,上面的谈到的都是我在一开始学习时遇到的一些问题,希望能够切实帮助到初学者,如果存在一些错误的地方还请大家指正!
另外第一个项目确实比较简单,代码就不上传了,项目文件直接贴出来:
multiThreadCamera.pro
QT       += core guigreaterThan(QT_MAJOR_VERSION, 4): QT += widgetsTARGET = multiThreadCamera
TEMPLATE = app# The following define makes your compiler emit warnings if you use
# any feature of Qt which as been marked as deprecated (the exact warnings
# depend on your compiler). Please consult the documentation of the
# deprecated API in order to know how to port your code away from it.
DEFINES += QT_DEPRECATED_WARNINGS# You can also make your code fail to compile if you use deprecated APIs.
# In order to do so, uncomment the following line.
# You can also select to disable deprecated APIs only up to a certain version of Qt.
#DEFINES += QT_DISABLE_DEPRECATED_BEFORE=0x060000 # disables all the APIs deprecated before Qt 6.0.0SOURCES += main.cpp\mainwindow.cppHEADERS  += mainwindow.hFORMS    += mainwindow.uiINCLUDEPATH += C:/opencv/build/include
win32:CONFIG(release, debug|release): LIBS += -LC:/opencv/build/x64/vc14/lib/ -lopencv_world320
else:win32:CONFIG(debug, debug|release): LIBS += -LC:/opencv/build/x64/vc14/lib/ -lopencv_world320d
else:unix: LIBS += -LC:/opencv/build/x64/vc14/lib/ -lopencv_world320INCLUDEPATH += C:/opencv/build/x64/vc14
DEPENDPATH += C:/opencv/build/x64/vc14win32-g++:CONFIG(release, debug|release): PRE_TARGETDEPS += C:/opencv/build/x64/vc14/lib/libopencv_world320.a
else:win32-g++:CONFIG(debug, debug|release): PRE_TARGETDEPS += C:/opencv/build/x64/vc14/lib/libopencv_world320d.a
else:win32:!win32-g++:CONFIG(release, debug|release): PRE_TARGETDEPS += C:/opencv/build/x64/vc14/lib/opencv_world320.lib
else:win32:!win32-g++:CONFIG(debug, debug|release): PRE_TARGETDEPS += C:/opencv/build/x64/vc14/lib/opencv_world320d.lib
else:unix: PRE_TARGETDEPS += C:/opencv/build/x64/vc14/lib/libopencv_world320.a
mainwindow.h
#ifndef MAINWINDOW_H
#define MAINWINDOW_H#include <QMainWindow>
#include <opencv2/core/core.hpp>
#include <opencv2/highgui.hpp>
#include <opencv2/opencv.hpp>
#include <opencv2/imgproc.hpp>
using namespace cv;namespace Ui {

class MainWindow;
}class MainWindow : public QMainWindow
{
    Q_OBJECTpublic:explicit MainWindow(QWidget *parent = 0);~MainWindow();private:Ui::MainWindow *ui;
};#endif // MAINWINDOW_H
mainwindow.cpp
#include "mainwindow.h"
#include "ui_mainwindow.h"MainWindow::MainWindow(QWidget *parent) :QMainWindow(parent),ui(new Ui::MainWindow)
{
    ui->setupUi(this);Mat picture = imread("C:\\Users\\ASUS\\Pictures\\001.jpg",0);namedWindow("window",WINDOW_NORMAL);imshow("window",picture);
}MainWindow::~MainWindow()
{
    delete ui;
}
main.cpp
#include "mainwindow.h"
#include <QApplication>int main(int argc, char *argv[])
{
    QApplication a(argc, argv);MainWindow w;w.show();return a.exec();
}